- About Us
-
 Secure, unlimited storage to ensures efficiency as well as high and continuous data access demand.
 Virtual server integration for 3D Rendering, AI or ML
 Enhance application capacity and availability.
 Access to an all-inclusive stack for AI development, driven by NVIDIA’s powerful technology!
 FPT Web Application Firewall provides powerful protection for web applications
 Advanced virtual server with rapid scalability
 Backup and restore data instantly, securely and maintain data integrity.
Advanced virtual server with rapid scalability
Access to an all-inclusive stack for AI development, driven by NVIDIA’s powerful technology!
Enhance application capacity and availability.
Backup and restore data instantly, securely and maintain data integrity.
Recovery, ensuring quick operation for the business after all incidents and disasters.
Backup and restore data instantly, securely and maintain data integrity.
Advanced virtual server with rapid scalability
Access to an all-inclusive stack for AI development, driven by NVIDIA’s powerful technology!
Enhance application capacity and availability.
Backup and restore data instantly, securely and maintain data integrity.
Recovery, ensuring quick operation for the business after all incidents and disasters.
 Diverse throughput and capacity to meet various business workloads.
Secure, unlimited storage to ensures efficiency as well as high and continuous data access demand.
FPT Web Application Firewall provides powerful protection for web applications
Intelligent and Comprehensive Virtual Web Application Firewall - Security Collaboration between FPT Cloud and Penta Security.
The Next generation firewall security service
Easily store, manage, deploy, and secure Container images
Safe, secure, stable, high-performance Kubernetes platform
Provided as a service to deploy, monitor, backup, restore, and scale MongoDB databases on cloud.
Provided as a service to deploy, monitor, backup, restore, and scale Redis databases on cloud.
Provided as a service to deploy, monitor, backup, restore, and scale PostgreSQL databases on cloud. System Monitoring Solution anywhere, anytime, anyplatform
 Helps reduce operational costs by up to 40% compared to traditional BI solutions, while improving efficiency through optimized resource usage and infrastructure scaling.
 - Pricing
- Partner
- Event
Blogs Tech
Categories
Blog chia sẻ kiến thức FPT Cloud

Fueling AI Initiatives with AI Data Platform
13:19 22/01/2026
What is an AI Data Platform & Why is It Important?
Enterprises today are under increasing pressure to realize measurable returns from their AI investments, yet despite rapid market growth projected by UN Trade and Development to reach $4.8 trillion by 2033, many organizations remain constrained by fragmented tools, isolated data, and operational complexity that prevent AI initiatives from scaling beyond experimentation into production.
To address this limitation, the concept of the AI data platform has gained increasing attention. An AI data platform such as FPT AI Factory is a comprehensive ecosystem that integrates the tools, frameworks, and infrastructure needed to support the entire AI lifecycle, from data ingestion and model development to deployment and ongoing management. Rather than serving solely as a data storage or processing system, it provides an end-to-end foundation for building, operating, and scaling AI-driven solutions.
Key Difference between AI Data Platform and Traditional Data Platform
The main difference between an AI data platform and a traditional data platform lies in their purpose. Traditional data platforms are built mainly for reporting, business intelligence, and historical analysis. They usually work with structured data, process data in batches, and focus on answering questions about past events, such as monthly revenue or customer trends.
An AI data platform, on the other hand, is designed to support machine learning workflows. It must handle large volumes of dynamic and diverse data, including unstructured data like text, images, and audio. It also supports continuous processes such as model retraining, validation, and real-time inference.
While traditional data platforms help organizations understand what happened, AI data platforms help predict what will happen and automate decision-making.
Strategic Value of Adopting AI Data Platform
The adoption of an AI data platform provides organizations with several strategic and operational advantages. One of the most significant benefits is the acceleration of AI development and deployment. By standardizing data ingestion, preparation, and feature management, the platform reduces manual effort and enables data science teams to focus on model design and optimization rather than repetitive data engineering tasks.
An AI data platform also contributes to improved model performance and reliability. Through continuous monitoring of data quality and model behavior, organizations can detect issues such as data drift, bias, or performance degradation at an early stage. This capability supports timely model retraining and ensures that AI systems remain accurate and effective in production environments.
In addition, AI data platforms enhance scalability and operational efficiency. As data volumes, model complexity, and user demand increase, the platform can scale resources dynamically while maintaining consistent performance and governance. This scalability is essential for enterprises seeking to deploy AI across multiple business functions.
Different Types of AI Data Platforms
AI data platforms can be broadly classified into different types based on their deployment model: cloud-based AI platforms and on-premises AI platforms. While both approaches aim to support the development and operation of AI systems, they differ significantly in terms of scalability, cost, flexibility, and operational complexity. To ensure successful AI adoption, organizations must assess their technical constraints, regulatory obligations, and growth objectives when determining the platform approach that best supports their AI strategy.
On-premises AI Platforms
On-premises AI platforms are deployed and managed within an organization’s own data centers. This approach offers greater control over infrastructure, data, and security, which may be necessary for organizations operating under strict regulatory or data sovereignty requirements.
However, on-premises platforms often involve high upfront capital expenditure and limited scalability. Expanding compute capacity or storage requires additional hardware investment and longer deployment timelines. Moreover, organizations must maintain dedicated teams to manage infrastructure, updates, and system reliability, which increases operational overhead.
As AI workloads grow in complexity and scale, these limitations can hinder innovation and slow the transition from experimentation to production when compared to cloud-based alternatives.
Cloud-based AI Platforms
Cloud-based AI platforms are delivered through public or hybrid cloud environments and provide on-demand access to computing resources, data storage, and AI services. Platforms such as FPT AI Factory have become the preferred choice for many organizations due to their flexibility and ability to support large-scale, data-intensive AI workloads.
Elastic scalability: Cloud-based AI platforms allow organizations to scale compute and storage resources up or down according to workload demands. This capability is especially critical for compute-intensive tasks such as model training, enabling enterprises to experiment with AI models and transition to production without substantial upfront infrastructure investment.
Integrated AI ecosystems: These platforms provide unified environments that combine managed machine learning services, automated model deployment, data analytics, and monitoring tools. The tight integration of these services accelerates development cycles and supports end-to-end AI workflows within a single platform.
Cost efficiency: Cloud-based AI platforms commonly follow a pay-as-you-go pricing model, allowing organizations to align costs with actual usage. For instance, while a single H100 GPU can cost up to $25,000 for the hardware alone, you could rent that same H100 on FPT AI Factory for tens of thousands of hours and still not yet be at your break-even point.
FPT AI Factory offers an all-in-one AI platform
FPT AI Factory provides AI platform designed to help businesses build, deploy, and scale AI solutions faster and more efficiently. By bringing together powerful AI tools, ready-to-use services, and enterprise-grade infrastructure in one unified ecosystem, our platform enables teams to turn ideas into real-world AI applications with ease. Below is an overview of the core services and capabilities offered by FPT AI Factory
FPT AI Studio
AI Studio is an inclusive platform with a set of smart tools and services for building, fine-tuning, and evaluating AI models
Model fine-tuning: A user-friendly service that enables users to customize and optimize pre-trained AI models using their own datasets within a few clicks.
Model Hub: A centralized repository enables users to browse, download, share, and manage versions of AI models, while also providing tools to support model training, fine-tuning, and deployment.
Data Hub: Enables users to store, manage, and organize datasets used for training, fine-tuning, and evaluating AI models in a secure and scalable environment.
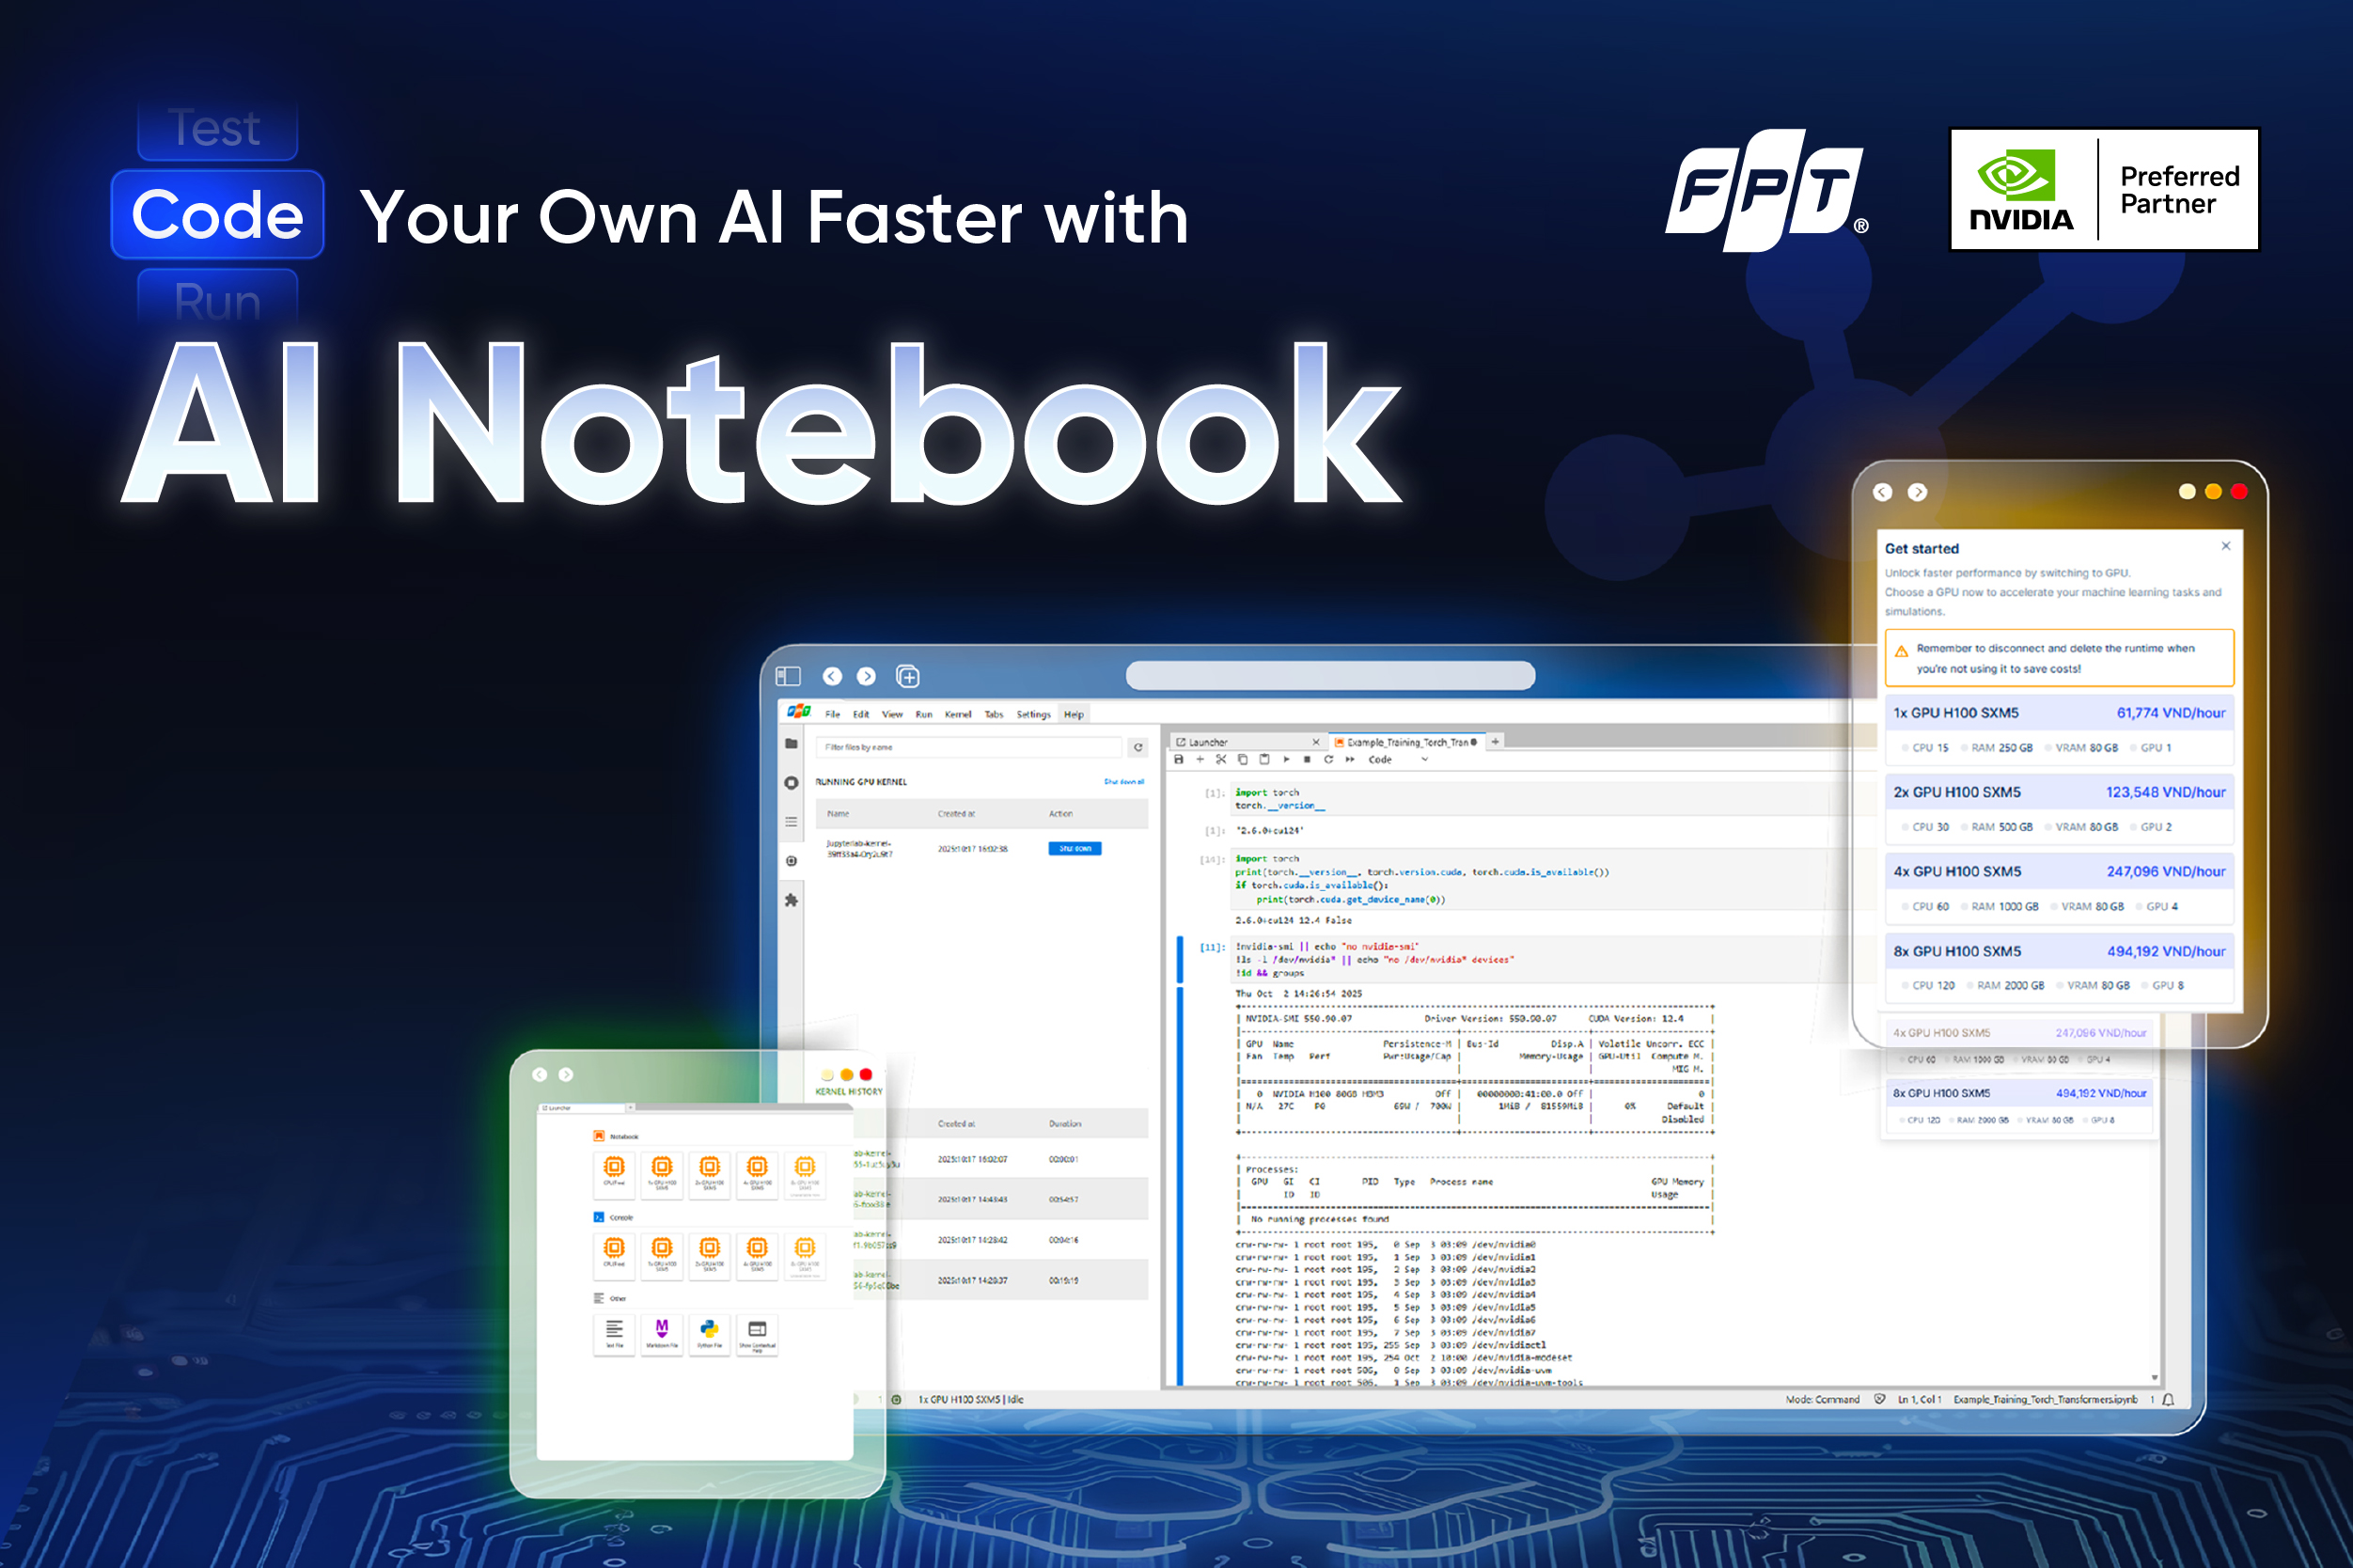
AI Notebook: A Jupyter-based development environment running on FPT’s AI Factory infrastructure. With one click, you can launch a pre-configured notebook server with GPU/CPU resources and persistent storage.
FPT AI Inference
AI Inference is a robust platform with a broad collection of high-performing models for deployment and scale.
Serverless Inference: Enables secure and scalable deployment of AI models via a unified endpoint, with real-time monitoring and isolated endpoints for enhanced security.
Dedicated Inference: delivers high-performance inference for open-source and FPT-provided models, supporting easy API integration, auto-scaling, continuous model updates, and fine-tuning.

World Models: Bridging the Gap between Perception and Action
15:30 10/01/2026
Over the last decade, artificial intelligence has advanced rapidly, driven by the development of large-scale models capable of learning from vast amounts of multimodal data. Models such as Gemini, ChatGPT, or Claude have demonstrated impressive performance in tasks ranging from natural language understanding to content generation, and they are now widely applied in both academic and industrial settings.
Despite these achievements, researchers have identified a critical limitation in current AI systems. Most existing models rely heavily on static data and pattern recognition, which allows them to reproduce knowledge but not to truly understand or experience the environments in which they operate. As a result, their intelligence remains largely passive, lacking the ability to reason through interaction, experimentation, and adaptation over time.
To address this limitation, the concept of world models has gained increasing attention. Rather than treating intelligence as the ability to generate correct outputs from large datasets, world models emphasize understanding the structure and dynamics of the environment itself.
The Definition of World Model
A world model is an artificial intelligence system that learns to represent how the world works and how it changes over time. Instead of only responding to inputs, a world model builds an internal simulation of its environment, including objects, events, and the relationships between them. This internal model allows an AI system to simulate potential future scenarios before taking action.
World models often integrate concepts from physics, probability, and causality to approximate how the real world behaves. By learning these underlying rules, the AI can generalize beyond previously observed data and adapt to new situations. In this sense, world models serve as the cognitive core that transforms AI from a passive pattern recognizer into an active agent capable of reasoning about the world.
Benefits of World Models
Improved Planning and Decision-Making
One of the most significant benefits of world models is their ability to support advanced planning and decision-making. By maintaining an internal simulation of the environment, AI systems can evaluate multiple action sequences before committing to a specific choice. This allows them to anticipate long-term consequences rather than relying solely on immediate feedback. Such capability is particularly important in complex environments where decisions are interdependent and outcomes are uncertain.
To put it more simply, a clear example can be seen in autonomous driving, where self-driving vehicles operate in highly dynamic environments, they must constantly perceive their surroundings, predict the actions of other road users, and make timely decisions under uncertainty. World models enable these systems to maintain a continuously updated representation of the driving environment, capturing not only vehicles and pedestrians, but also road structure, traffic rules, and changing conditions.
Optimizing Cost, Time, and Risk
World models allow AI systems to learn by simulating interactions internally, reducing the need for extensive real-world experimentation. This significantly lowers the cost, time, and risk associated with training intelligent agents, especially in environments where mistakes can be dangerous or expensive.
By exploring hypothetical scenarios, AI can test strategies, observe outcomes, and refine its behavior without causing real-world harm. For example, in the medical and healthcare domain where experimentation is often costly, time-consuming, and ethically constrained. World models allow AI systems to simulate disease progression, test different treatment strategies, and observe potential outcomes without putting patients at risk.
Better Representation of the Real World
World models help AI generate visual content that looks more realistic by understanding how objects move and interact in the real world. Instead of focusing only on appearance, these models take into account basic physical principles, such as motion, contact, and spatial relationships. As a result, the visual outputs produced by world models can be more accurate and consistent over time. In many cases, these outputs can also be used as synthetic data to train perception-based AI systems.
Current AI video generation systems often fail when faced with complex scenes, largely because they lack a true understanding of cause-and-effect relationships. In contrast, world models, especially when integrated with 3D simulation environments, demonstrate a more structured form of visual reasoning. They can simulate scenarios in which actions lead to consistent physical outcomes, such as an industrial robot lifting a heavy object surrounded by debris, where factors like weight, contact forces, and environmental constraints must be considered.
World Model’s Drawbacks
Despite their strong potential, world models face several challenges that limit their practical deployment. One major drawback is the high computational and data cost required to train and maintain accurate models of complex environments. Developing reliable world models often demands large-scale multimodal datasets and extensive computing resources, making them difficult and expensive to scale.
Another limitation is that world models are inherently imperfect representations of reality. Since no model can capture all variables and causal relationships in the real world, world models may produce inaccurate or incomplete predictions, particularly when encountering scenarios outside their training distribution. This can lead to suboptimal or even unsafe decisions in real-world applications.
Companies Shifting Toward World Models
In recent years, world models have moved beyond academic research and attracted growing interest from leading technology companies and startups, which are increasingly investing in this approach as a foundation for building more capable and reliable AI systems.
According to TechCrunch, World Labs, a startup co-founded by Fei-Fei Li that raised $230 million to develop large world models capable of understanding and generating 3D environments, has accelerated the world model race with Marble - its first commercial product which enables the creation of persistent and editable 3D worlds from text, images, or video.
Moreover, large technology companies are also moving in this direction. Meta, for instance, Meta is actively exploring world models as a core technology for advancing virtual environments and metaverse-related applications (VKTR, 2025). By using world modeling, Meta’s AI systems can simulate and predict user interactions, enabling more immersive and adaptive digital spaces. These models also contribute to improved AI-driven personalization across Meta’s platforms, helping tailor content and experiences to user preferences.
Uncovers How AI Is Rewiring Supply Chains and Customer Experiences
13:30 10/01/2026
In 2026, artificial intelligence has moved well beyond experimentation in the retail and consumer packaged goods (CPG) sectors. According to the latest State of AI in Retail and CPG survey from NVIDIA, businesses are transitioning from early-stage pilots to full scale deployment of AI tools across operations, customer experience, and supply chain functions. This shift shows that AI is now a practical driver of business value rather than just a future idea.
Nearly all companies are now engaged with AI. The survey found that around 91% of respondents say their organizations are either actively using AI or evaluating its adoption. In response to early returns, most companies plan to increase their investment in AI technologies in 2026.
AI’s influence is already measurable in several key areas:
Revenue and cost impact: A large majority report that AI is contributing to higher annual revenue and lower operating costs. Nearly nine out of ten respondents noted revenue gains with AI, while an even higher share reported cost reductions.
Business performance: Many respondents said AI boosts employee productivity, drives operational efficiency, and improves customer service - concrete outcomes that go beyond theoretical promise.
Strategic value of open source: Open-source AI models and tooling are now seen as a central part of many companies’ AI strategies, giving businesses more flexibility to adapt solutions to their data and processes.
Agentic AI Gains Momentum Across Retail and CPG
One emerging trend highlighted in the survey is the rise of agentic AI systems - intelligent agents designed to operate with a higher degree of autonomy than traditional AI tools. Unlike rule-based automation or single-purpose models, these agents can independently perform tasks, coordinate actions across systems, and make decisions based on real-time data and defined objectives. This shift marks a move toward AI that does not just support human work, but actively participates in it.
Nearly half of the respondents say they are already using or evaluating AI agents, signaling growing confidence in their practical value. In many organizations, these agents are being applied to operational workflows, where speed and consistency are critical. For example, AI agents can continuously monitor inventory levels, sales patterns, or supply chain signals and take predefined actions without waiting for manual intervention. This allows businesses to respond faster to demand changes and reduce operational friction.
Strengthening Supply Chains
Another important focus highlighted in the survey is how AI is reshaping supply chain operations across retail and CPG organizations. Ongoing volatility, shifting consumer demand, and global sourcing challenges have made supply chains more complex and harder to predict. According to the survey, many companies are turning to AI to gain better end-to-end visibility, using data from across their networks to understand risks, bottlenecks, and inefficiencies earlier than before.
AI is enabling more accurate demand forecasting, smarter inventory optimization, and faster responses to disruption, all of which are priorities for over half of the industry. By identifying patterns and risks earlier, AI-driven systems allow organizations to reduce out-of-stocks, limit excess inventory, and adapt more quickly to changes in supply or demand. These capabilities are becoming increasingly important as retailers and CPG companies seek to balance efficiency with flexibility in an uncertain operating environment.
The Infrastructure Behind A Superb AI Solution
As organizations increasingly rely on AI to consistently drive revenue growth and meaningfully improve operations across their businesses, its impact across retail and CPG domains has become undeniable.
However, building such AI systems is far from simple; organizations will need a strong and resilient infrastructure. From fast GPU resources to flexible model training environments and seamless model deployment, these capabilities are what transform theory into practice.
Recognizing that organizations are actively seeking this level of AI infrastructure, FPT launched FPT AI Factory in Japan and Vietnam, equipped with thousands of cutting-edge NVIDIA H100/H200 GPUs, delivering exceptional computing power. With this computational strength, businesses are allowed to drastically reduce research time while accelerating AI solution development and deployment by more than 1,000 times compared to traditional methods. This creates vast opportunities for turning ideas into reality and applying AI to enhance efficiency and innovation across all areas.
Source: NVIDIA

Bare Metal or Virtual Servers: Find the Best Fit for Your Workload
10:00 09/01/2026
What factors should you consider when choosing the right cloud infrastructure for your workload? Should you run on bare metal servers or virtual servers, and why does that choice matter? Rather than treating one option better than the other, it’s important to understand how different workload requirements influence this decision. Let’s take a closer look at the key criteria to consider when selecting the most suitable cloud server environment.
The Advantages of Bare Metal Servers
Unlike traditional services that may use virtualization for ease of management, bare metal servers provide direct access to the physical hardware, enabling workloads to utilize CPU, GPU, memory, and storage resources with minimal overhead. As a result, performance remains consistent and predictable, making bare metal environments well suited for long-running and compute-intensive workloads.
In addition, bare metal servers offer a high degree of control over the computing environment. Therefore, organizations opting for it are able to gain the highest level of control and customization. They can fine-tune server configurations, optimize performance, and install operating systems and software without any virtualization-related constraints. This level of customization is particularly valuable for specialized and performance-sensitive use cases.
Moreover, this cloud infrastructure can also deliver strong isolation, as all hardware resources are dedicated to a single tenant or workload. This isolation supports enhanced security, compliance, and data protection, which are critical considerations for regulated or data-sensitive applications.
The advantages of Virtual Servers
Virtual servers are designed to deliver flexibility and speed. They can be provisioned rapidly and scaled up or down in response to changing workload demands, making them suitable for dynamic environments where resource requirements evolve over time.
Another key advantage is efficient resource utilization. Virtual servers allow multiple workloads to share underlying hardware, helping organizations optimize costs while maintaining acceptable performance levels.
Virtual environments are also easier to manage and automate. Tasks such as deployment, backup, monitoring, and recovery are often simpler in virtualized setups, supporting rapid iteration and continuous development.
Bare Metal Servers vs. Virtual Servers: Workload and Use Case Considerations
Bare Metal Servers
Virtual Servers
Primary use case
Maximum performance and predictable resources
Flexibility and rapid deployment
Typical workloads
Large-scale AI training, HPC, long-running data processing
Development/testing, experimentation, inference
Runtime pattern
Continuous, long-term workloads
Short-lived or bursty workloads
Resource access
Full access to GPU memory, storage, and network
Virtualized and shared resources
Performance
High and consistent
Varies based on allocation and sharing
Operational fit
Strict performance, security, or compliance needs
Agile teams managing multiple environments
Key Considerations for Infrastructure Selection
When deciding between bare metal and virtual servers, it is important to understand the characteristics of your workloads. Factors such as performance sensitivity, workload duration, scaling needs, and operational complexity should guide the decision.
Cost structure is another consideration. While the short-term cost of running workloads in the cloud may be reduced through the use of virtual servers, this approach often involves trade-offs in areas such as control, performance, and security:
Bare Metal Servers
Virtual Servers
Cost
No hypervisor overhead, allowing direct control over hardware and system-level configurations
Hypervisor layer consumes some compute resources and adds abstraction
Performance
Fully controlled environment with optimized CPU, memory, and storage; ideal for HPC and latency-critical workloads
Performance may be affected by virtualization overhead
Security
Single-tenant model with dedicated resources; suitable for strict compliance requirements (GDPR, HIPAA, HITECH, PCI DSS)
Multi-tenant environment with shared resources
Cost: Virtual server infrastructures rely on hypervisors, which consume some underlying compute resources and introduce an additional abstraction layer. Bare metal environments operate without this overhead, enabling more direct control over hardware and system-level configurations.
Performance: Bare metal servers allow workloads to run in fully controlled environments where CPU, memory, and storage can be optimized to meet application-specific requirements. This level of tuning is particularly valuable for performance-sensitive workloads, including high-performance computing and latency-critical applications commonly found in industries such as financial services.
Security: Bare metal deployments use a single-tenant model with dedicated resources, reducing risks associated with multi-tenant environments. This makes bare metal suitable for workloads that require strong security controls and compliance with data protection regulations such as GDPR, HIPAA, HITECH, and PCI DSS.
To help organizations more easily adopt infrastructure models, FPT AI Factory provides both bare metal and virtualized services called Metal Cloud and GPU Virtual Machine. Both are designed to support a wide range of AI workloads.
The FPT AI Factory Advantages
Metal Cloud enables you to deploy and manage bare metal servers globally. Our platform offers the flexibility of virtualized cloud environments with the performance, security, and control of dedicated.
While GPU Virtual Machine (GPU VM) enables you to deploy and manage high-performance GPU servers with ease. GPU VM uses a passthrough GPU to get a dedicated GPU; applications access it through the layers of a guest OS and hypervisor. Other critical VM resources that applications use, such as RAM, storage, and networking, are also virtualized.
FPT AI Factory Honored at Make in Vietnam Awards 2025: Advancing Make in Vietnam Technology on the Global Stage
10:00 08/01/2026
On December 30, 2025, FPT AI Factory was named among the Top 10 Outstanding Strategic Digital Technology Products at the Make in Vietnam Awards 2025, organized by the Ministry of Science & Technology. The announcement was made at the National Forum on Developing Vietnamese Digital Technology Enterprises 2025, a key national event celebrating innovation and technological leadership.
The recognition highlights FPT AI Factory’s contribution to strengthening Vietnam’s artificial intelligence capabilities and enhancing the country’s position in the global technology landscape.
FPT AI Factory, a comprehensive ecosystem for end-to-end AI development, is the result of a long-term and strategic research and development journey. It builds upon FPT’s continuous investment and accumulated expertise in artificial intelligence since 2012, spanning both technology development and large-scale real-world deployment.
Developed by FPT Smart Cloud, a subsidiary of FPT specializing in cloud and AI, FPT AI Factory was created to address the growing demand for high-performance, AI infrastructure, advanced development tools, and specialized AI services. The platform serves not only the Vietnamese market but is also designed to scale across regional and international markets.
FPT AI Factory currently offers 43 AI services, utilizing NVIDIA’s latest GPU series and technologies, covering the full AI lifecycle, from model training and fine-tuning to deployment and inference. The platform has become a trusted foundation for 18,853 AI scientists, application developers, and AI engineers around the world, supporting a wide range of AI use cases across various industries.
Beyond technology enablement, FPT AI Factory also plays an active role in nurturing Vietnam’s AI ecosystem. The platform has contributed to the acceleration of more than 20 AI startups and co-hosted 8 AI competitions, helping to develop AI talent and drive long-term innovation.
Being named among the Top 10 Strategic Digital Technology Products at the Make in Vietnam Awards 2025 underscores the growing capability of Vietnamese enterprises to develop advanced, globally competitive technologies.
For FPT, the recognition reflects a broader ambition: to bring Make in Vietnam products and Vietnamese intelligence to the global stage, contributing to the emergence of Vietnam as a technology hub in the AI era.
As Vietnam continues to pursue a digital-first growth strategy, FPT AI Factory continues to empower innovation, enhance productivity, and enable organizations to lead in the age of artificial intelligence.
The Make in Vietnam Awards 2025 honor outstanding digital technology products that embody Vietnamese innovation and intellectual excellence. The awards aim to promote comprehensive and inclusive digital transformation, accelerate the development of the digital economy, and drive breakthroughs in productivity, quality, efficiency, and national competitiveness. It also recognizes Vietnamese technology products that successfully expand into global markets, contributing to human development and national prosperity. Notably, 2025 marks the first year the awards honor Outstanding Strategic Digital Technology Products included in the national list of strategic technologies and products, as stipulated in Decision No. 1131/QĐ-TTg dated June 12, 2025, issued by the Prime Minister of Vietnam.
DeepSeek-V3.2-Speciale: A New Reasoning Rival for GPT-5 & Gemini-3.0?
11:38 31/12/2025
Less than a year after a knockout blow that stunned the AI industry, China’s DeepSeek is back with new open-source model and an ambitious set of claims that are turning heads across the tech world. The newly released DeepSeek V3.2-Speciale, fully open-source, is touted by the company as capable of competing with; and in some cases, even surpassing the biggest names today, including OpenAI’s GPT-5 and Google’s Gemini 3 Pro.
DeepSeek-V3.2-Speciale is a large language model that demonstrates exceptionally strong reasoning capabilities across mathematical, algorithmic, and logic-intensive evaluations. According to DeepSeek report, DeepSeek-V3.2-Speciale achieved gold-medal level performance in both the 2025 International Mathematical Olympiad (IMO) and the 2025 International Olympiad in Informatics (IOI), showcasing its capacity to tackle highly structured mathematical proofs and algorithmic problems with precision rarely seen in AI systems. Furthermore, its submissions to the ICPC World Finals 2025 reached top-tier placements, rivalling expert human competitors across timed programming challenges.
Table 1: Performance of DeepSeek-V3.2-Speciale in top-tier mathematics and coding competitions
Key technical highlights
In comparisons with frontier models such as GPT-5, DeepSeek-V3.2-Speciale shows greater consistency in multi-step reasoning, clearer intermediate logic, and lower variance in problem-solving outputs. These characteristics make the model particularly effective on tasks where correctness, logical depth, and reasoning stability are critical, highlighting an important direction for progress in large language model reasoning performance.
What sets DeepSeek-V3.2-Speciale apart is not sheer scale alone, but a design focuses on efficient reasoning and problem decomposition. DeepSeek-V3.2-Speciale has been optimized through a combination of sparse attention mechanisms and a scalable reinforcement learning framework to deliver higher consistency and deeper multi-step reasoning in domains that require exact logical rigor.
Table 2: Benchmark performance and efficiency of reasoning models
Across a range of reasoning-heavy benchmarks, DeepSeek-V3.2-Speciale consistently matches or outperforms GPT-5 High and Gemini 3.0 Pro, particularly on tasks that emphasize mathematical rigor and multi-step logical reasoning such as AIME 2025, HMMT Feb 2025, HMMT Nov 2025, and IMOAnswerBench.
Taken as a whole, the benchmark results suggest that DeepSeek-V3.2-Speciale has closed the reasoning gap with frontier models; and in several dimensions, moved ahead of them. Compared to GPT-5 and Gemini 3.0 Pro, DeepSeek-V3.2-Speciale shows stronger consistency on reasoning-intensive tasks, with fewer performance drop-offs across different problem distributions. Rather than excelling in isolated benchmarks, it delivers high, stable scores across mathematics, algorithmic reasoning, and competitive programming, indicating robustness rather than specialization in a single test format.
Relative to GPT-5, the results point to a clear trade-off: while GPT-5 remains broadly capable, its reasoning performance exhibits greater variance, whereas DeepSeek-V3.2-Speciale maintains more reliable accuracy on structured, multi-step problems. Against Gemini 3.0 Pro, which performs strongly on select benchmarks, DeepSeek-V3.2-Speciale distinguishes itself by sustaining top-tier performance across a wider range of reasoning evaluations, suggesting stronger generalization within the reasoning domain itself.
When to use DeepSeek-V3.2-Speciale
For practitioners, the implications are fairly clear once the nature of the task is defined. When the problem is pure reasoning on a bounded input such as proving a functional inequality, solving a difficult combinatorics problem, or designing a non-trivial algorithm from scratch. DeepSeek-V3.2-Speciale stands out as one of the strongest engines available.
However, real-world workflows often extend beyond this narrow but demanding class of problems. When a task begins to blend reasoning with broader context, such as drawing up-to-date world knowledge, large multi-file codebases, shell commands, browsing, or multimodal inputs, raw contest performance becomes less decisive. In these mixed workflows, the broader ecosystem and tool integration matter more, and systems like GPT-5.1-High, Gemini-3-Pro, Claude-Opus-4.5, or even standard V3.2-Thinking often deliver better end-to-end results.
Conclusion
In conclusion, DeepSeek-V3.2-Speciale demonstrates that frontier-level reasoning can be achieved through focused design rather than sheer scale. Its strong and consistent performance on mathematical and algorithmic benchmarks places it among the most capable reasoning models available today. While it is not a universal solution for every workflow, in bounded, reasoning-heavy tasks it sets a new bar for reliability and logical depth, pointing toward a more specialized and purposeful direction for future language models.
To experience DeepSeek-V3.2-Speciale, visit our website at AI Marketplace. New users will receive up to 100 million tokens to explore and evaluate this robust model on real-world reasoning tasks.
Get started with DeepSeek-V3.2-Speciale here: https://marketplace.fptcloud.com/en
On-Premises vs. Cloud GPUs: Which Is More Cost-Effective?
13:32 30/12/2025
As AI, machine learning, and data science workloads continue to grow in scale and complexity, GPUs have become a critical piece of enterprise infrastructure. Now, organizations are mostly facing a fundamental decision: Whether to build and operate on-premises GPU clusters or adopt cloud-based platforms such as FPT AI Factory. While both options enable high-performance computing, their cost structures, scalability, and operational implications differ significantly. Understanding these differences is essential to help you choose your perfect fit.
Upfront Investment and Capital Efficiency
Buying powerful GPUs is often seen as the main hurdle, but it is only one piece of the puzzle. An on-prem GPU infrastructure requires a full supporting environment to operate reliably. This includes GPU servers, networking equipment, storage, supporting data center infrastructure, and experienced staff to maintain everything. High-performance GPUs can cost tens of thousands of dollars per unit, and production environments often require large clusters to support training, inference, and redundancy. Beyond hardware, organizations also absorb depreciation, long procurement cycles, and the risk of underutilized assets.
On the other hand, cloud providers like FPT AI Factory remove this upfront barrier by delivering GPU resources as a service. Instead of owning hardware, enterprises can access high-performance GPUs on demand, converting capital expenditure into operating expenditure with the pay-as-you-go model. This allows organizations to allocate budget more flexibly as needed to evolve.
Cost Factor
On-Premises GPU Cluster
Cloud GPU
Initial Hardware Investment
High upfront costs for GPUs, servers, and networking
No initial investment, pay-as-you-go
Infrastructure Setup
Requires data center space, power, and cooling
No data center costs, resources managed
Staffing Costs
Dedicated IT staff for maintenance and monitoring
Minimal IT staff required
Maintenance & Upgrades
Regular hardware replacements and software updates
Managed by Cloud provider at no extra cost
Operational Costs
Fixed monthly power, cooling, and space expenses
Variable, based on usage hours
Flexibility & Scalability
Limited by physical infrastructure
Easily scalable, flexible resource allocation
Monthly Cost Estimate
High (fixed costs, regardless of usage)
Variable (based on active usage only)
To put it in perspective, a single H100 can cost up to $25,000 just for the card itself, and that's before the cost of the machine around it, data center amenities like cooling, data linkups, and hosting, as well as the expertise required to pay for its operation and maintenance, whereas you could rent that same H100 on FPT AI Factory for tens of thousands of hours and still not yet be at your break-even point.
Scalability and Performance in Practice
On-prem GPU environments are often seen as more stable in terms of performance, but that stability depends heavily on how well the system is designed and maintained. Network congestion, storage limitations, or insufficient cooling can quickly become bottlenecks, reducing performance even when powerful GPUs are in place.
Cloud GPU platforms are built to address these challenges by offering high-performance GPU instances, including dedicated options for demanding AI workloads. In practice, teams can achieve performance that matches or even exceeds self-managed clusters, without having to handle infrastructure on their own.
Moreover, scalability is also where cloud solutions clearly stand out. Teams can scale resources up for training, scale down after experiments complete, and switch between GPU types depending on the task. This is important for projects with different demands. On-prem systems, by contrast, are limited by the hardware already purchased, making rapid growth expensive and slow.
Efficiency and Resource Utilization
A common challenge with on-prem GPU clusters is low utilization. GPUs may sit idle during off-peak hours or between projects, yet still incur full operational costs.
Unlike that, cloud providers improve efficiency by allowing resources to be used only when needed. This is ideal for workloads such as batch data processing, model training cycles, experimentation, or inference with variable demand. Paying only for active usage helps eliminate waste and keeps costs aligned with actual work being done.
Considerations for Choosing Between Cloud and On-Premises Solutions
Although cloud-based GPUs generally offer greater flexibility and efficiency, the final decision should be driven by an organization’s specific workload characteristics and long-term strategy.
Workload duration and usage patterns play a critical role. Short-term, experimental, or highly variable workloads are better suited to cloud environments, where resources can be provisioned and released on demand. In contrast, stable and continuously running workloads may achieve better cost efficiency with on-premises GPU clusters.
Budget and operational resources are another key factor. Organizations with limited upfront capital or without specialized infrastructure teams often benefit from the cloud’s lower operational overhead and managed services. Meanwhile, enterprises that already operate data centers and possess dedicated IT staff may find long-term value in investing in on-premises hardware.
Scalability expectations should also be carefully evaluated. When rapid growth or unpredictable demand is anticipated, cloud solutions provide the agility to scale instantly without large capital investments. This allows organizations to align infrastructure expansion closely with actual business needs, rather than over-provisioning resources in advance.
By carefully evaluating these factors, organizations can select the deployment model that delivers the best balance between performance, cost efficiency, and scalability.
FPT AI Factory in Review 2025: Taking the Lead in AI Innovation
11:48 24/12/2025
2025 marked a pivotal year for FPT AI Factory as we continued to advance our mission of building a sovereign, enterprise-grade AI infrastructure that empowers innovation, accelerates productivity, and supports the global AI community. Backed by a deep collaboration with NVIDIA as an NVIDIA Preferred Partner, FPT AI Factory has evolved into a comprehensive ecosystem for end-to-end AI development, serving enterprises, startups, and AI practitioners across multiple markets.
Driving AI Innovation at Scale
Throughout 2025, FPT AI Factory delivered tangible progress in scale, performance, and adoption. The platform successfully launched 43 AI services, covering the full AI lifecycle, from data processing and model training to deployment, inference, and monitoring.
One of the most significant milestones was the processing of 1,111 billion tokens across various AI workloads, enabling large-scale experimentation and production use of advanced language models. The platform also expanded its AI portfolio with 70+ AI models, including both internally developed models and leading open and commercial models, giving users the flexibility to build solutions tailored to their specific needs.
Empowering a Growing AI Community
Beyond technology, 2025 was about empowering people. FPT AI Factory became a trusted platform for a rapidly growing AI ecosystem, supporting 18,853 AI scientists, application developers, and AI engineers.
FPT AI Factory also played a critical role in nurturing innovation at the grassroots level, partnering with 20+ AI startups and providing the foundational infrastructure for more than 8 AI competitions. These initiatives not only helped discover new talents but also accelerated real-world AI applications, contributing to the long-term development of Vietnam’s AI ecosystem.
A Comprehensive Ecosystem for End-to-End AI Development
FPT AI Factory continued to strengthen its position as a one-stop platform for AI development, integrating infrastructure, tools, models, and services into a unified ecosystem. From scalable GPU computing and secure data environments to model marketplaces and deployment pipelines, the platform enables teams to move seamlessly from idea to production.
This holistic approach reflects FPT’s philosophy of “Build Your Own AI,” empowering organizations and individuals to develop, customize, and scale AI solutions independently, while maintaining full control over data, models, and deployment strategies.
New Product Highlight: AI Notebook
One of the most notable product launches in 2025 was AI Notebook. Built on NVIDIA-accelerated computing and the open-source Jupyter Notebook architecture, AI Notebook delivers a powerful, cloud-based coding workspace for AI engineers, developers, and researchers.
With one-click deployment and an embedded notebook gallery, AI Notebook significantly reduces setup time and complexity. Its cost-efficient model - free CPU usage with pay-as-you-go GPU pricing - allows teams to experiment freely while maintaining full cost transparency and control. With 400+ labs created in just one month, AI Notebook is on its way to becoming a preferred environment for rapid prototyping, experimentation, and model refinement.
Enterprise-Grade Security and Proven Quality
Security and trust remain our top priority. FPT AI Factory achieved and maintained a comprehensive set of international certifications, including ISO/IEC 27001:2022, ISO/IEC 27017:2015, ISO/IEC 27018:2019, PCI DSS, SOC 2, and SOC 3, ensuring the highest standards for information security, cloud governance, and data protection.
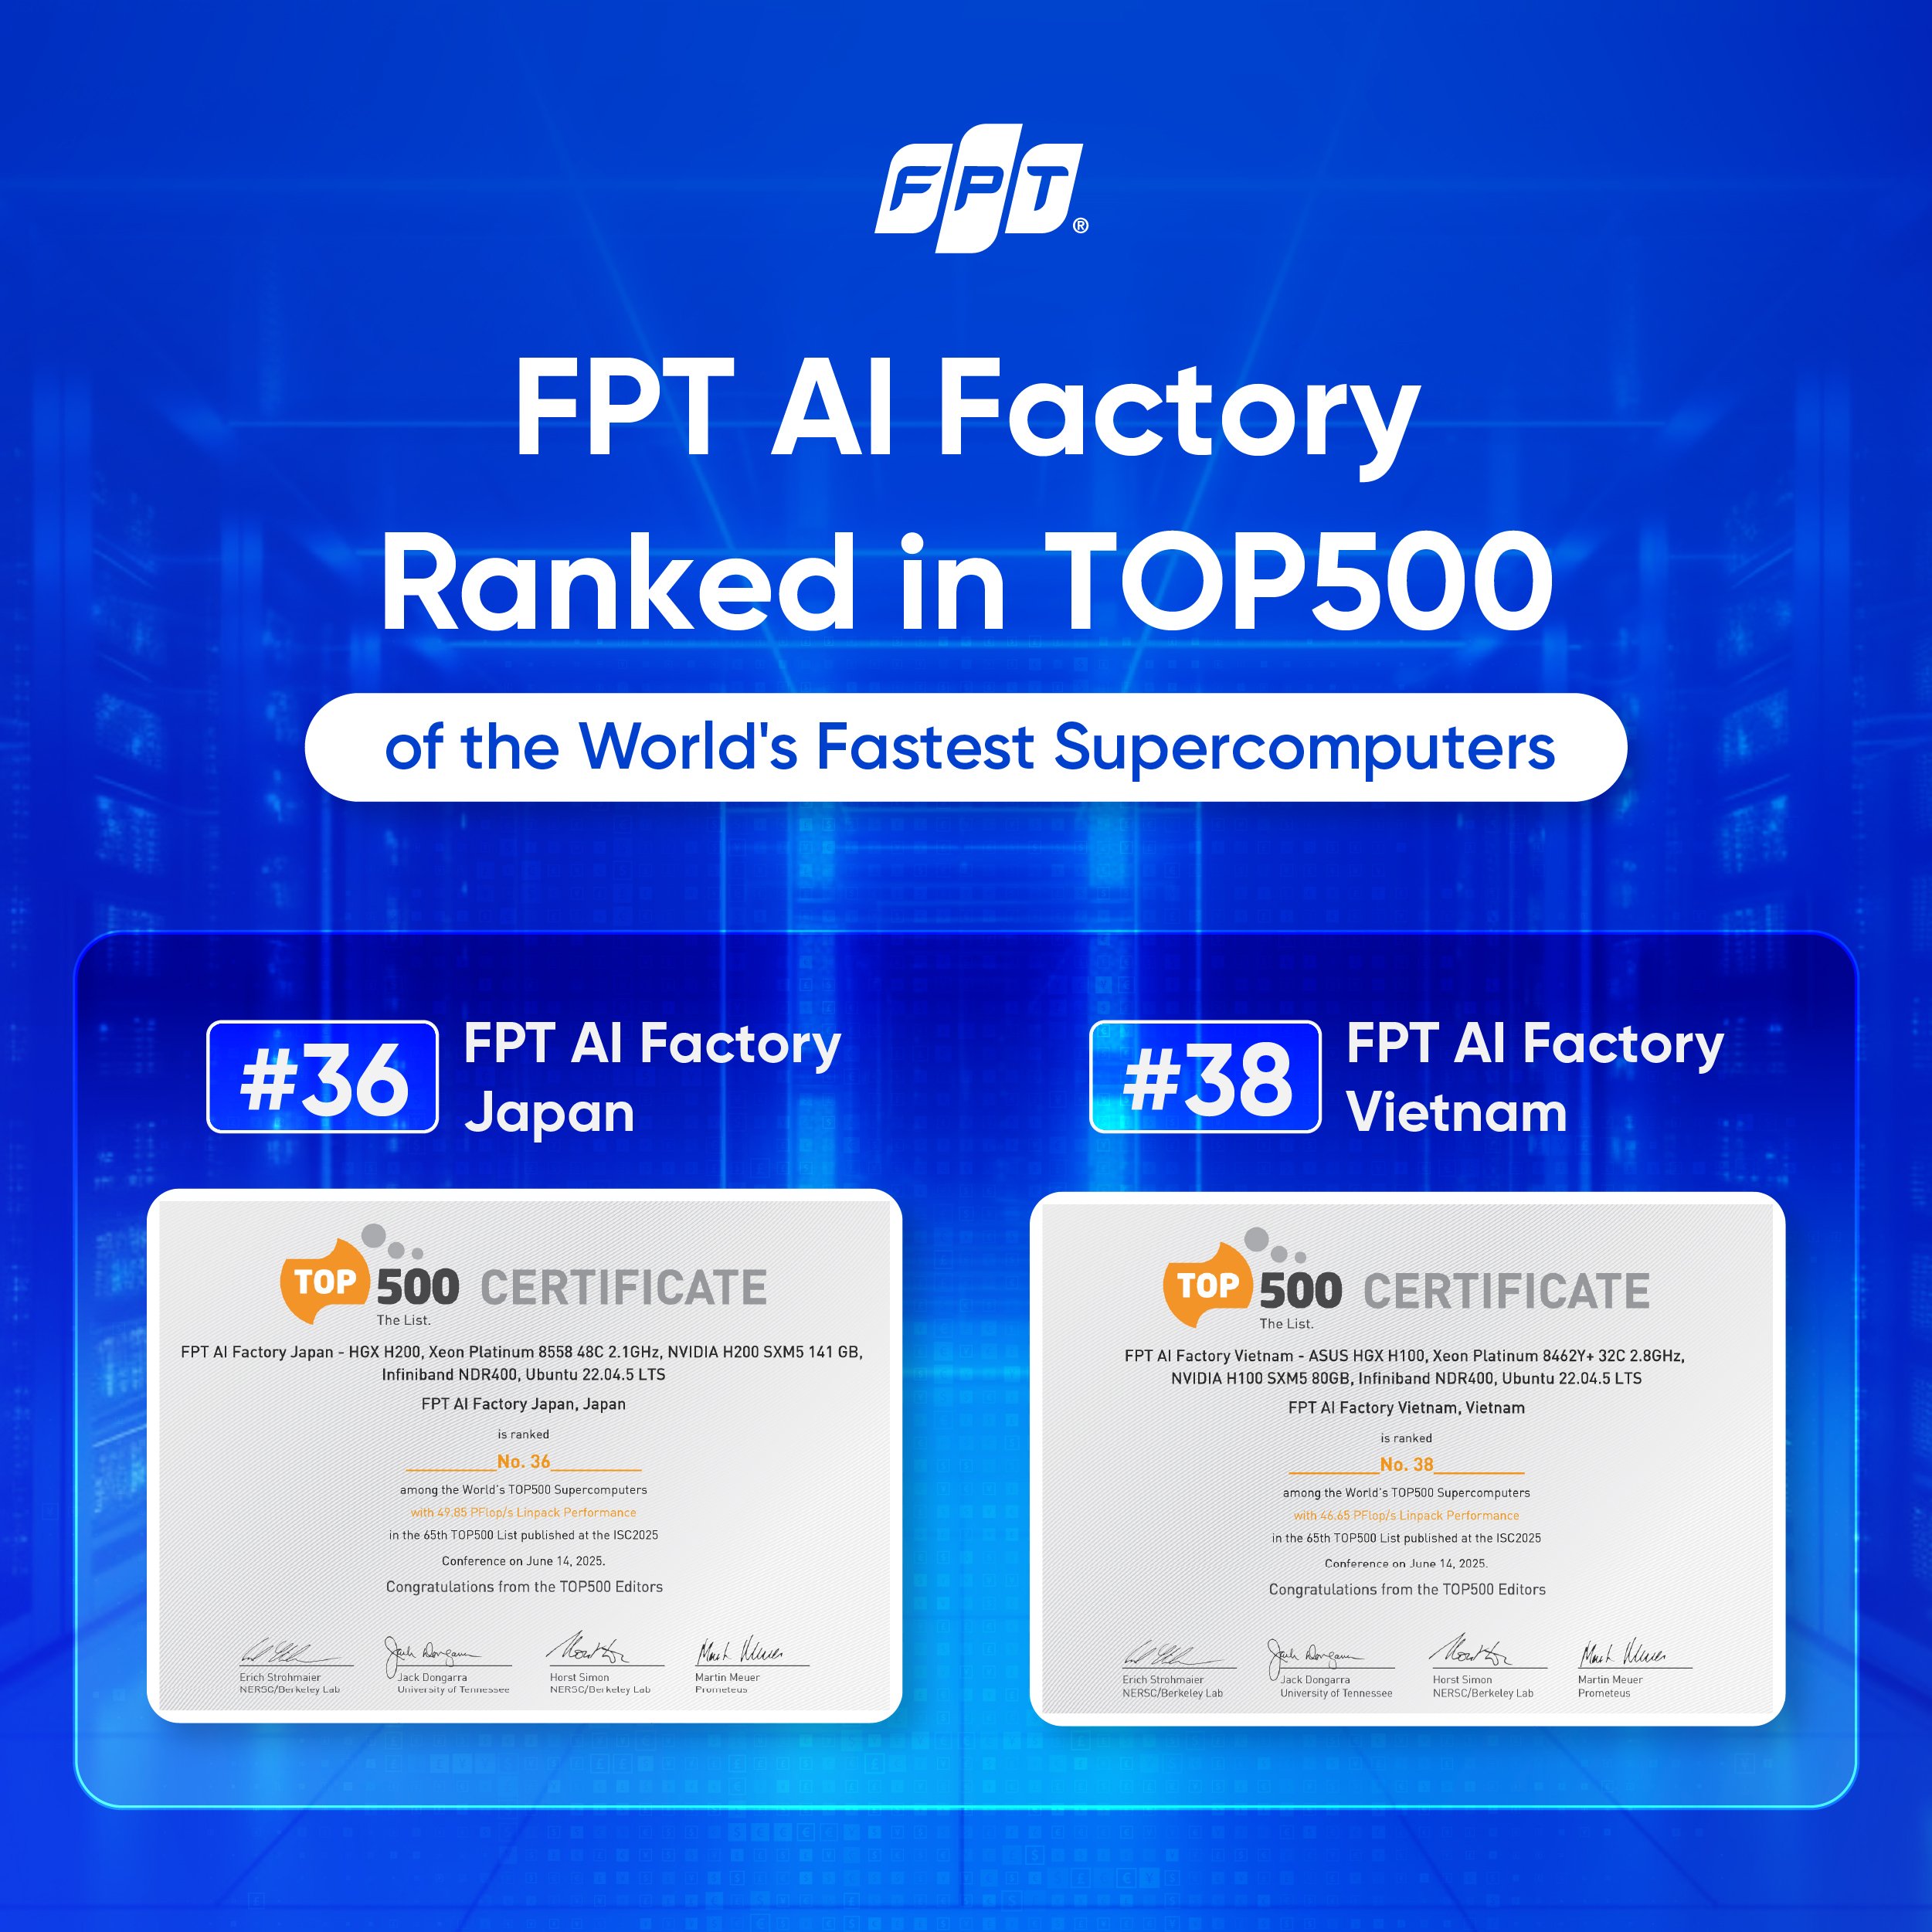
In terms of computing capability, FPT AI Factory continued to rank among the world’s leading AI infrastructures, reaching Top 36 globally for the Japan site and Top 38 globally for the Vietnam site. These rankings reflect the platform’s large-scale deployment of advanced GPU technologies, including NVIDIA H100 and H200, enabling high-performance AI workloads at enterprise and national scale.
Looking Ahead
As we reflect on 2025, FPT AI Factory stands as more than just an AI platform. It is a foundation for innovation, a catalyst for productivity growth, and a strategic enabler for organizations seeking to lead in the AI era. With a robust ecosystem, strong community engagement, and a clear vision for sovereign and sustainable AI development, FPT AI Factory is well-positioned to drive the next wave of AI innovation in 2026 and beyond.
Together with our partners, customers, and the global AI community, we look forward to continuing this journey: building AI, shaping the future, and empowering innovation at scale.