- About Us
-
 Secure, unlimited storage to ensures efficiency as well as high and continuous data access demand.
 Virtual server integration for 3D Rendering, AI or ML
 Enhance application capacity and availability.
 Access to an all-inclusive stack for AI development, driven by NVIDIA’s powerful technology!
 FPT Web Application Firewall provides powerful protection for web applications
 Advanced virtual server with rapid scalability
 Backup and restore data instantly, securely and maintain data integrity.
Advanced virtual server with rapid scalability
Access to an all-inclusive stack for AI development, driven by NVIDIA’s powerful technology!
Enhance application capacity and availability.
Backup and restore data instantly, securely and maintain data integrity.
Recovery, ensuring quick operation for the business after all incidents and disasters.
Backup and restore data instantly, securely and maintain data integrity.
Advanced virtual server with rapid scalability
Access to an all-inclusive stack for AI development, driven by NVIDIA’s powerful technology!
Enhance application capacity and availability.
Backup and restore data instantly, securely and maintain data integrity.
Recovery, ensuring quick operation for the business after all incidents and disasters.
 Diverse throughput and capacity to meet various business workloads.
Secure, unlimited storage to ensures efficiency as well as high and continuous data access demand.
FPT Web Application Firewall provides powerful protection for web applications
Intelligent and Comprehensive Virtual Web Application Firewall - Security Collaboration between FPT Cloud and Penta Security.
The Next generation firewall security service
Easily store, manage, deploy, and secure Container images
Safe, secure, stable, high-performance Kubernetes platform
Provided as a service to deploy, monitor, backup, restore, and scale MongoDB databases on cloud.
Provided as a service to deploy, monitor, backup, restore, and scale Redis databases on cloud.
Provided as a service to deploy, monitor, backup, restore, and scale PostgreSQL databases on cloud. System Monitoring Solution anywhere, anytime, anyplatform
 Helps reduce operational costs by up to 40% compared to traditional BI solutions, while improving efficiency through optimized resource usage and infrastructure scaling.
 - Pricing
- Partner
- Event


When a GPU VM running Ubuntu is successfully created on the FPT Portal, users can access it by default through the built-in Web Console.
Additionally, users can connect externally using SSH clients or third-party software such as PuTTY or Bitvise.
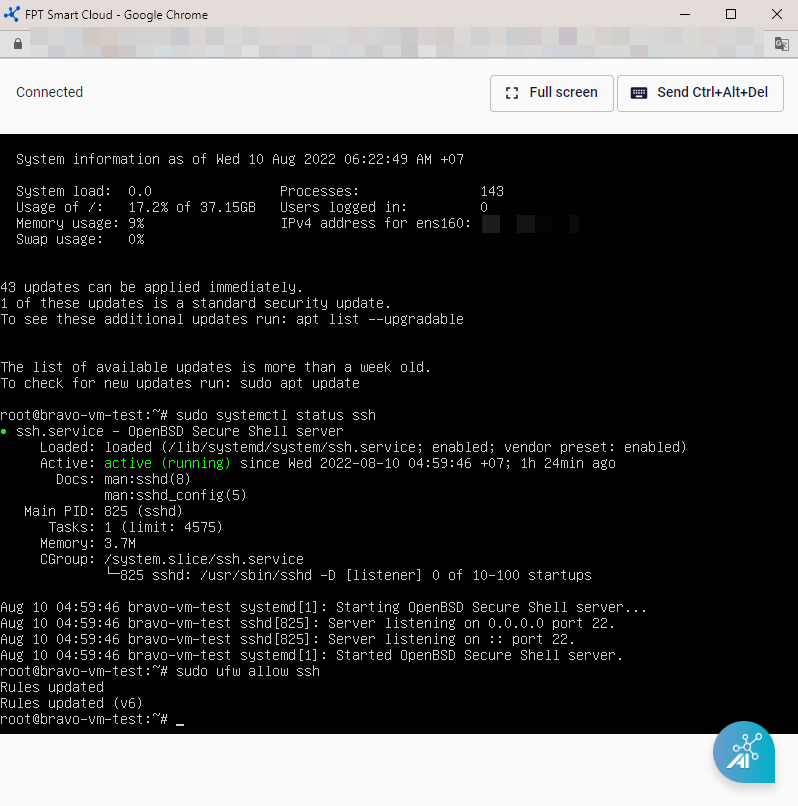
Connect to a GPU VM via Web Console
The Web Console allows users to control all GPU VMs on FPT Cloud, even those without a Public IP.
Step 1: On the Side menu, go to Instance Management, find the virtual machine you want to access, and under the Actions section, select Console.
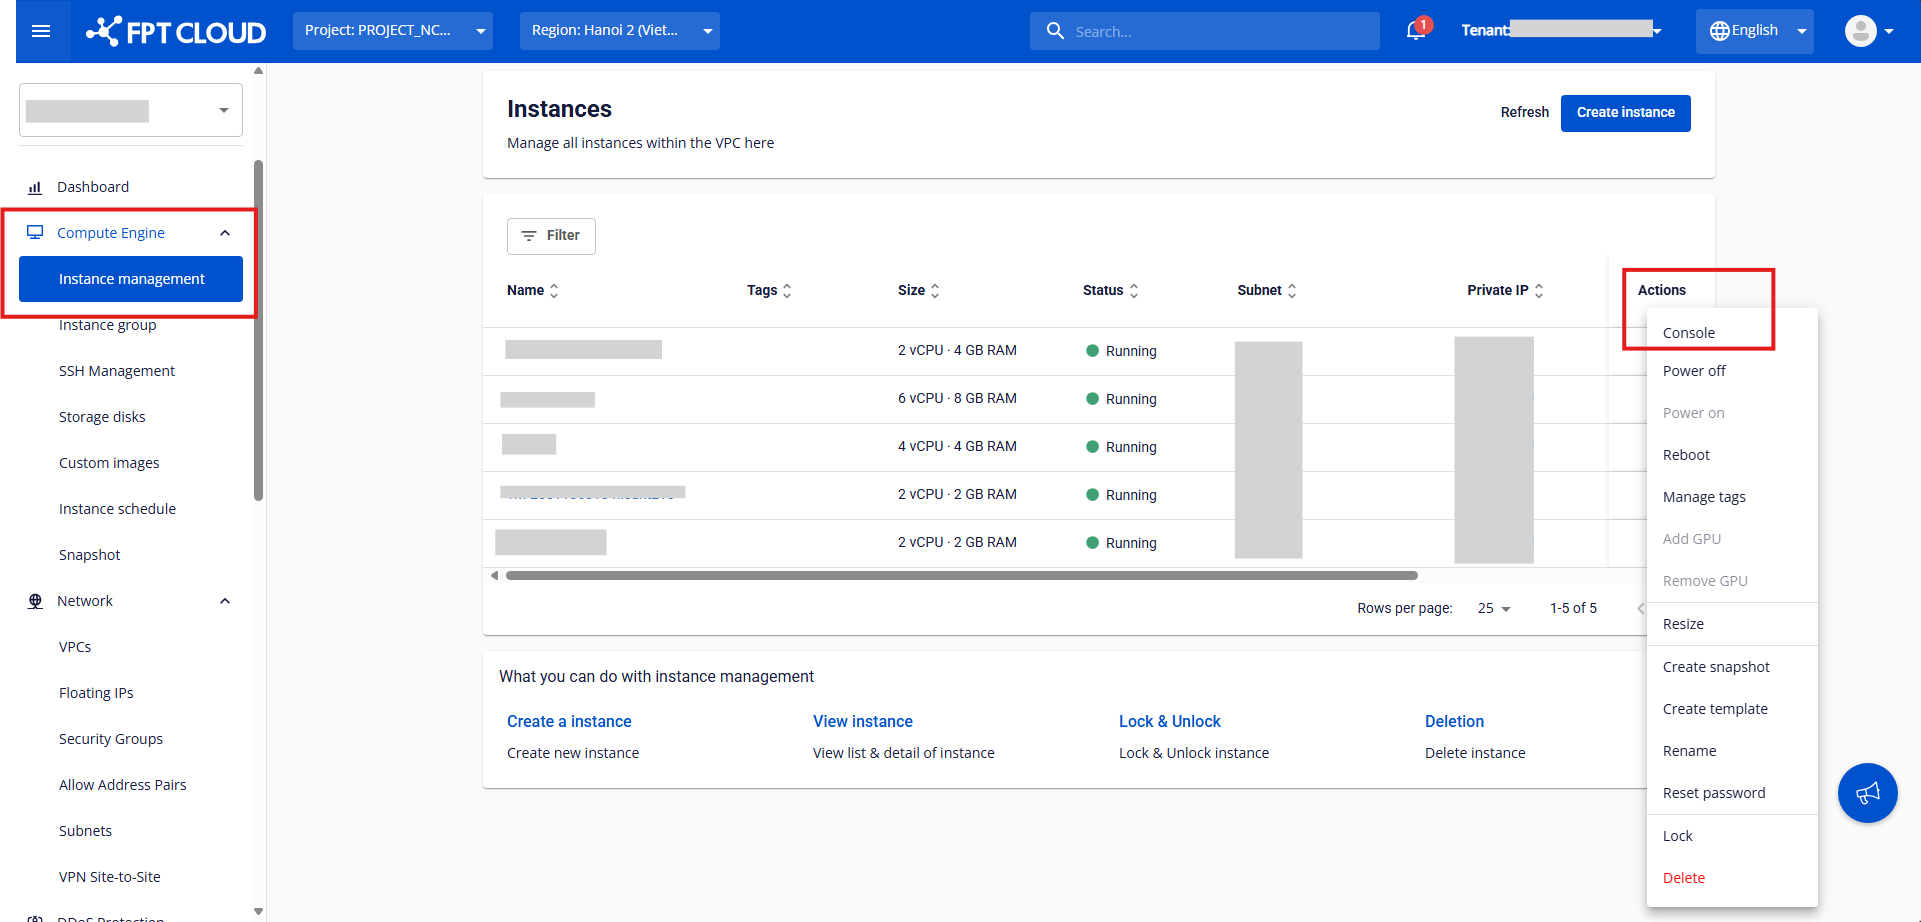
Step 2: The browser will immediately open a new window displaying the server screen, allowing you full control and interaction with the connected server.
SSH to Connect to a GPU VM
You can connect to a GPU VM using an SSH client, typically from a terminal.
To do so, you need to have the following three pieces of information:
-
The public IP address: After your GPU VM is created and allocated a public IP, it is displayed in the GPU VM list or the GPU VM details page.
-
The username: The default username on the server during initial creation is root.
-
The authentication method for that user. If you added SSH keys to your GPU VM, you can connect using those keys, which we strongly recommend for its additional security. Otherwise, if you use password authentication, use the password you chose.
Once you have your GPU VM’s public IP address, username, and password or SSH key, follow the instructions below for your SSH client.
Step 1: Open Your Terminal
-
On Linux/macOS: Launch the Terminal app.
-
On Windows: Use CMD, PowerShell, Git Bash, or WSL.
Step 2: Connecting to Your VM
You can connect to your VM in two ways: using a password or an SSH key (.pem file).
Method 1: Connect Using a Password
-
Open your terminal or command prompt.
-
Enter the following command to connect to your VM:
ssh <username>@<VM_IP>Method 2: Connect Using an SSH Key (.pem file)
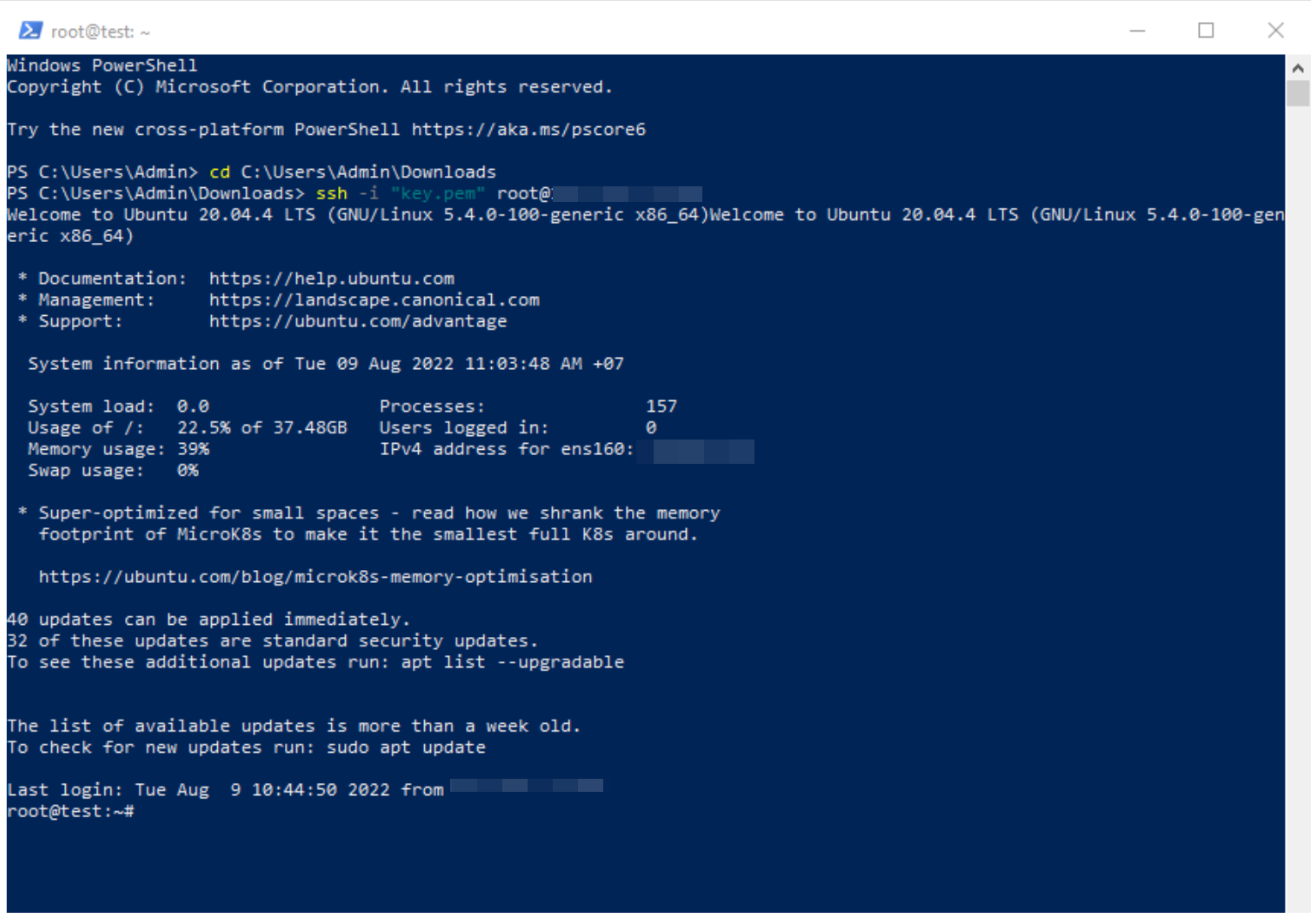
- Navigate to the directory where your .pem file is located:
cd <path_to_pem_file_directory>- Use the SSH key to connect to your VM:
ssh -i "<your_key_file.pem>" <username>@<VM_IP>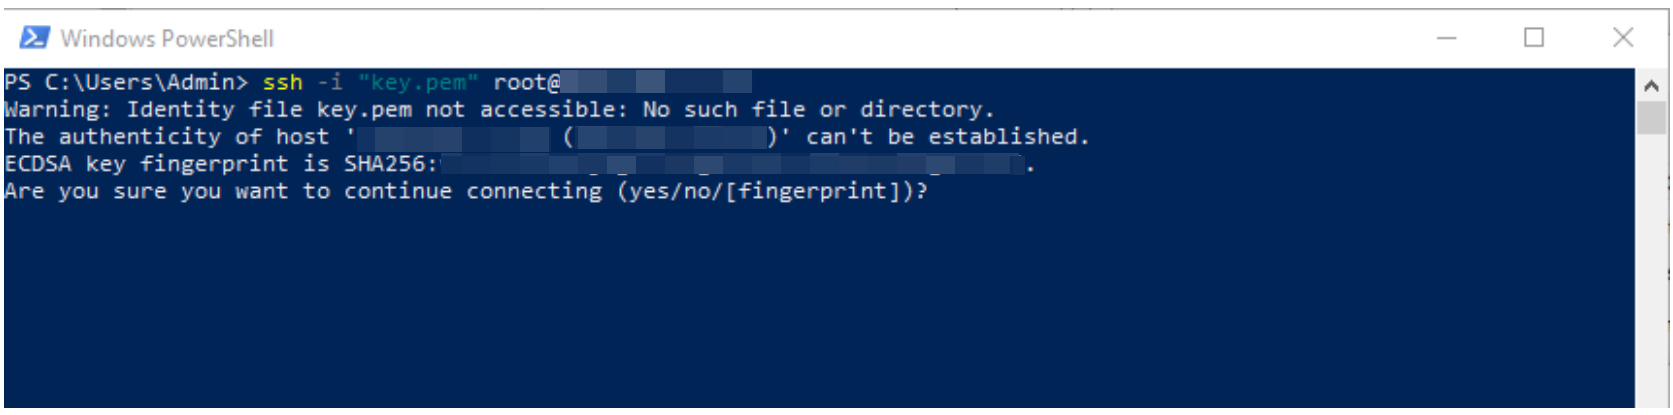
-
On your first connection, type yes to verify the host’s fingerprint and continue.
-
You have successfully connected to the server via SSH. Type exit to close the SSH session and return to your local shell.
Note:
If you see the error: WARNING: REMOTE HOST IDENTIFICATION HAS CHANGED!, it means the saved SSH fingerprint for the server has changed. To fix it, run the following command to remove the old fingerprint:
ssh-keygen -R "<VM_IP>"