- About Us
-
 Secure, unlimited storage to ensures efficiency as well as high and continuous data access demand.
 Virtual server integration for 3D Rendering, AI or ML
 Enhance application capacity and availability.
 Access to an all-inclusive stack for AI development, driven by NVIDIA’s powerful technology!
 FPT Web Application Firewall provides powerful protection for web applications
 Advanced virtual server with rapid scalability
 Backup and restore data instantly, securely and maintain data integrity.
Advanced virtual server with rapid scalability
Access to an all-inclusive stack for AI development, driven by NVIDIA’s powerful technology!
Enhance application capacity and availability.
Backup and restore data instantly, securely and maintain data integrity.
Recovery, ensuring quick operation for the business after all incidents and disasters.
Backup and restore data instantly, securely and maintain data integrity.
Advanced virtual server with rapid scalability
Access to an all-inclusive stack for AI development, driven by NVIDIA’s powerful technology!
Enhance application capacity and availability.
Backup and restore data instantly, securely and maintain data integrity.
Recovery, ensuring quick operation for the business after all incidents and disasters.
 Diverse throughput and capacity to meet various business workloads.
Secure, unlimited storage to ensures efficiency as well as high and continuous data access demand.
FPT Web Application Firewall provides powerful protection for web applications
Intelligent and Comprehensive Virtual Web Application Firewall - Security Collaboration between FPT Cloud and Penta Security.
The Next generation firewall security service
Easily store, manage, deploy, and secure Container images
Safe, secure, stable, high-performance Kubernetes platform
Provided as a service to deploy, monitor, backup, restore, and scale MongoDB databases on cloud.
Provided as a service to deploy, monitor, backup, restore, and scale Redis databases on cloud.
Provided as a service to deploy, monitor, backup, restore, and scale PostgreSQL databases on cloud. System Monitoring Solution anywhere, anytime, anyplatform
 Helps reduce operational costs by up to 40% compared to traditional BI solutions, while improving efficiency through optimized resource usage and infrastructure scaling.
 - Pricing
- Partner
- Event


Note: Some mandatory conditions for performing this operation:
-
CPU, RAM, Storage, and Instance quotas must be sufficient for the desired Cluster configuration.
-
01 Public IP Available: Used for the Kubernetes API and Ingress.
-
01 VM Network: Network used for Kubernetes Nodes. Create a Subnet with a Static IP Pool as instructed here.
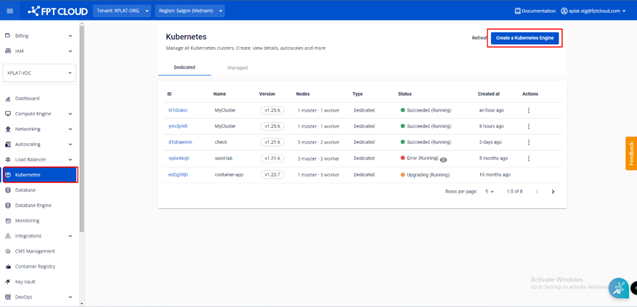
Step 1: In the FPT Portal menu, select Kubernetes > Create.
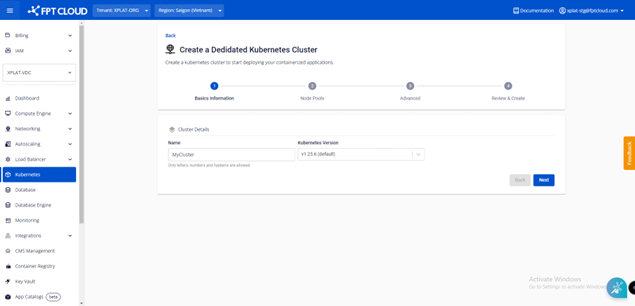
Step 2: Enter Cluster's general information and click Next
-
Name: Enter the Cluster name.
-
Version: Choose a Kubernetes version.
Step 3: Configure Node Pools as desired, then click Next
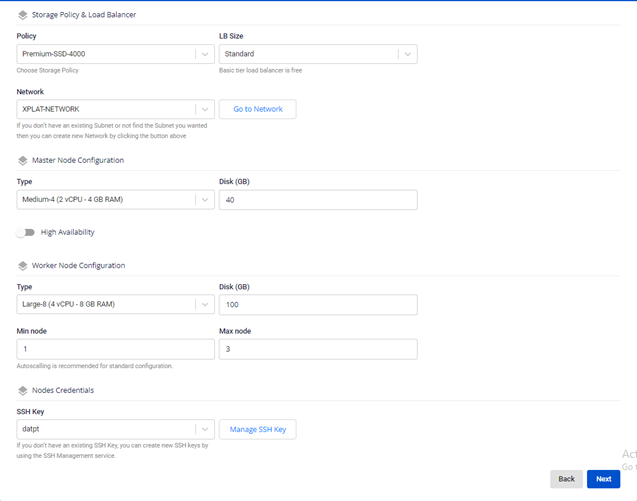
Storage Policy & Load Balancer
-
Policy: Choose Storage Policy for Disk of VMs in the Kubernetes Cluster.
-
LB Size: Load Balancer's config:
-
Standard: Max 2000 CCU, 4000 HTTP req/s, bandwidth 100Mbps.
-
Advanced: Max 4000 CCU, 8000 HTTP req/s, bandwidth 100Mbps.
-
Premium: Max 8000 CCU, 16000 HTTP req/s, bandwidth 100Mbps.
-
Master Node Configuration
-
Type: Choose CPU & Memory configuration for Master Node
-
Disk (GB): Choose root disk’s capacity for Master Node
-
High Availability:
-
Disable: Quantity (1) corresponds to the number of Master Node's VM instance for this Cluster is 01.
-
Enable: Quantity (3) corresponds to the number of Master Node's VM instance for this Cluster is 03.
-
Worker Node Configuration
-
Type: Choose CPU & Memory configuration for Worker Nodes
-
Disk (GB): Choose root disk’s capacity for Worker Nodes
-
Quantity: Number of Worker Nodes for this Cluster
-
Autoscale: Enable/Disable Autoscale function for this Cluster. If you select Enable, please enter the Scale Min value (number of remaining nodes when scaling down) and Scale Max value (maximum number of nodes when scaling up).
Node Credentials:
- SSH Keys: Key is used for access VM Node (user root). If you haven’t create one, please follows the instructions here.
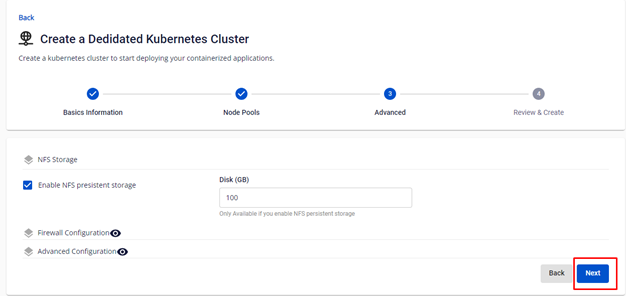
Step 4: Configure Advanced configuration, then click Next
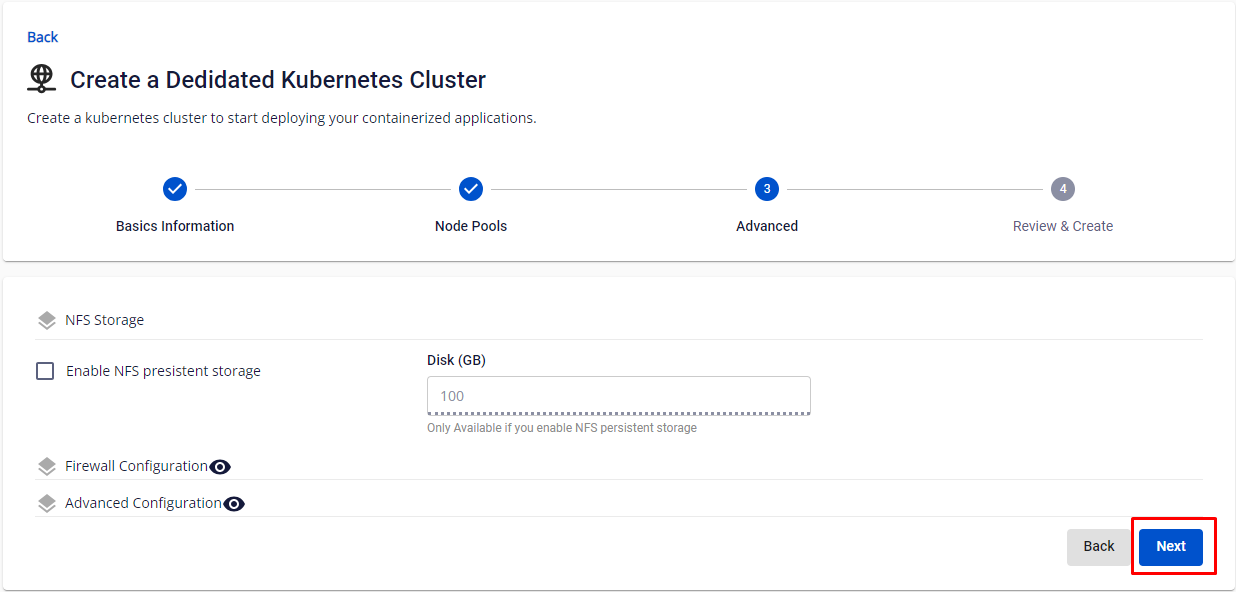
NFS Storage:
-
Enable NFS Persistent Storage: Enabling NFS Persistent Storage to be deploy along with this Cluster.
-
Disk (GB): Capacity of NFS Storage. Remember to have suitable sizing, changing disk capacity will hvae to be done manually by the user.
Firewall Configuration:
These settings are for advanced users, click the view icon to expand. If you do not understand these parameters, leave them as default.
- Enable Firewall: Select to configure Edge IP, Public IP, Private IP with Kubernetes Cluster.
Advanced Config:
These settings are also for advanced users, click the view icon to expand. If you do not understand these parameters, leave them as default.
-
Pod Network: Network used for Pods in the cluster.
-
Service Network: Network used for Services in the cluster.
-
Network Node Prefix: Subnet Prefix for Pods in the Node.
-
Max Pod per Node: Maximum number of Pods on each Kubernetes Node.
-
Node DNS: DNS is used for Nodes and Kubernetes Cluster. Enter your desired DNS to use your DNS system.
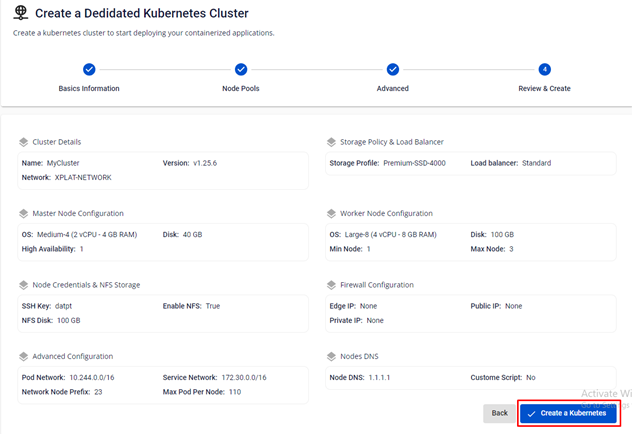
Step 5: Click Next.
The system will display a screen to confirm all entered information, to check the resources and proceed with the process of initializing the Kubernetes Cluster based on the selected configuration.
Step 6: Click Create a Kubernetes.
The system will configure, check for resources quota, and initiate the process of creating the Kubernetes Cluster based on the selected configuration.