VPN Site-to-Site
-
 Quick Guide
-
 Detailed Instructions
-
 FAQs
FAQs
-
 VPN Site-to-Site (new version)
-
Common VPN Device Configuration
- VPN Site-to-Site Configuration with Palo Alto
- VPN Site-to-Site Configuration with Fortigate
- VPN Site-to-Site Configuration between FCI and AWS (Virtual private gateways)
- VPN Site-to-Site Configuration between FCI and AWS (Transit-Gateway)
- VPN Site-to-Site Configuration between Openstack portal and VMW
-
VPN Connection Management
- Create a VPN Connection
- Edit VPN Connection
- Enable/Disable VPN Connection
- Delete VPN Connection
- Create Customer gateway
- Edit Customer gateway
- Delete Customer gateway
- Service Authorization Management
- Setting up alerts via the Cloud Guard service
- Service monitoring via the Monitoring feature
- Monitoring service through Logging feature
- FAQs
-
Common VPN Device Configuration
You must ensure the following conditions are met:
-
The VPN Site-to-Site service is set up on the FPT Cloud Portal.
-
A Palo Alto firewall is installed and enabled on the customer's side.
-
The Palo Alto firewall has been configured with three IP addresses: Management (Public IP) - WAN (Public IP) - LAN.
Step 1: Configure VPN Site-to-Site
Access and create the VPN Site-to-Site on https://console.fptcloud.com/
-Create a Customer Gateway:
-
Remote private network: LAN subnet range for peering with Palo Alto
-
Remote IP public: Public IP address of Palo Alto
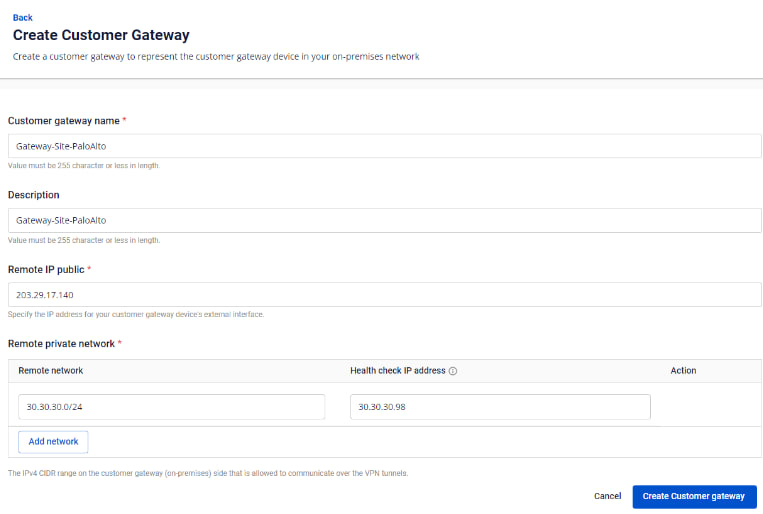
-Create a VPN Connection:
A VPN connection includes three main sections:
-
General Information (contains general connection details)
-
Remote VPN Information (contains encryption and customer-side information)
-
Dead Peer Detection (number of automatic retries if the connection encounters issues)
Section 1: General Information
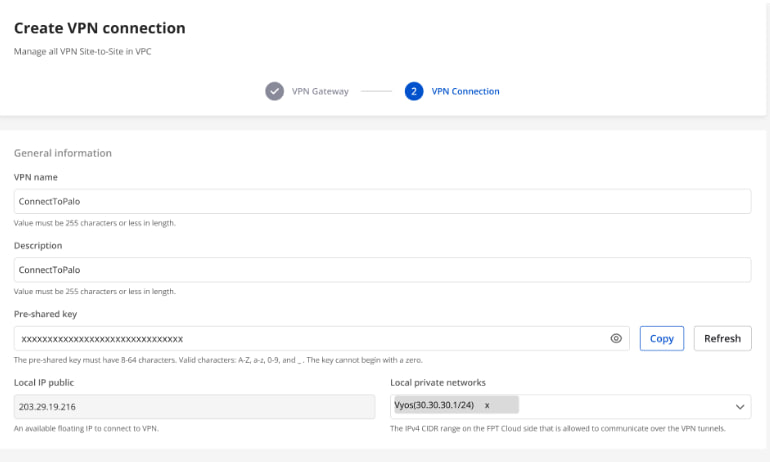
Note: The Pre-shared key value should be saved for configuration on Palo Alto.
Section 2: Remote VPN Information
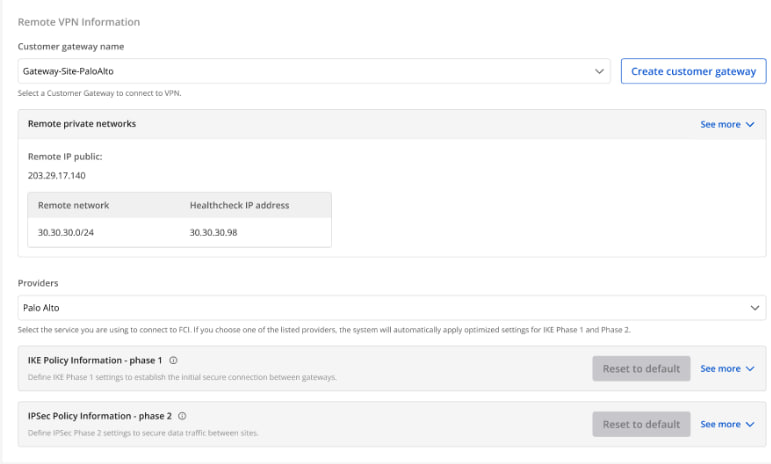
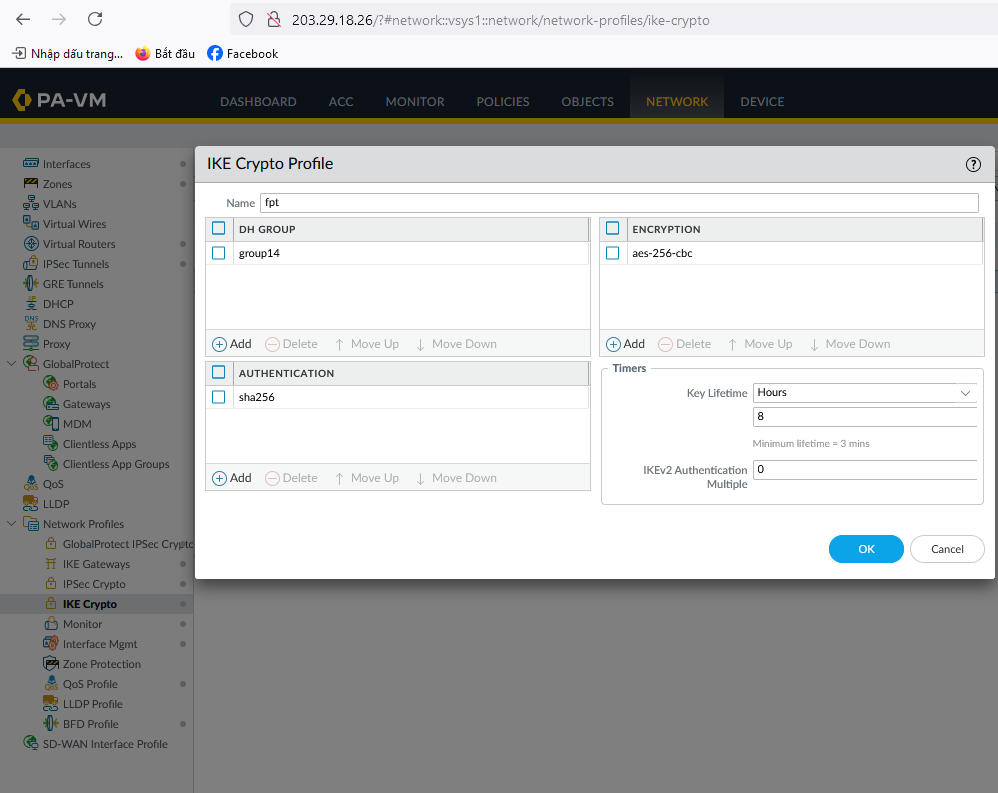
When selecting the provider “Palo Alto,” the system automatically fills in the IKE and IPsec information as follows: For IKE:
-
Encryption algorithm: aes-256
-
Authorization algorithm: sha256
-
IKE version: ikev2
-
Lifetime units: seconds
-
Lifetime value: 28800
-
DH Group: GROUP_14
-
Phase 1 negotiation mode: main
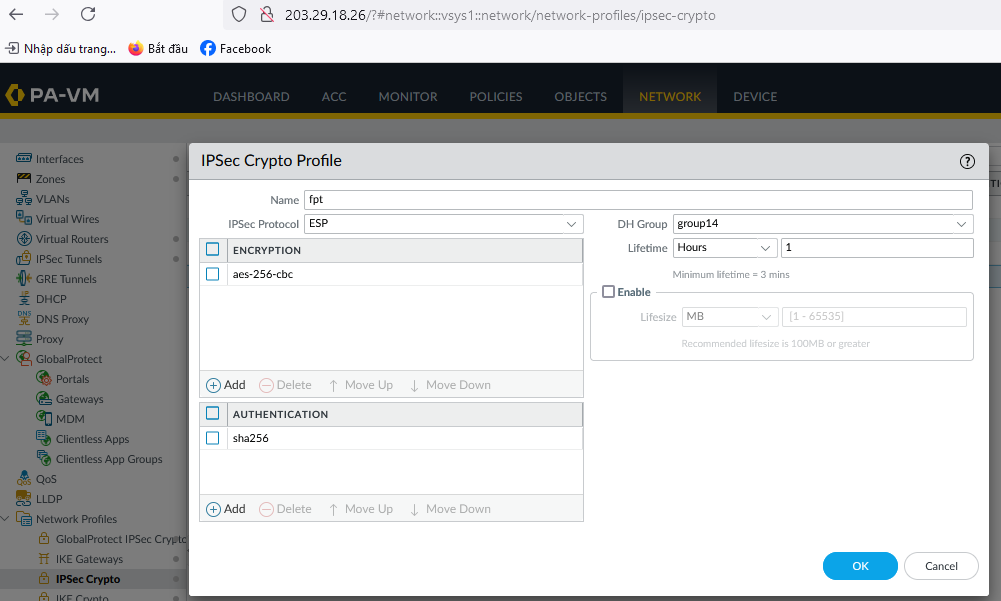
For IPsec:
-
Encapsulation mode: tunnel
-
Encryption algorithm: aes-256
-
Authorization algorithm: sha256
-
Lifetime units: seconds
-
Lifetime value: 3600
-
Perfect forward secrecy (PFS): GROUP_14
-
Transform protocol: esp
Section 3: Dead Peer Detection

Enter the Delay and Max failure values, then click Create VPN Connection.
Step 2: Configure IPsec on Palo Alto
-
Log in to Palo Alto via the Management IP:
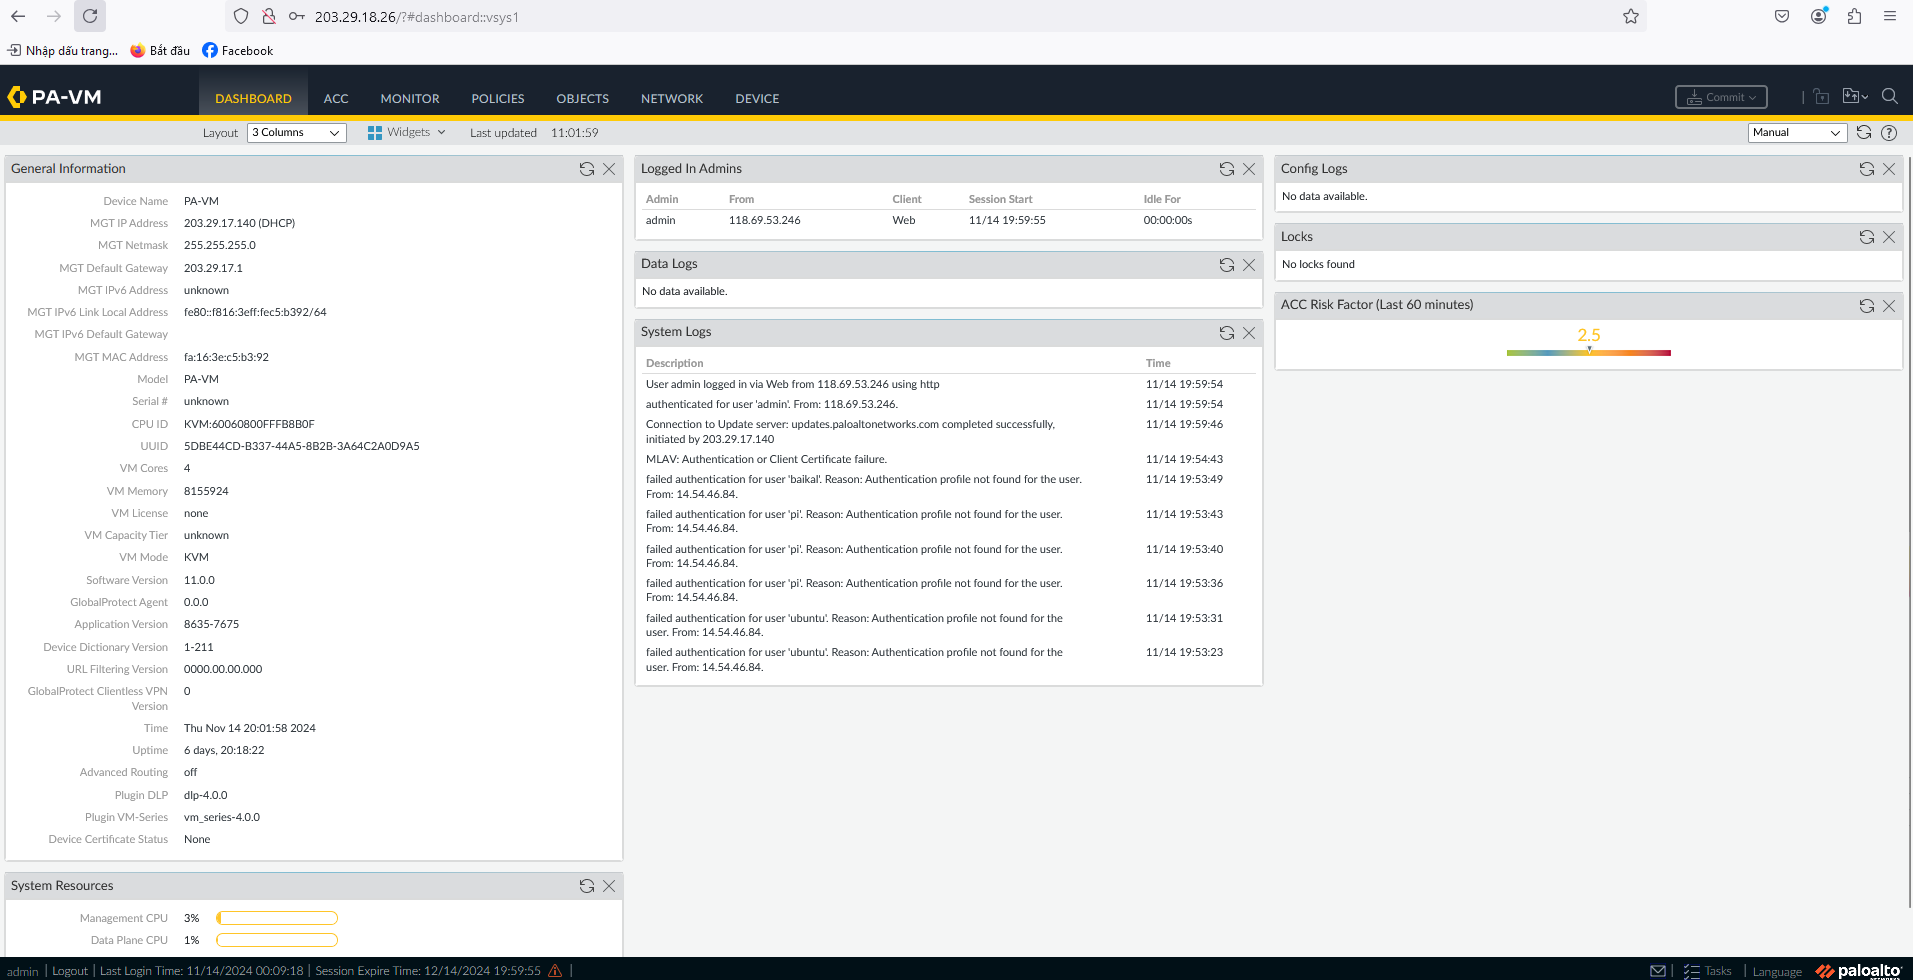
-
Click Add and activate the Palo Alto Zone.
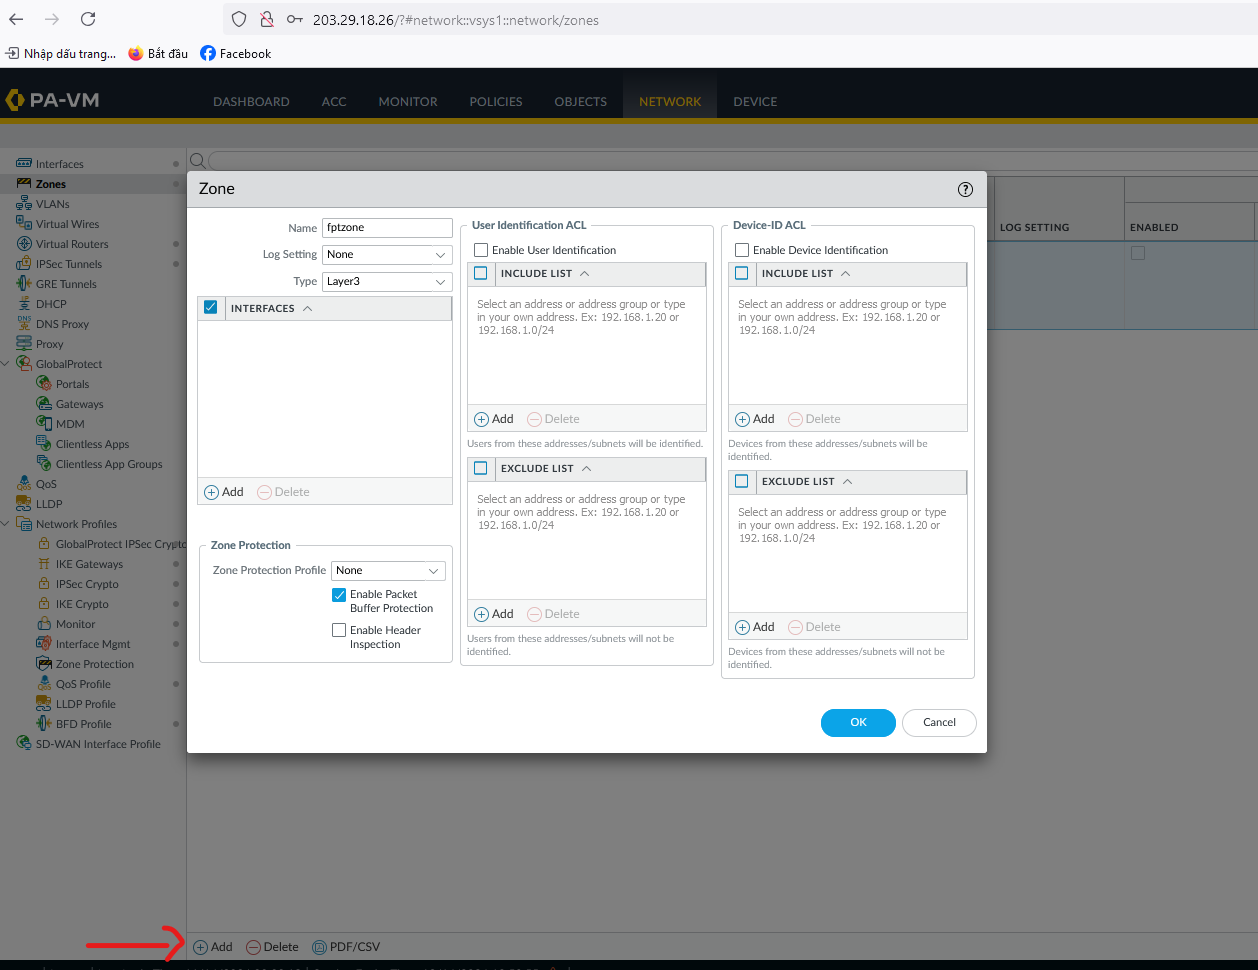
-
Create a Virtual Router on Palo Alto and click OK.
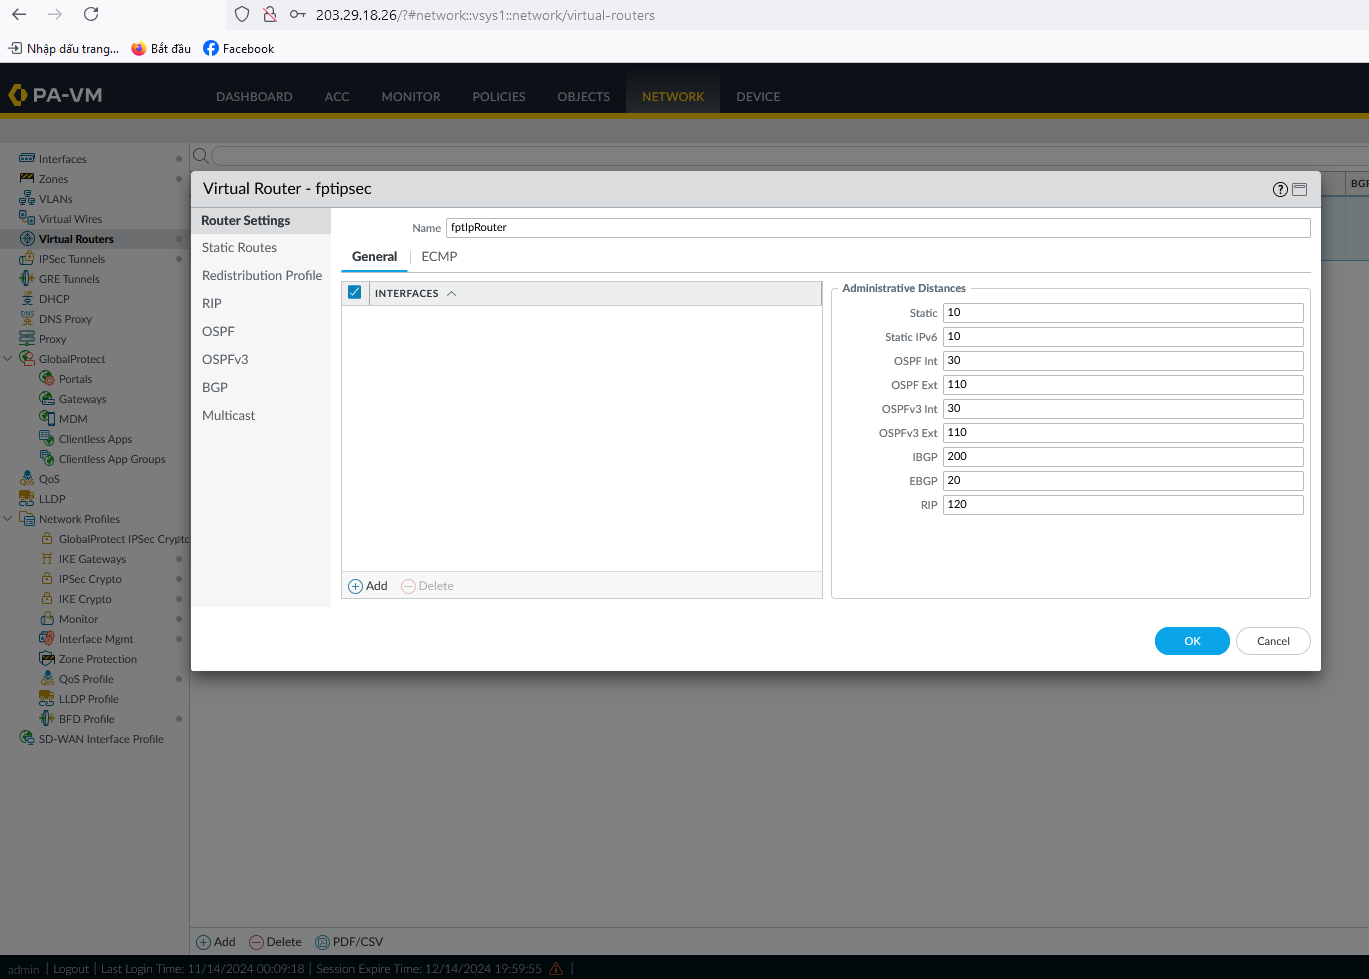
-
Create WAN and LAN interfaces (for example, ethernet1/1 and ethernet1/2).
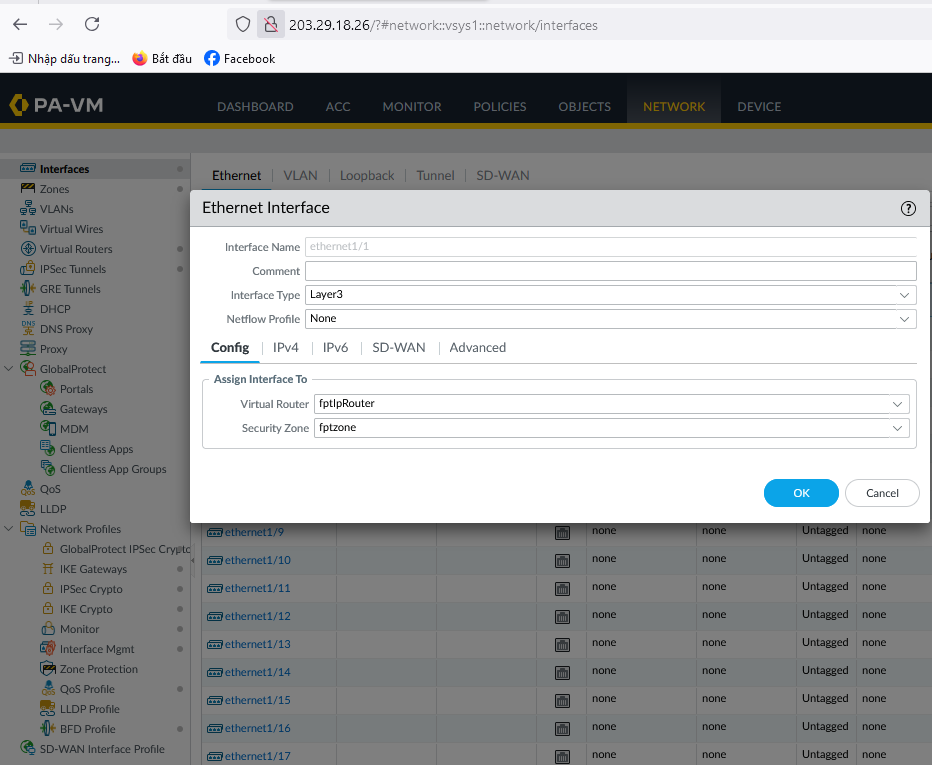
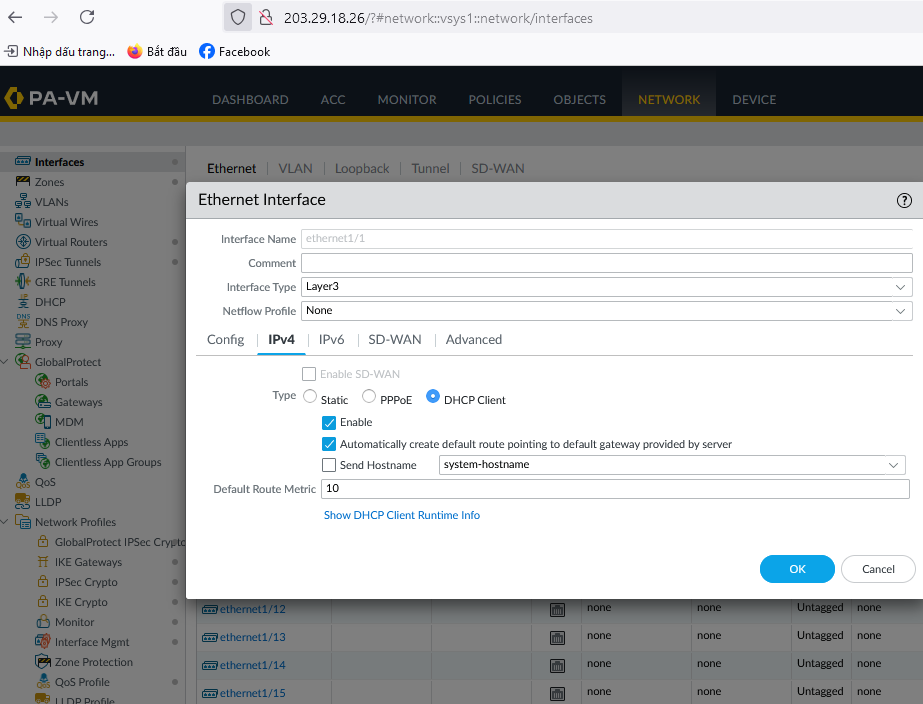
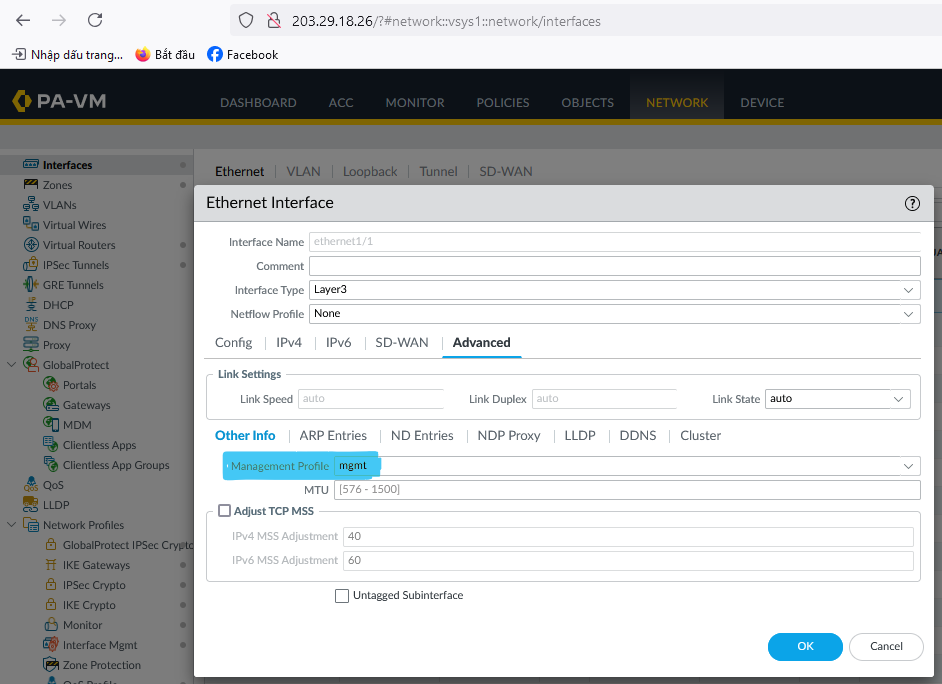
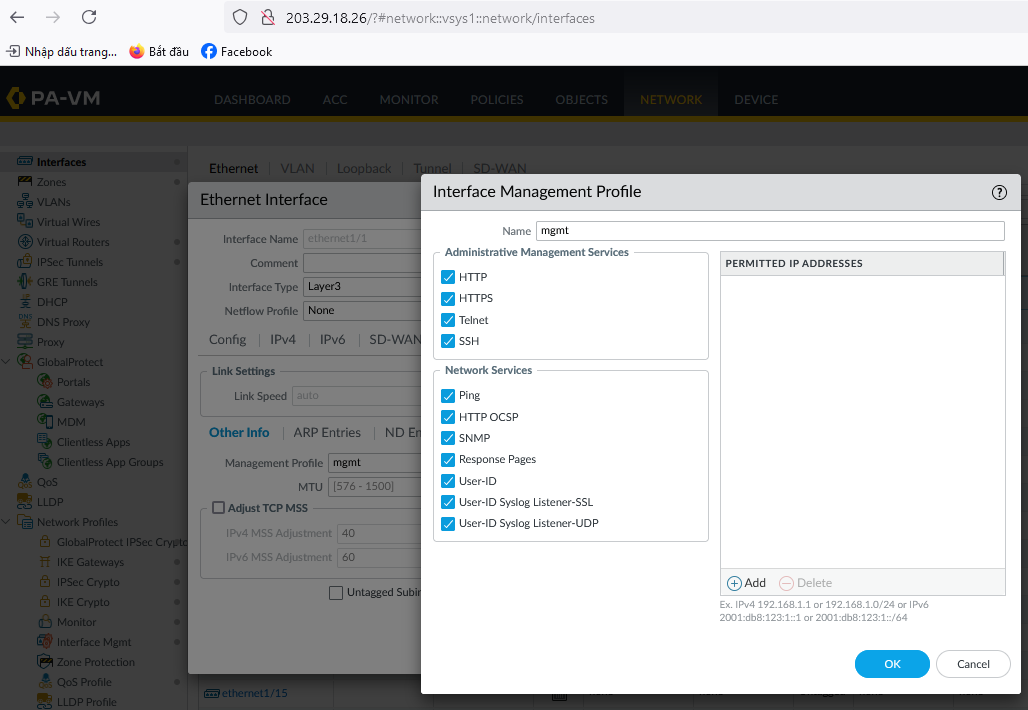
-
Create an IKE Crypto profile.
-
Create an IPSec Crypto profile.
-
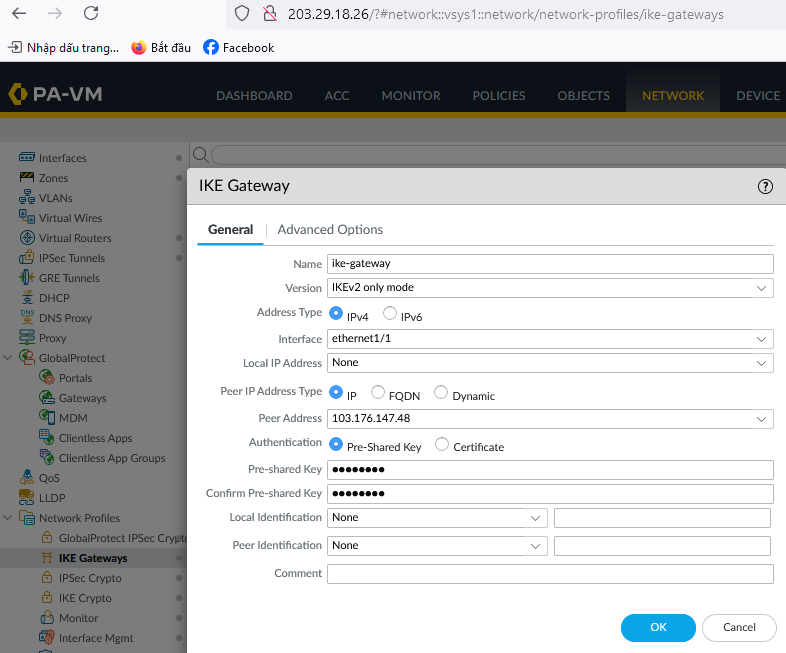
Go to IPsec Tunnels:
-In the General tab, enter Peer Address as the IP from FPT created in Step 1 (e.g., 103.176.147.48).
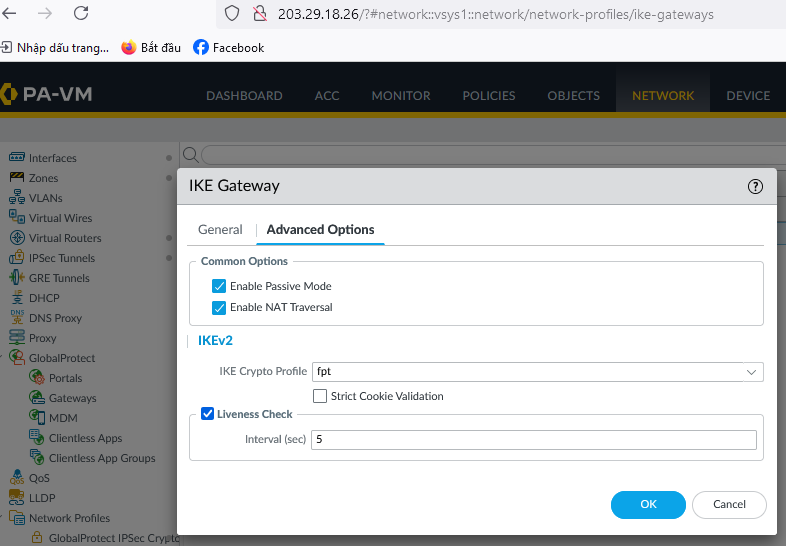
 -In the Advanced Options tab, fill in the required details:
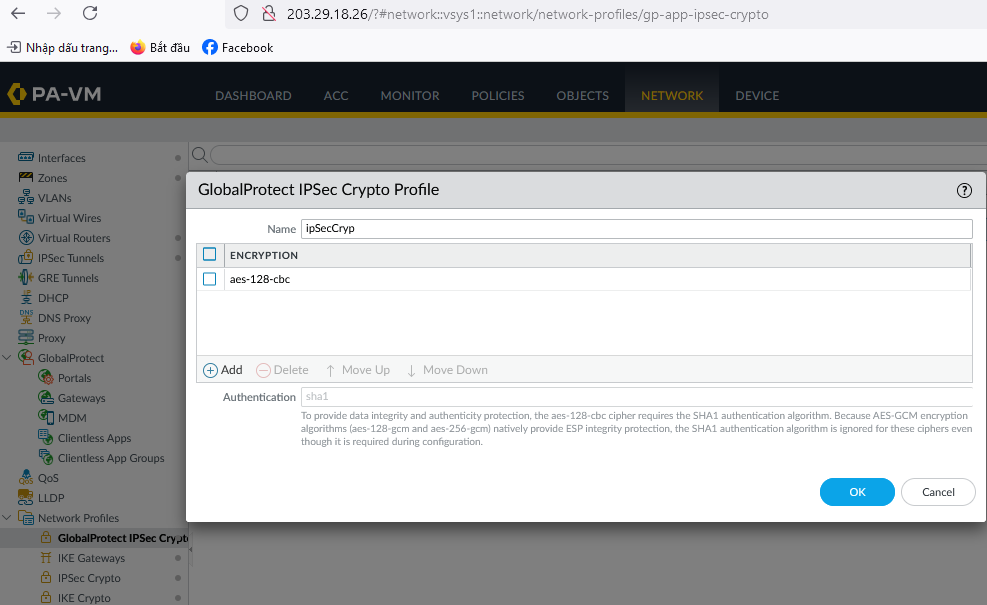
 - Create GlobalProtect IPSec:
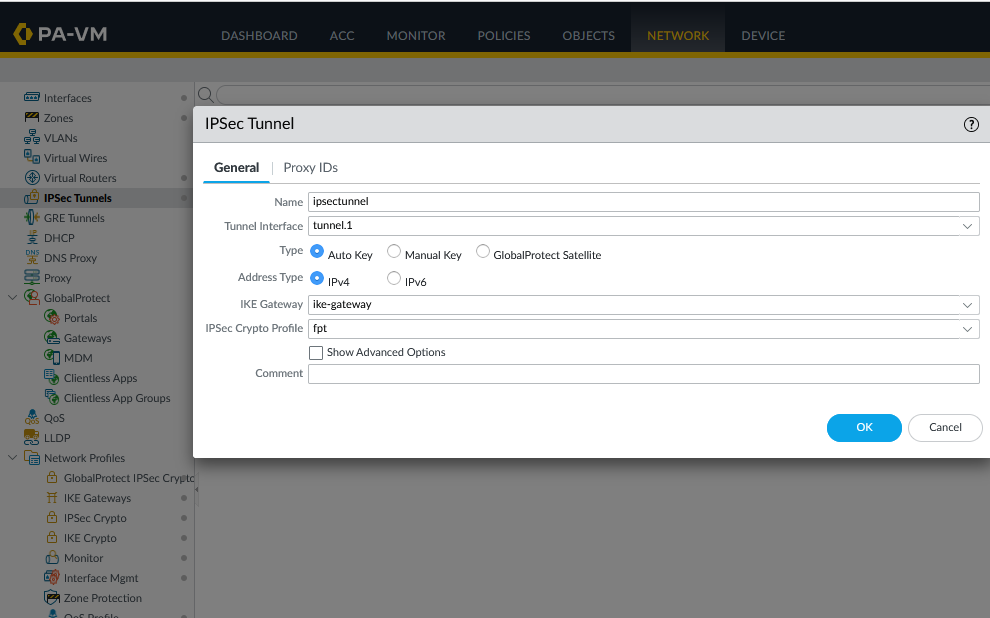
- Create IPSec Tunnels:
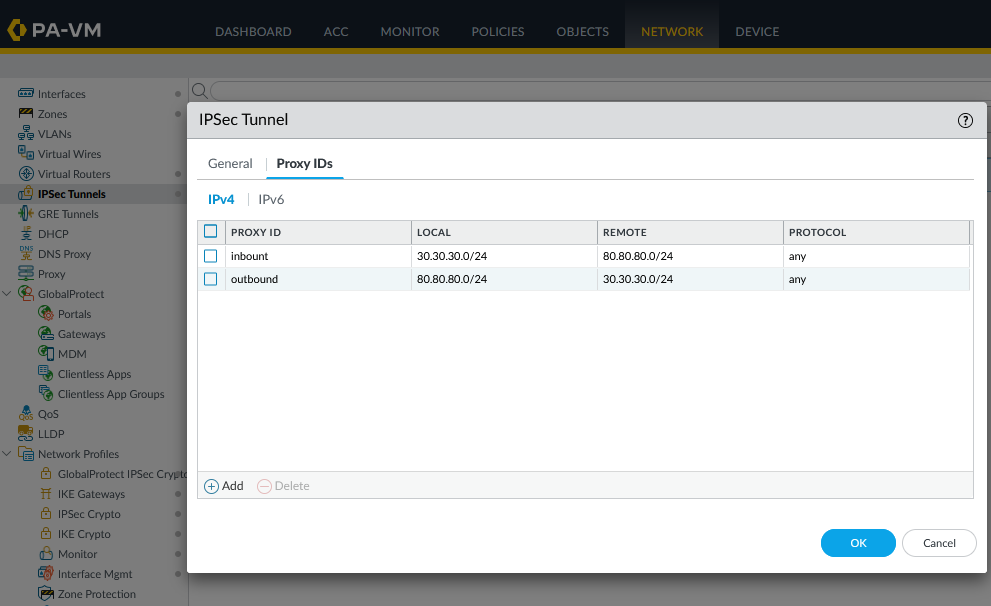
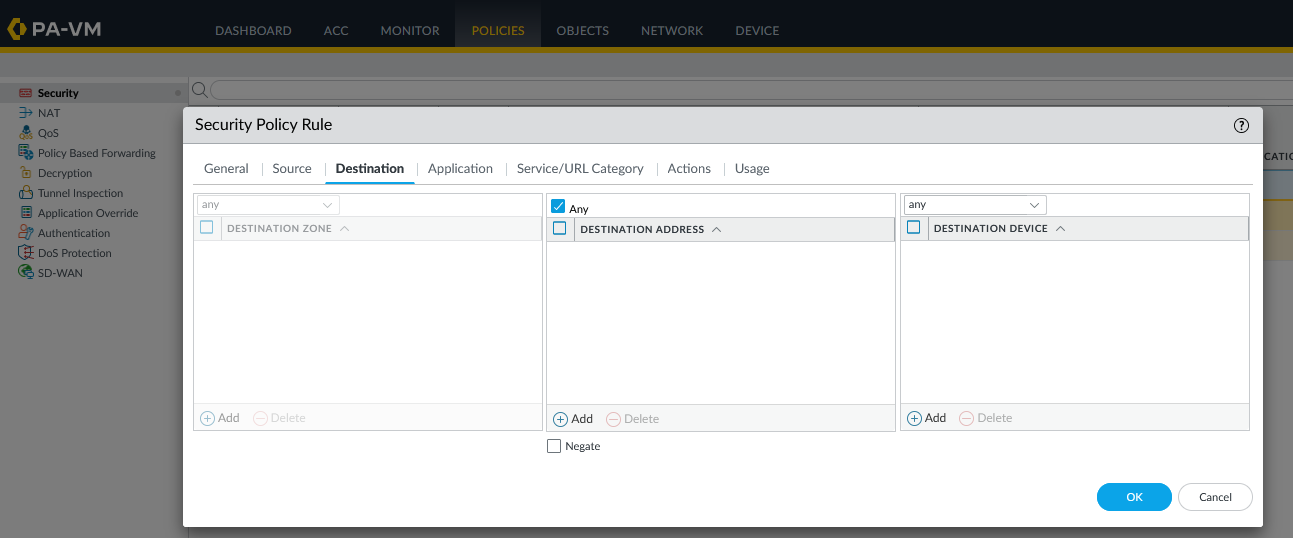
Step 3: Configure Firewall and Routing on Palo Alto
To configure the firewall and routing on Palo Alto, follow the example below:
- Open any firewall policy.
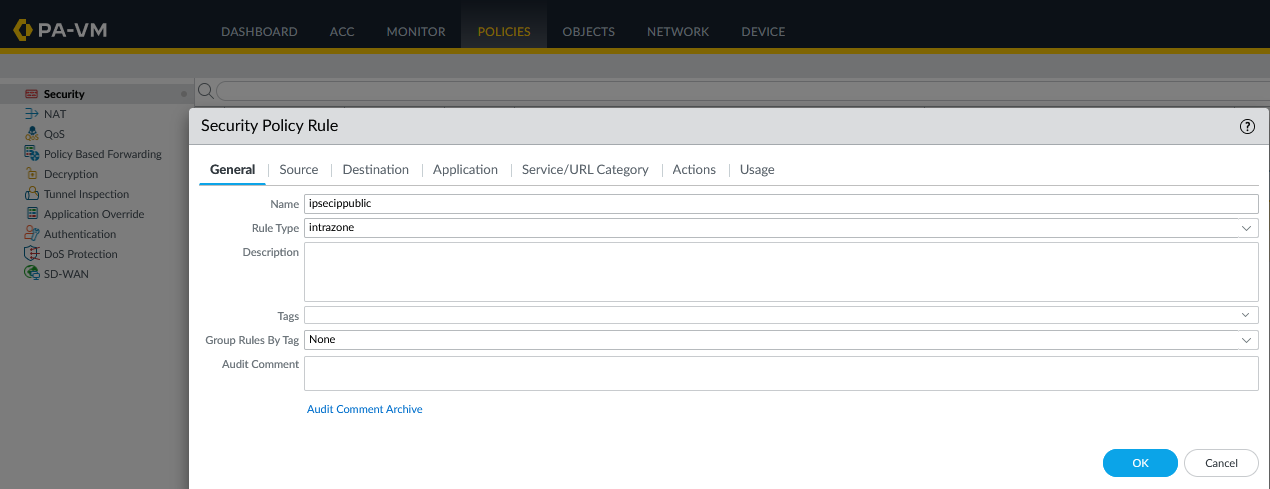
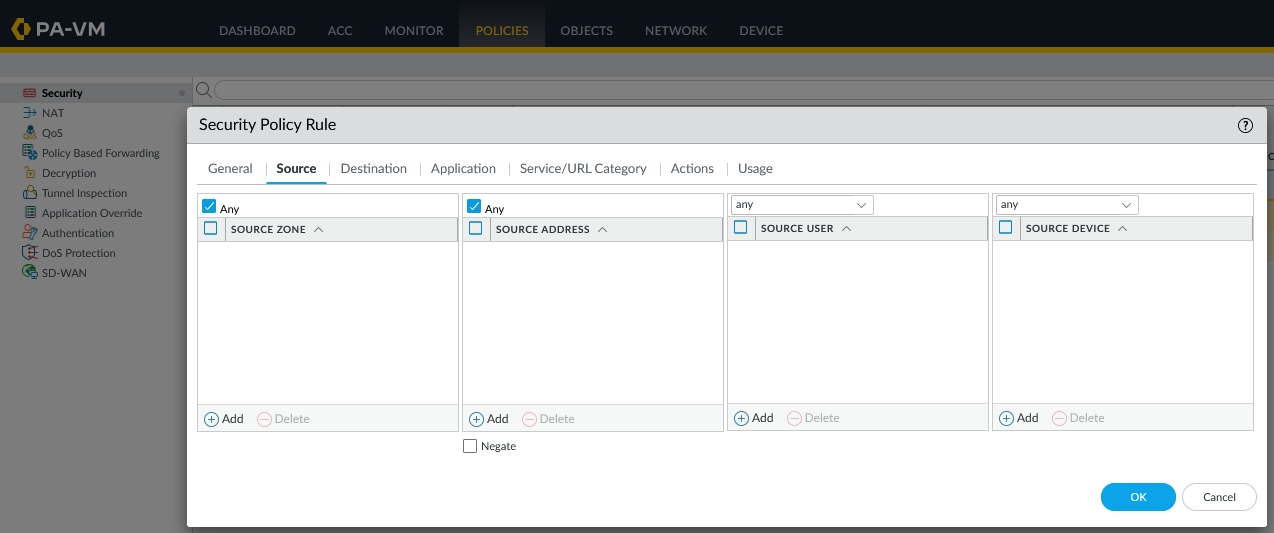
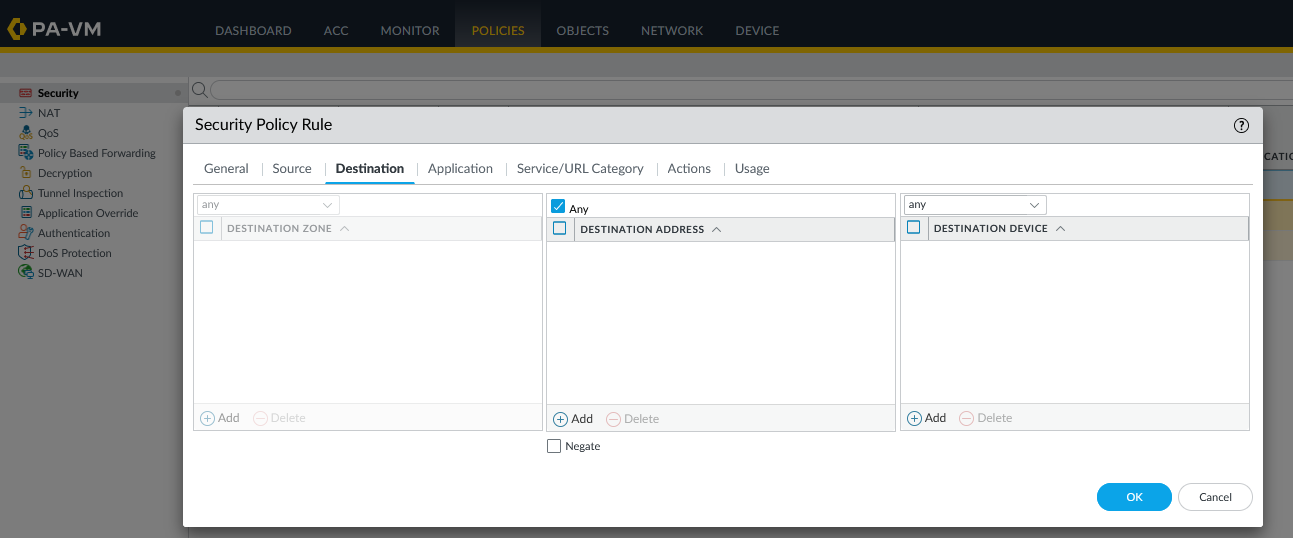
Depending on your environment, configure the source and destination according to the rule.
- Configure routing between the two subnets 30.30.30.0/24 and 80.80.80.0/24 (adjust according to your actual source and destination networks).
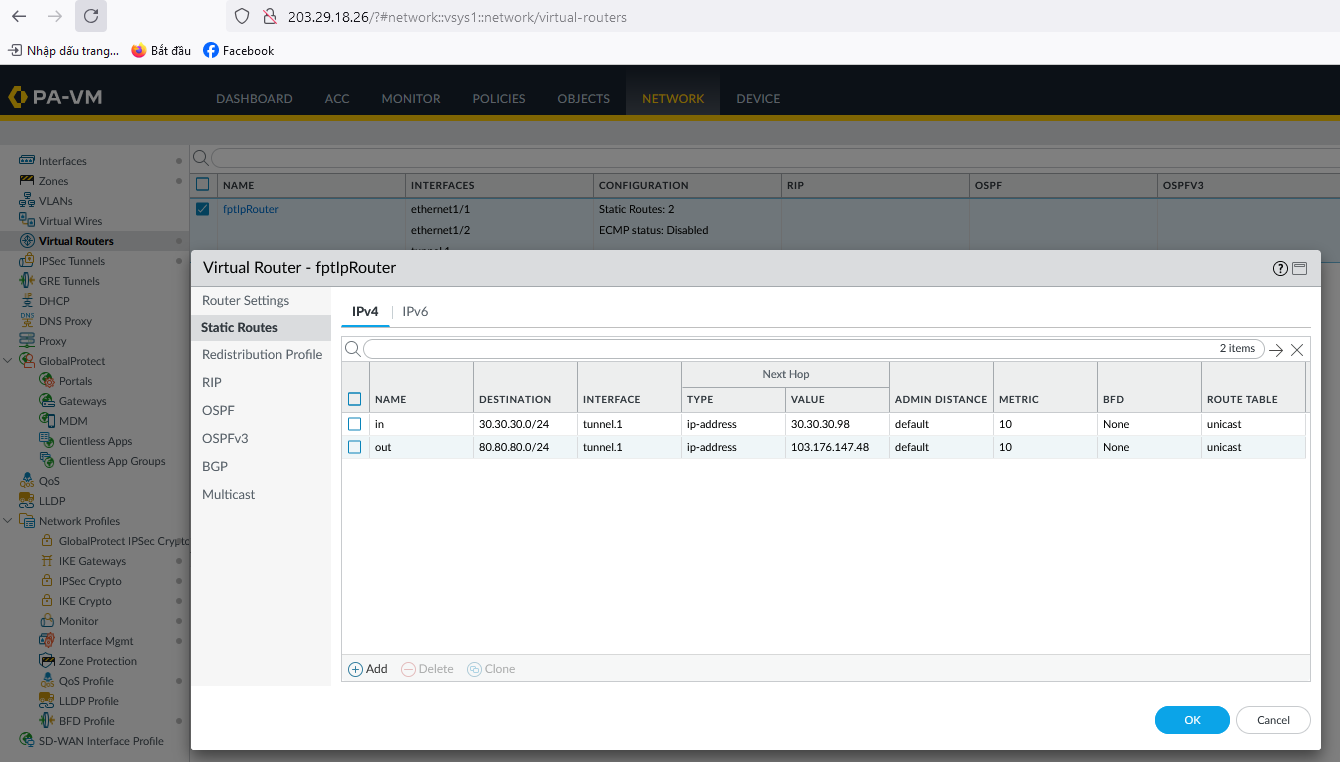
At this point, you can open the Terminal / Command Line to test network connectivity using ping.


