- About Us
-
 Secure, unlimited storage to ensures efficiency as well as high and continuous data access demand.
 Virtual server integration for 3D Rendering, AI or ML
 Enhance application capacity and availability.
 Access to an all-inclusive stack for AI development, driven by NVIDIA’s powerful technology!
 FPT Web Application Firewall provides powerful protection for web applications
 Advanced virtual server with rapid scalability
 Backup and restore data instantly, securely and maintain data integrity.
Advanced virtual server with rapid scalability
Access to an all-inclusive stack for AI development, driven by NVIDIA’s powerful technology!
Enhance application capacity and availability.
Backup and restore data instantly, securely and maintain data integrity.
Recovery, ensuring quick operation for the business after all incidents and disasters.
Backup and restore data instantly, securely and maintain data integrity.
Advanced virtual server with rapid scalability
Access to an all-inclusive stack for AI development, driven by NVIDIA’s powerful technology!
Enhance application capacity and availability.
Backup and restore data instantly, securely and maintain data integrity.
Recovery, ensuring quick operation for the business after all incidents and disasters.
 Diverse throughput and capacity to meet various business workloads.
Secure, unlimited storage to ensures efficiency as well as high and continuous data access demand.
FPT Web Application Firewall provides powerful protection for web applications
Intelligent and Comprehensive Virtual Web Application Firewall - Security Collaboration between FPT Cloud and Penta Security.
The Next generation firewall security service
Easily store, manage, deploy, and secure Container images
Safe, secure, stable, high-performance Kubernetes platform
Provided as a service to deploy, monitor, backup, restore, and scale MongoDB databases on cloud.
Provided as a service to deploy, monitor, backup, restore, and scale Redis databases on cloud.
Provided as a service to deploy, monitor, backup, restore, and scale PostgreSQL databases on cloud. System Monitoring Solution anywhere, anytime, anyplatform
 Helps reduce operational costs by up to 40% compared to traditional BI solutions, while improving efficiency through optimized resource usage and infrastructure scaling.
 - Pricing
- Partner
- Event


Overview
Block Storage is a service that provides block-based storage volumes for GPU Virtual Machines (VMs). Each storage disk behaves like a physical hard drive when attached to a VM, supporting fast, consistent, and high-throughput data access.
Compared to local NVMe storage, Block storage offers greater durability, scalability, and persistence, ensuring that data remains available even when a VM is deleted or stopped.
There are two types of Block Storage disks:
-
Root disk: serves as the primary system disk of a VM, containing the OS and essential system files required for boot and runtime. It is automatically created along with the VM during provisioning.
-
External disk: is an independent data disk used to expand a VM's storage capacity. External disks can be detached from one VM and reattached to another, allowing flexible data reuse across workloads.
To access this service, go to Main Menu > Compute Engine > Storage disks.
From this page, users can view a list of all Storage Disks created within the VPC, along with key details such as Name, Tags, Storage type, Storage policy, Size, Created At (creation date), and Attached (associated virtual machine).
Create Storage Disks
To create a Storage disk in FPT Cloud, first identify the type of disk you need:
-
Root disk is automatically created along with the virtual machine. References: Create a GPU VM
-
External disk can be created independently and attached to a virtual machine later.
You can create an External disk using either of the following methods:
Option 1: Create an External disk from a Virtual machine detail page
1. Access the Storage section:
-
From the main menu, go to Compute Engine > Instance management.
-
Select the virtual machine you want to add external storage to from the list, then click Storage tab.
-
Click Create disk.

2. Enter the required configuration:
-
Storage policy: Select the storage type or performance tier.
-
Size: Define the storage capacity.

3. Create the disk:
-
Click Create disk.
-
The system will initialize the new disk and notify you upon completion.
-
Once successful, the new External disk will appear in the Storage tab.
Option 2: Create an External disk from the Storage disks page
1. Access the Storage disks page:
-
From the main menu, go to Compute Engine > Storage disks.
-
Click Create storage.
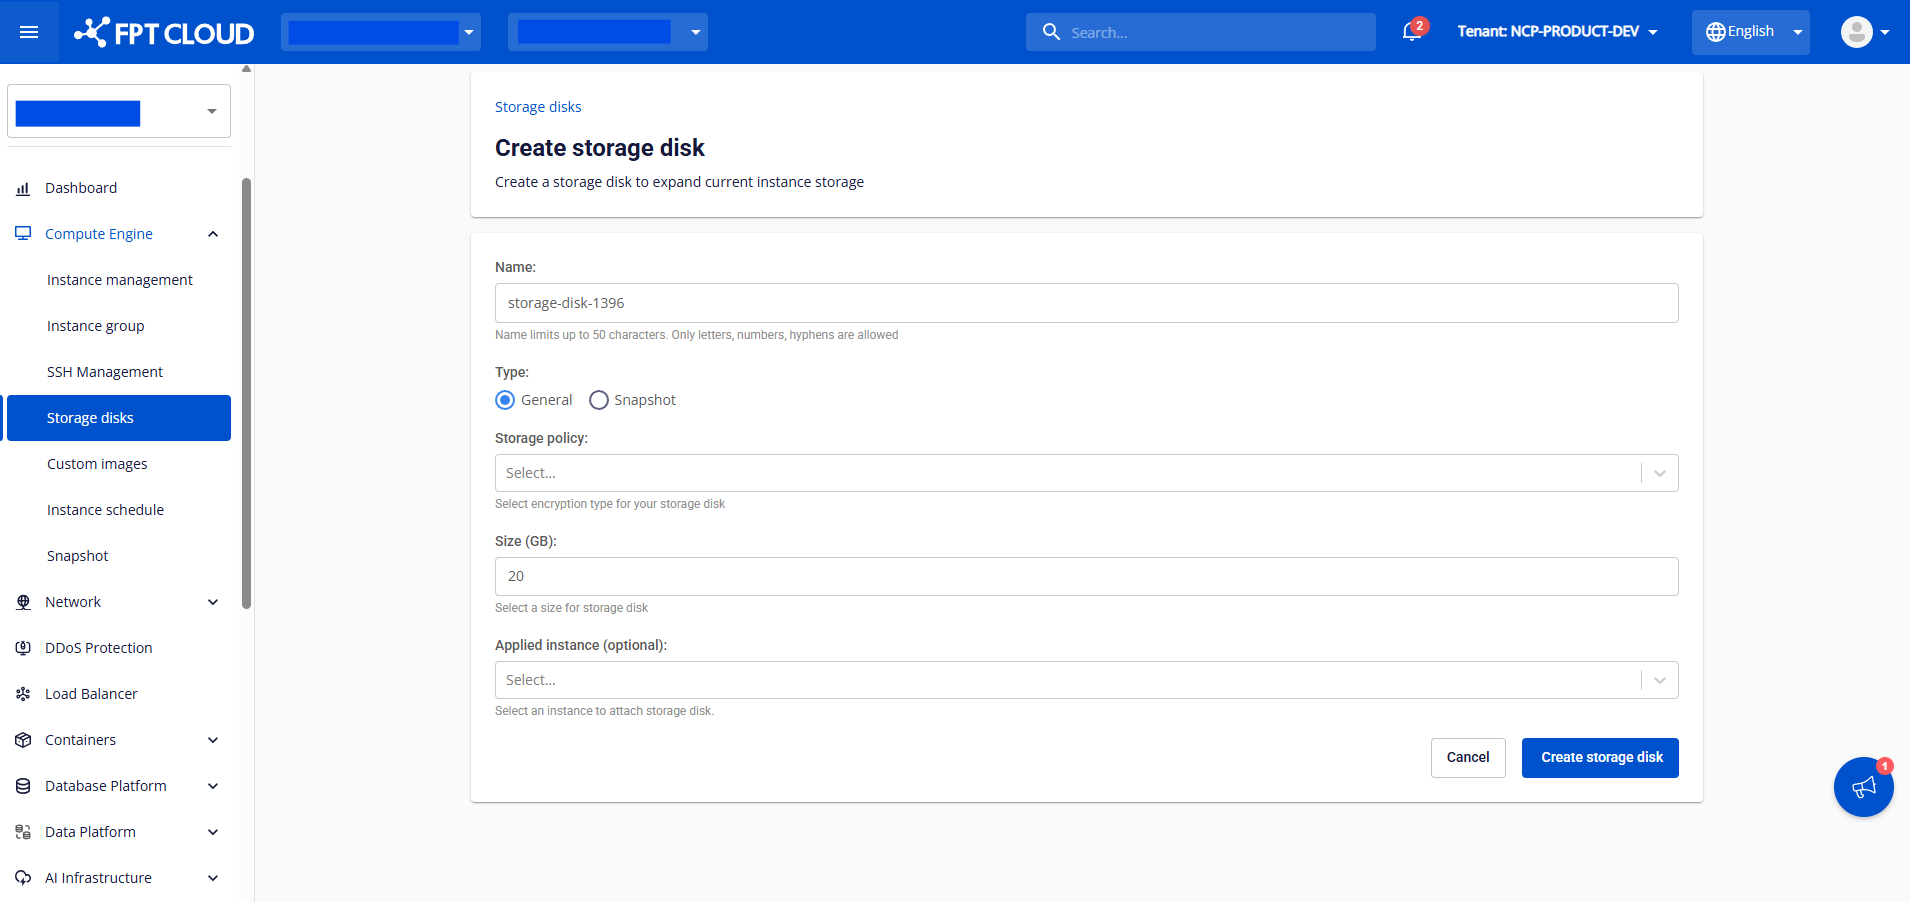
2. Enter the required configuration:
-
Name: Specify the storage disk name.
-
Type: Choose General to create a new empty disk or Snapshot to restore from an existing snapshot.
-
Storage policy: Select the storage type or performance tier.
-
Size: Define the storage capacity.
-
Applied instance (optional): Choose a VM to attach the disk to (can be done later).

3. Create the disk:
-
Click Create storage disk.
-
The system will initialize the new disk and notify you upon completion.
-
Once successful, the new External disk will appear in the Storage disks page.
Attach External Disks to GPU VMs
After creation, if an External disk is not yet attached to any virtual machine, you can manually attach it to enable usage.
Storage disks are compatible with all OSs supported on FPT Cloud.
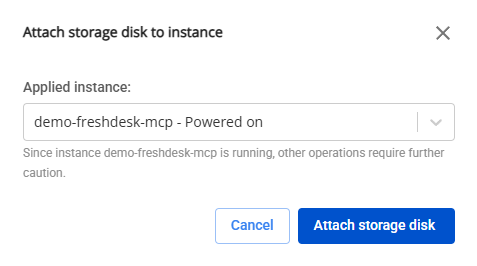
1. Select the External disk you want to attach. Then click Actions > Attach.
2. Choose the target virtual machine from the popup window and click Attach storage disk.
Note:
-
Each Storage disk can only be attached to one virtual machine at a time.
-
For Windows virtual machines, additional configuration steps are required before the new disk becomes usable.
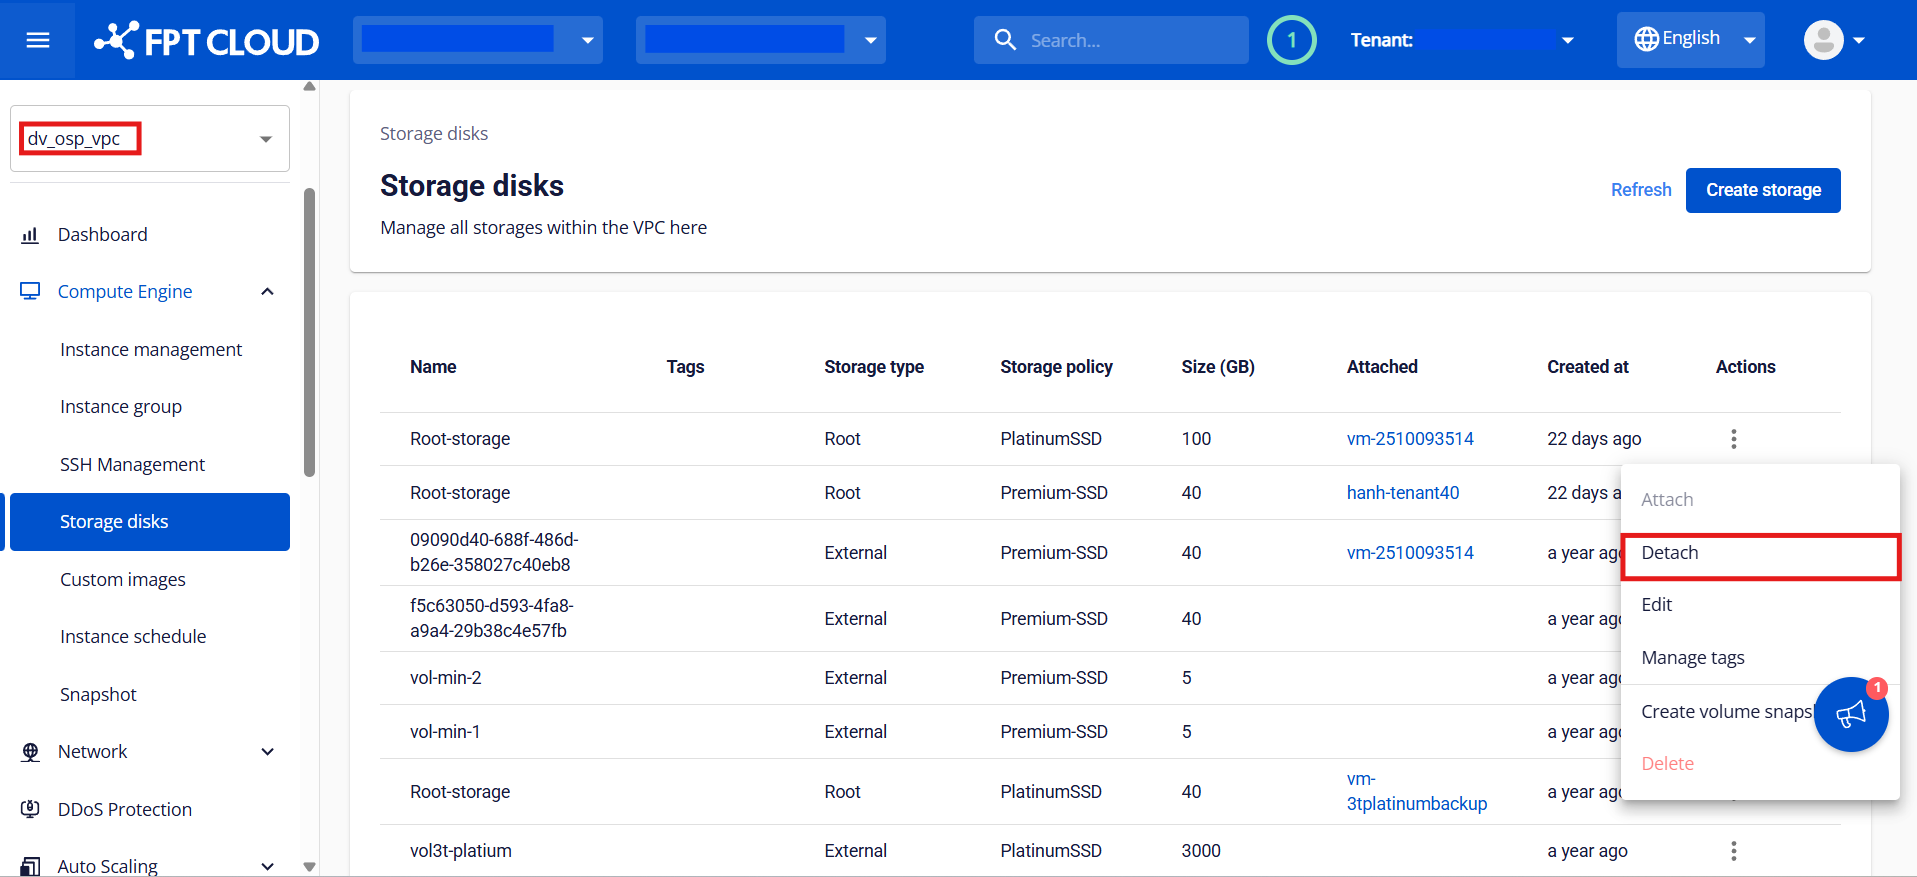
Detach External Disks from GPU VMs
You can detach an External disk from a virtual machine when it is no longer needed.
After detachment, all data on the disk remains intact, and the disk can be reattached to another virtual machine at any time.
1. Select the External disk you want to detach from the list, then click Actions > Detach.
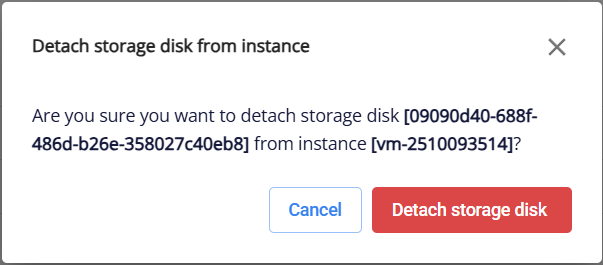
2. Review the confirmation popup, then click Detach to confirm.
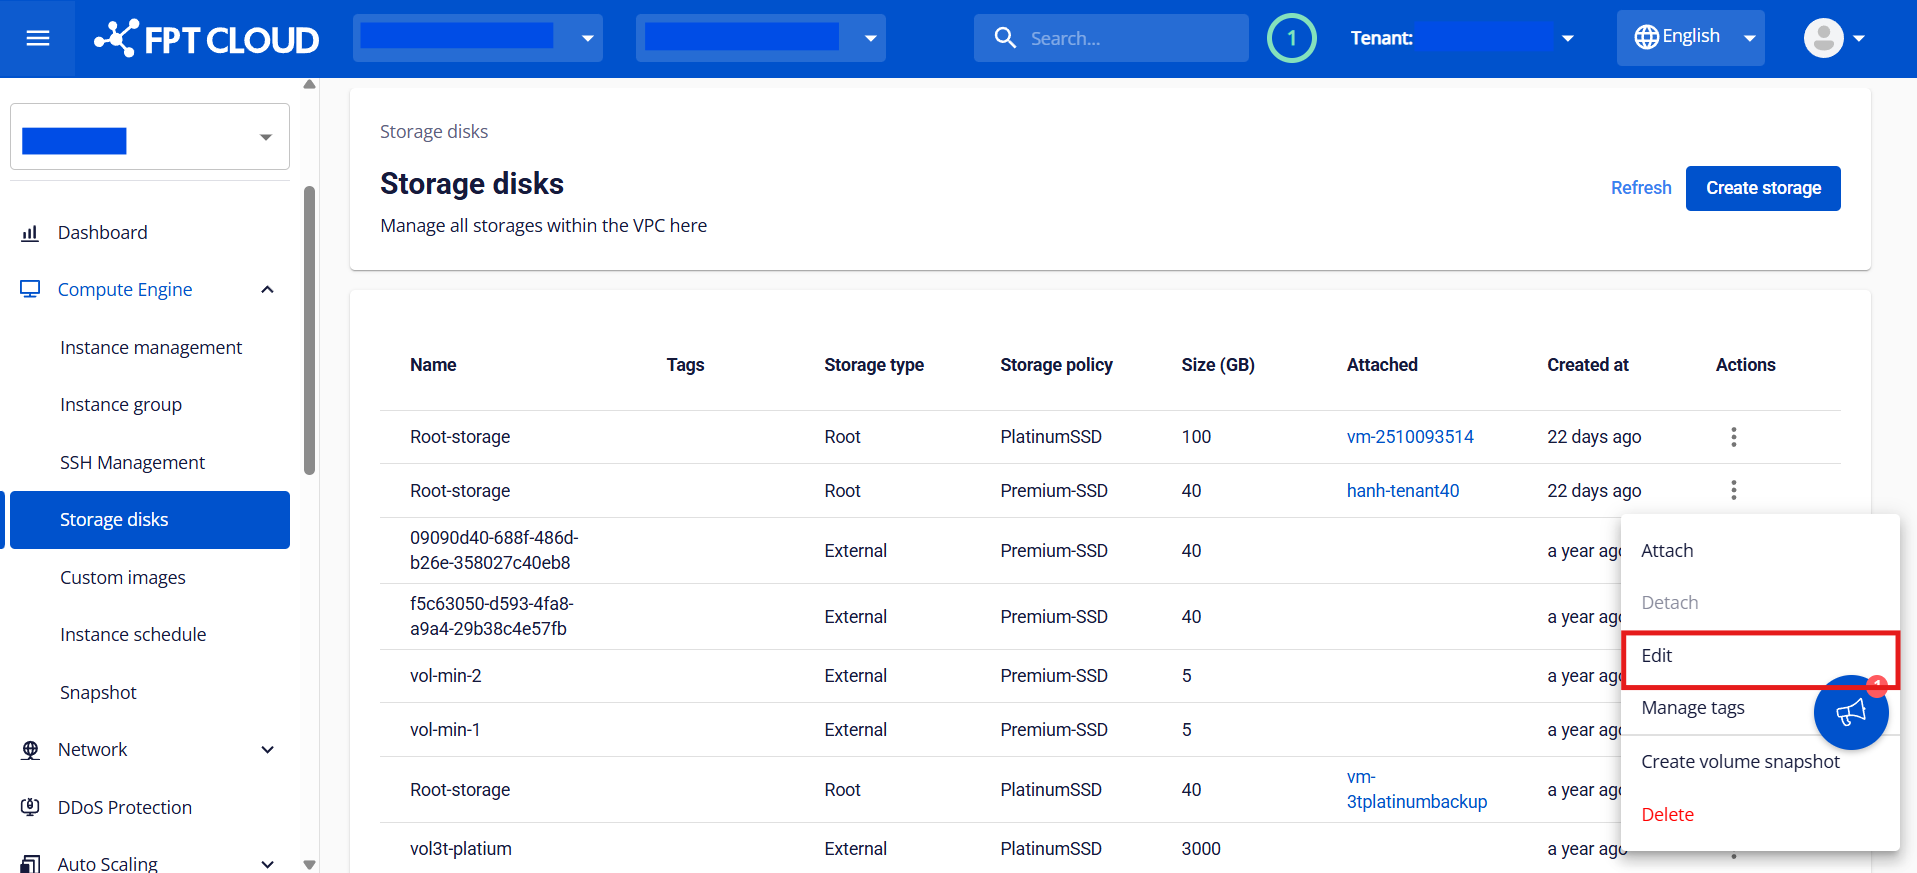
Edit Storage Disks
You can edit the details of a Storage disk when it is not attached to any virtual machine.
1. Select the Storage disk you want to modify from the list, then click Actions > Edit.
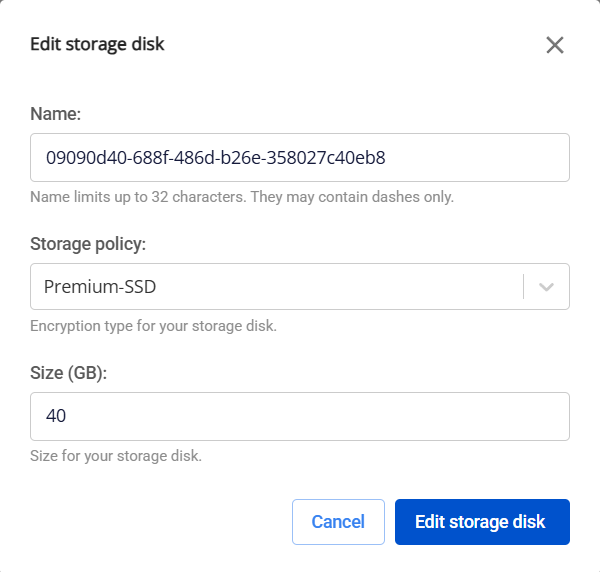
2. In the Edit popup, update the necessary information, then click Edit root disk / Edit storage disk to save changes.
-
Name: the name of the storage disk.
-
Storage policy: the storage type or performance tier.
-
Size: the capacity of the storage disk.
Note: The new size must be greater than the current size — reducing disk size is not supported.
Create Volume Snapshots
1. Select the Storage disk you want to back up from the list, then click Actions > Create volume snapshots.
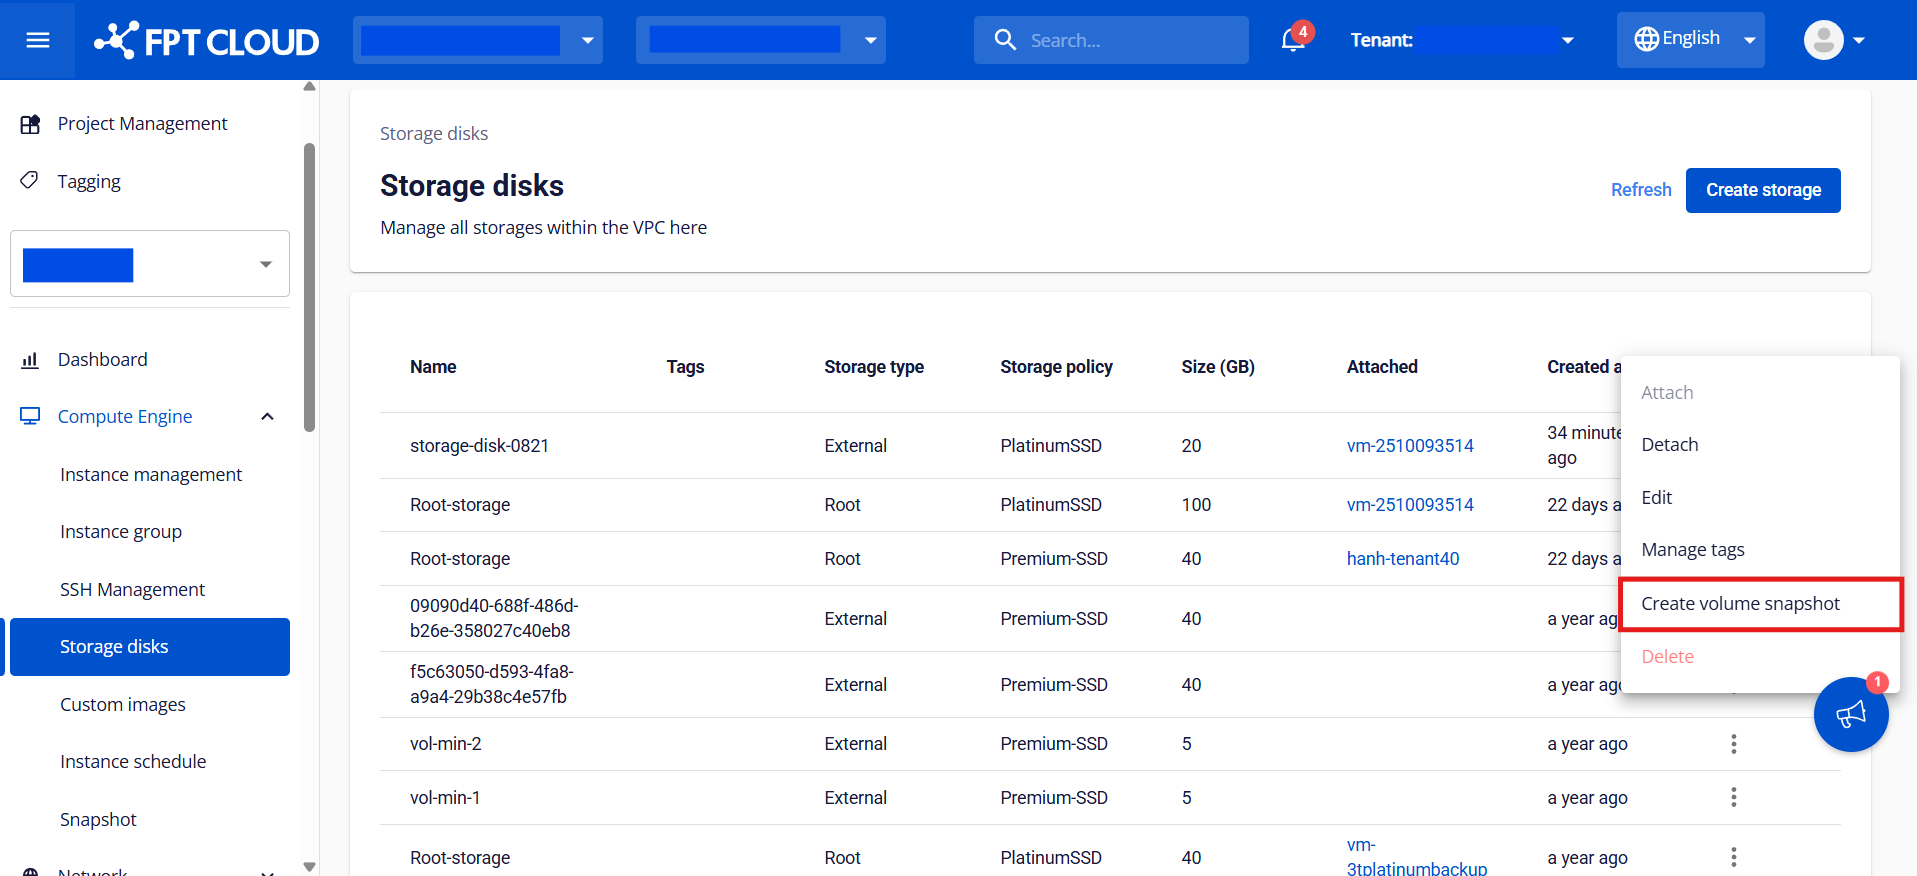
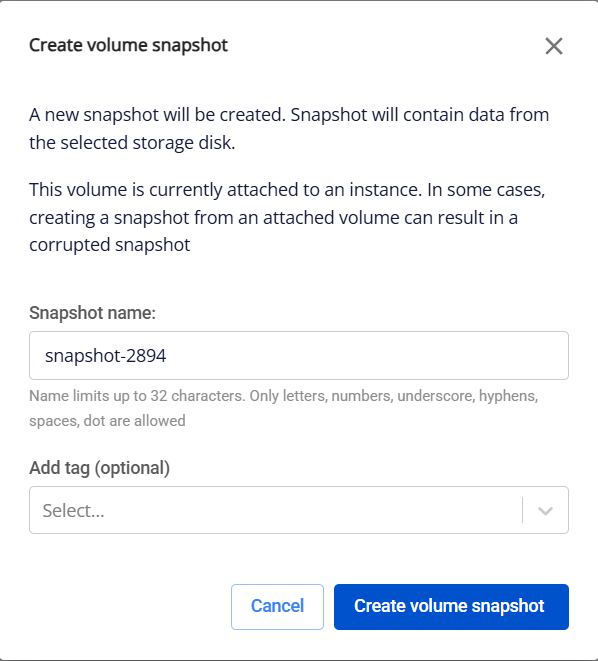
2. In the Create volume snapshot pop-up, update the necessary information, then click Create volume snapshot.
-
Snapshot name: the name for the snapshot.
-
Add tag (optional): tags for the snapshot.
Note:
-
The snapshot will contain data from the selected storage disk.
-
Creating a snapshot from an attached volume may cause data inconsistency in some cases. It’s recommended to detach the disk or stop the VM before taking a snapshot for critical workloads.
-
Snapshots are stored in the Snapshot section and can be used to create new disks or restore data later.
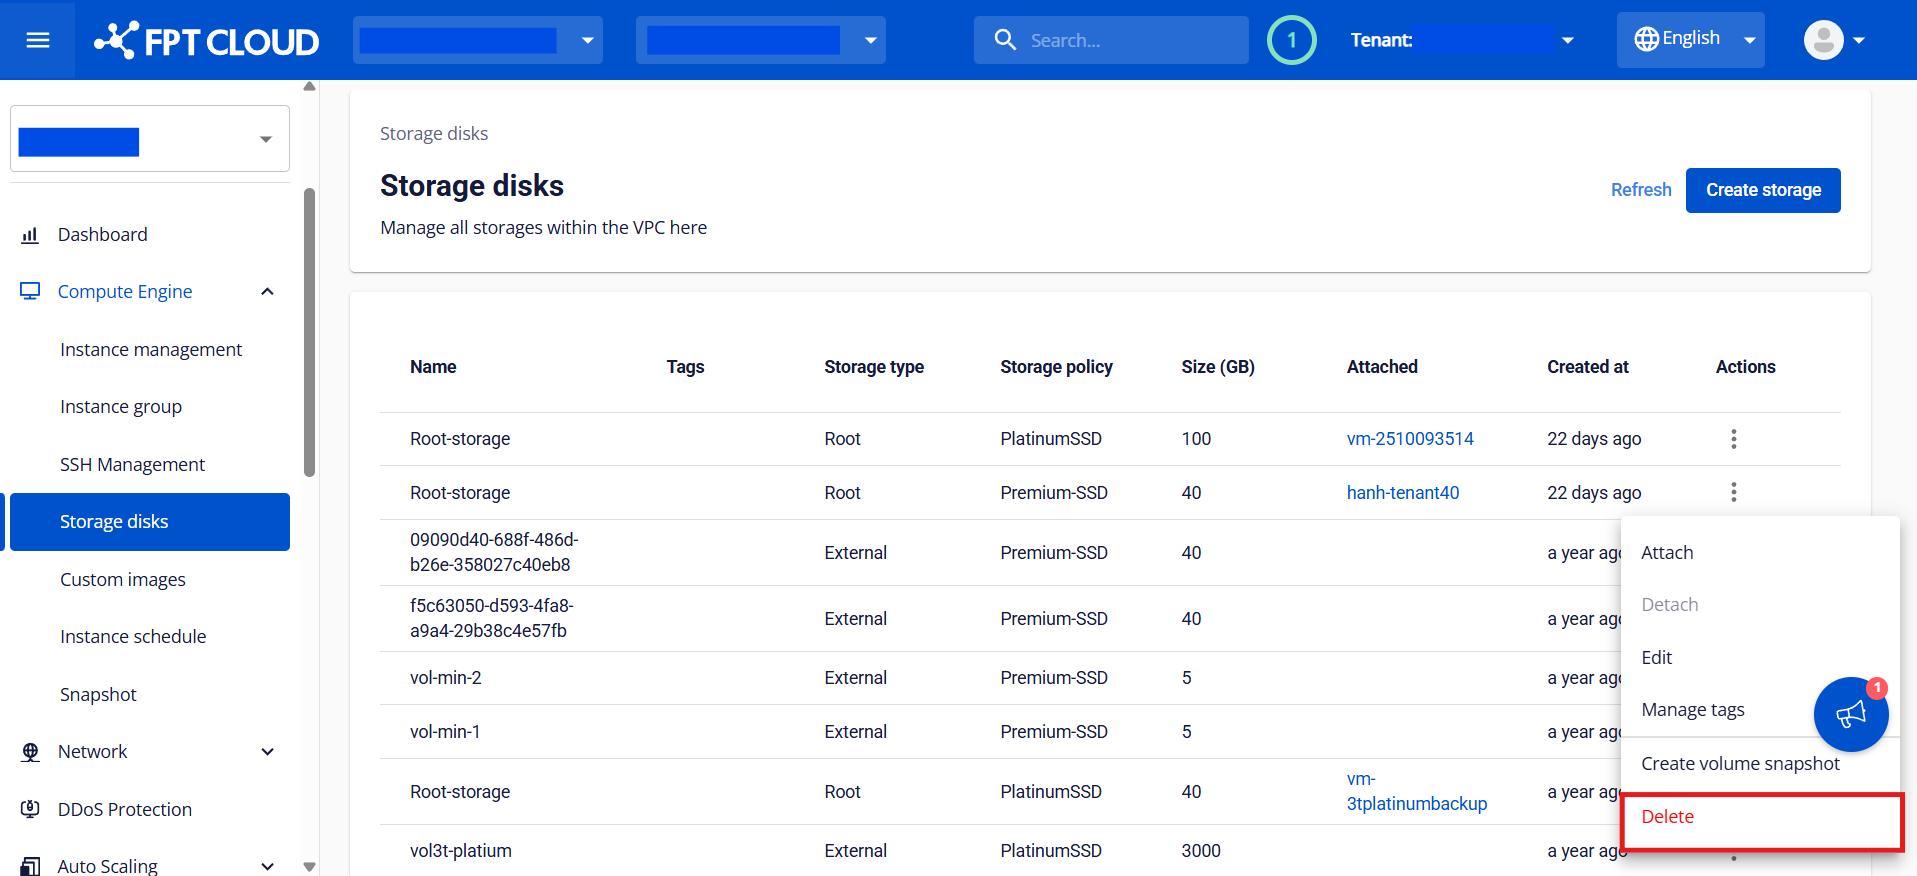
Delete Storage Disk
A Storage disk can be automatically or manually deleted depending on its type and attachment status.
-
Root disk: is automatically deleted together with the virtual machine it is attached to. No manual action is required.
-
External disk: is not deleted when the virtual machine it is attached to is removed. The disk remains available in Storage disks and can be reattached to another VM as needed.
You can also manually delete an External disk at any time to avoid additional storage costs by following these steps:
Note:
-
Only detached External disks (not attached to any instance) can be deleted.
-
Once deleted, all data on the disk cannot be recovered. Please proceed with caution.
1. Select the External disk you want to delete from the list, then click Actions > Delete.
2. Review the warning message in the confirmation pop-up and click Delete storage disk to confirm.
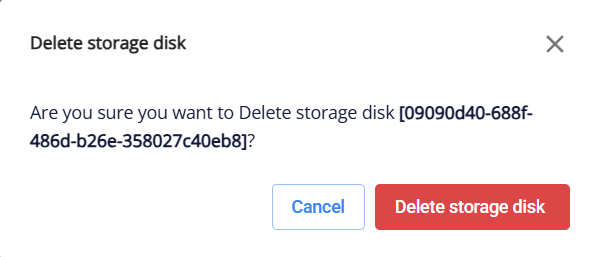
The External disk will be permanently removed from your VPC.