- About Us
-
 Secure, unlimited storage to ensures efficiency as well as high and continuous data access demand.
 Virtual server integration for 3D Rendering, AI or ML
 Enhance application capacity and availability.
 Access to an all-inclusive stack for AI development, driven by NVIDIA’s powerful technology!
 FPT Web Application Firewall provides powerful protection for web applications
 Advanced virtual server with rapid scalability
 Backup and restore data instantly, securely and maintain data integrity.
Advanced virtual server with rapid scalability
Access to an all-inclusive stack for AI development, driven by NVIDIA’s powerful technology!
Enhance application capacity and availability.
Backup and restore data instantly, securely and maintain data integrity.
Recovery, ensuring quick operation for the business after all incidents and disasters.
Backup and restore data instantly, securely and maintain data integrity.
Advanced virtual server with rapid scalability
Access to an all-inclusive stack for AI development, driven by NVIDIA’s powerful technology!
Enhance application capacity and availability.
Backup and restore data instantly, securely and maintain data integrity.
Recovery, ensuring quick operation for the business after all incidents and disasters.
 Diverse throughput and capacity to meet various business workloads.
Secure, unlimited storage to ensures efficiency as well as high and continuous data access demand.
FPT Web Application Firewall provides powerful protection for web applications
Intelligent and Comprehensive Virtual Web Application Firewall - Security Collaboration between FPT Cloud and Penta Security.
The Next generation firewall security service
Easily store, manage, deploy, and secure Container images
Safe, secure, stable, high-performance Kubernetes platform
Provided as a service to deploy, monitor, backup, restore, and scale MongoDB databases on cloud.
Provided as a service to deploy, monitor, backup, restore, and scale Redis databases on cloud.
Provided as a service to deploy, monitor, backup, restore, and scale PostgreSQL databases on cloud. System Monitoring Solution anywhere, anytime, anyplatform
 Helps reduce operational costs by up to 40% compared to traditional BI solutions, while improving efficiency through optimized resource usage and infrastructure scaling.
 - Pricing
- Partner
- Event


This article will introduce how to build a highly available (HA) network gateway using pfSense. This FreeBSD-based open-source software helps you achieve a stable and reliable network environment.
What is pfSense?
pfSense is an open source router/firewall software based on FreeBSD that can implement various network functions such as router, firewall, VPN, and proxy.
The configuration of the virtual network gateway when building ExpressRoute / Site-to-Site VPN is also described in the official documentation, making it safe and suitable for many corporate environments.
File Preparation
Step 1: Download pfSense ISO file
Go to the official pfSense website: https://www.pfsense.org/download/
Download the latest ISO image.
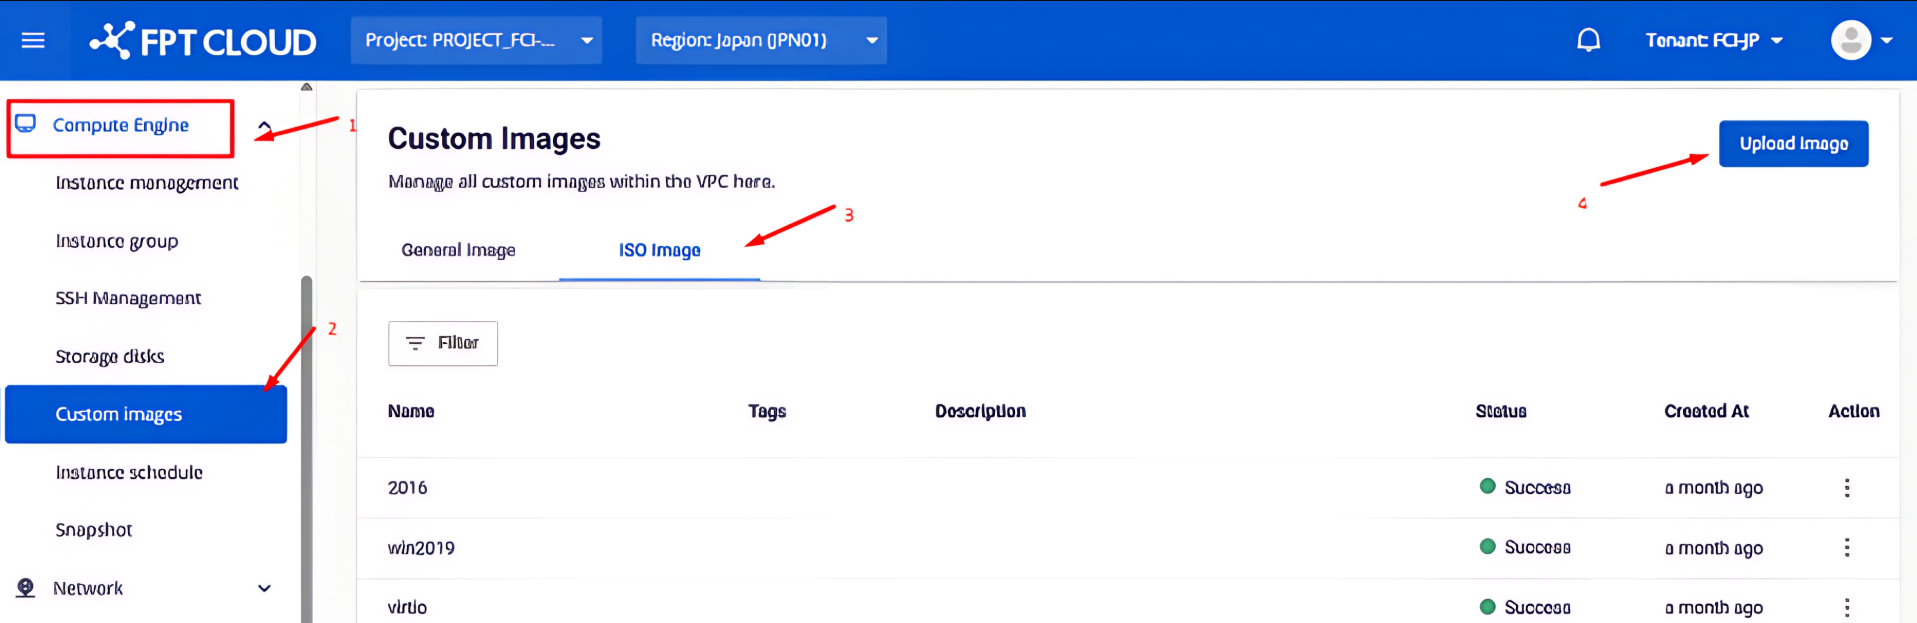
Step 2: Login to FPT Cloud Console
Visit https://console.fptcloud.jp/ and log in using your provided credentials.
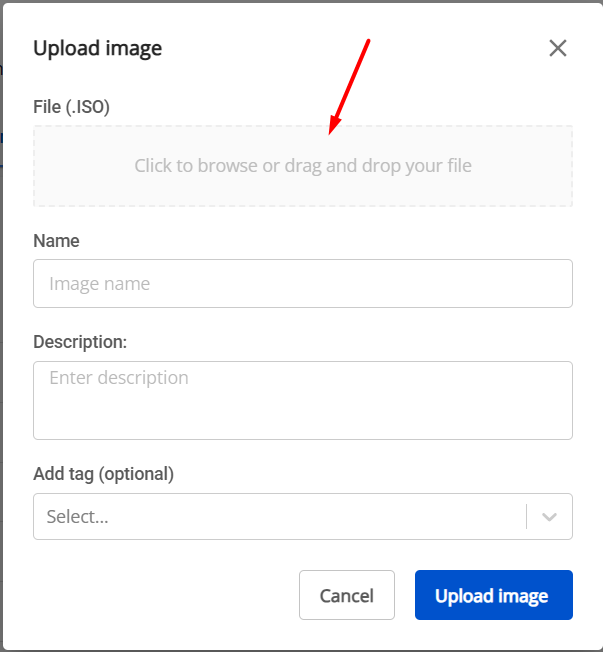
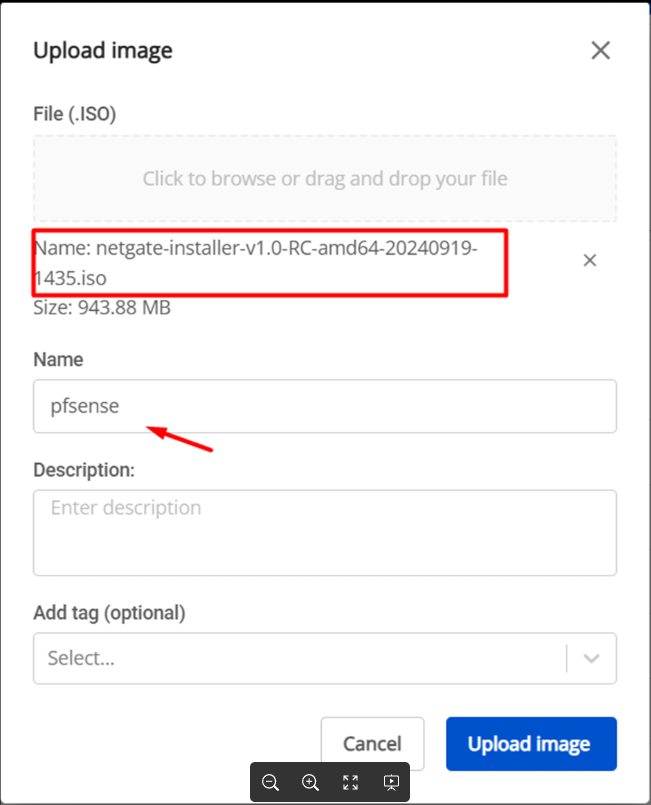
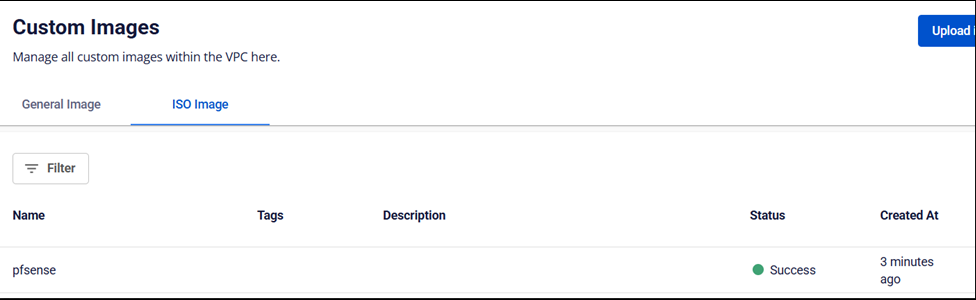
Step 3: Upload the ISO file
Select the downloaded pfSense ISO file and upload it to the portal. You will receive a confirmation message once the upload is complete.

Network Environment Preparation
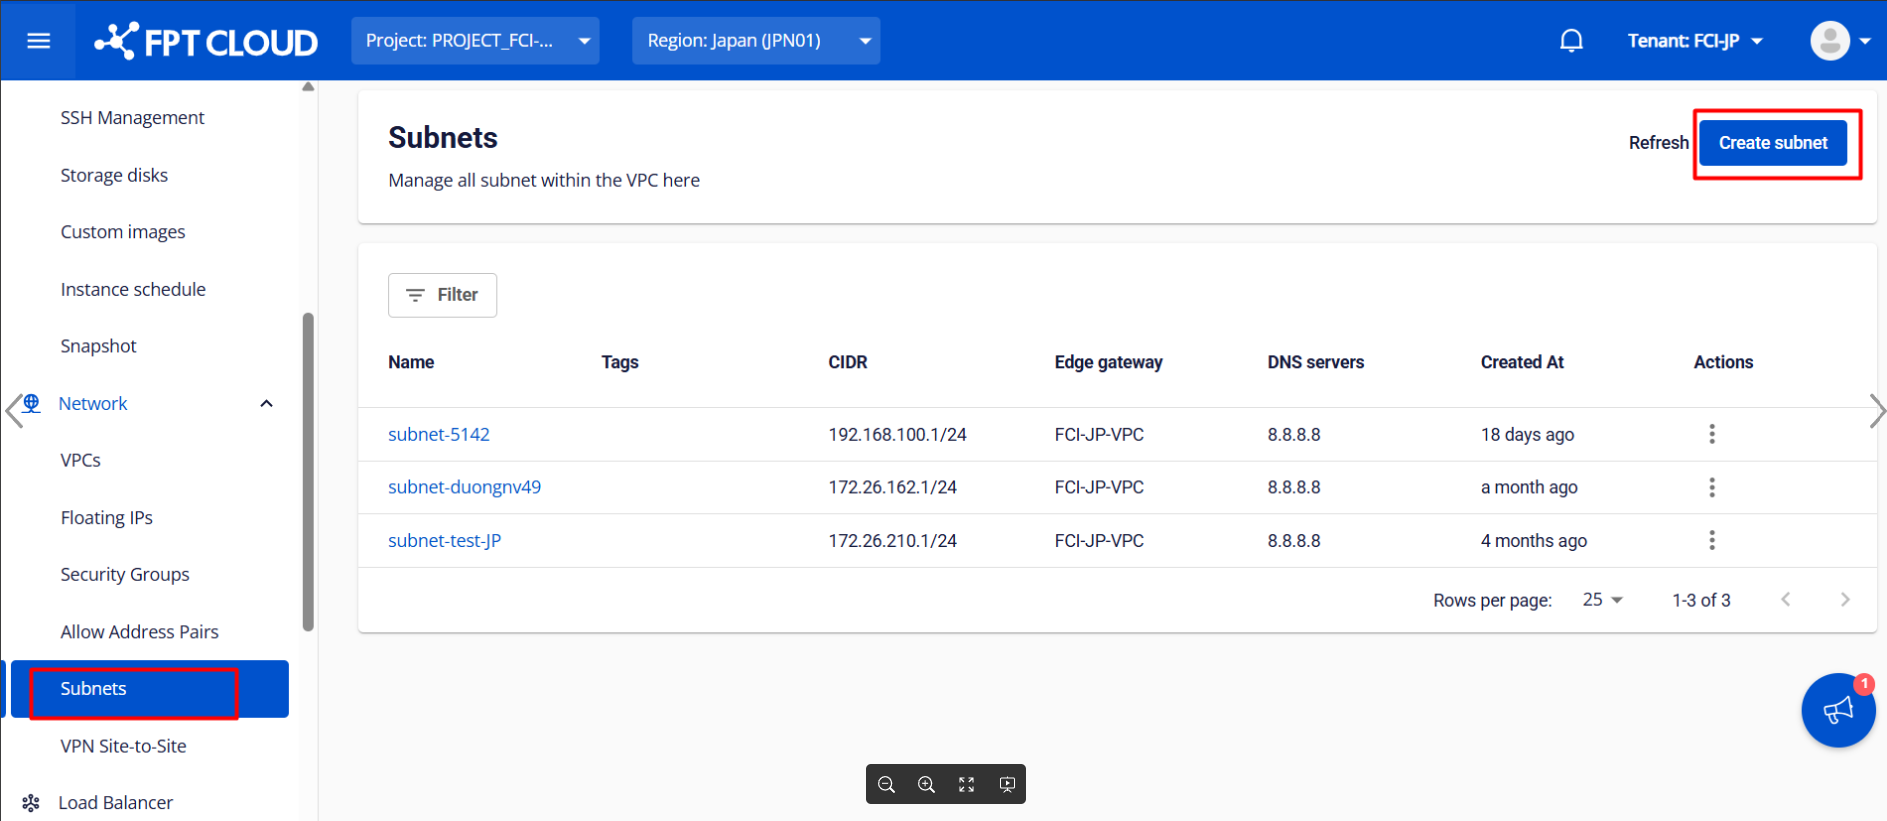
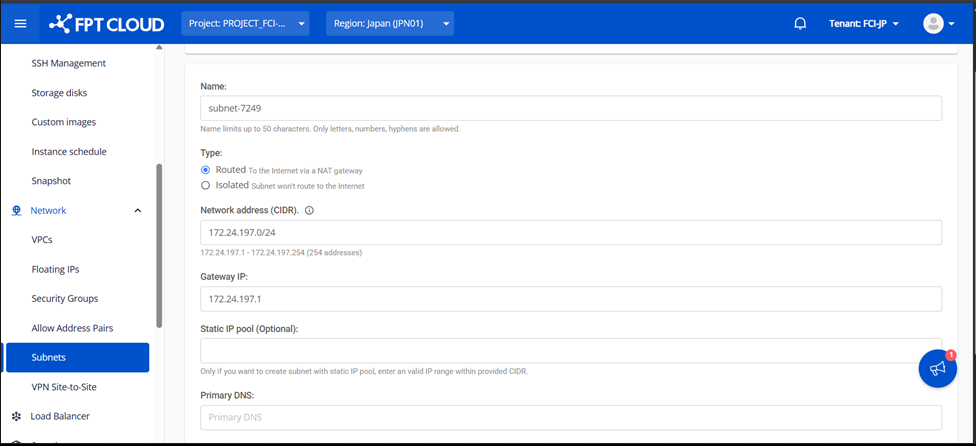
Step 1: Create a New Subnet
In the FPT Cloud Console, create a new subnet according to your network requirements, which will allow you to assign the necessary IP addresses to the network interfaces of pfSense.
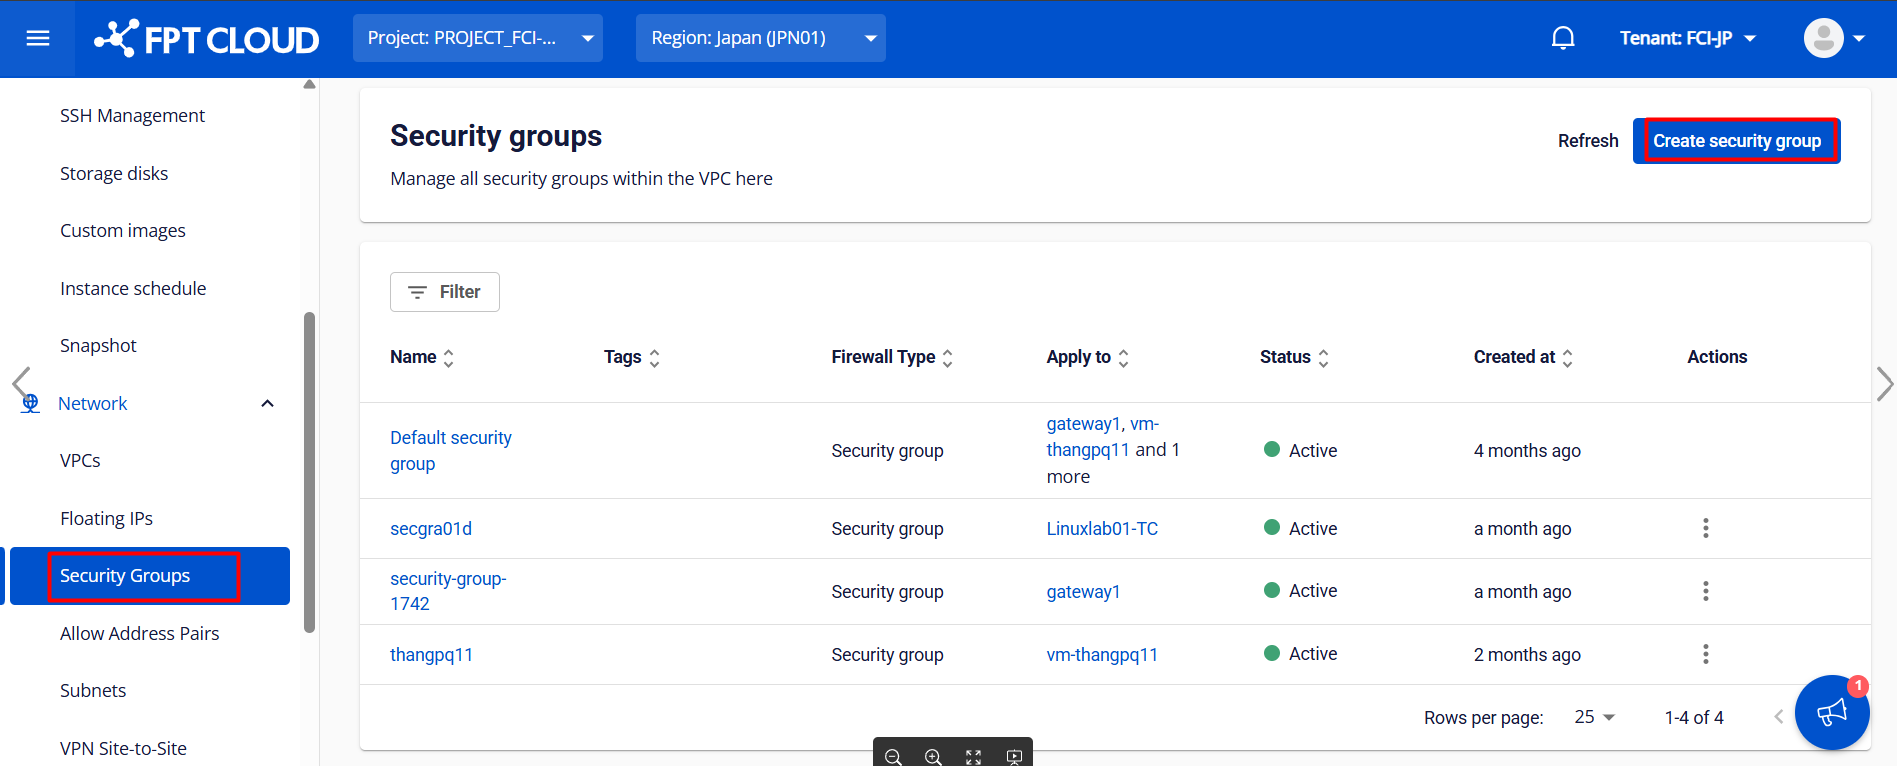
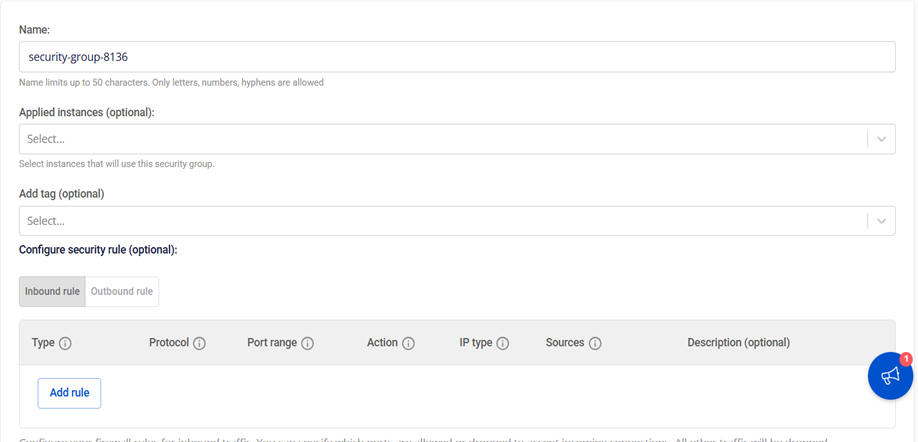
Step 2: Create a Security Group
Define security rules for your environment and create appropriate security groups to control communication and network traffic between pfSense virtual machines.
Creating a pfSense Virtual Machine
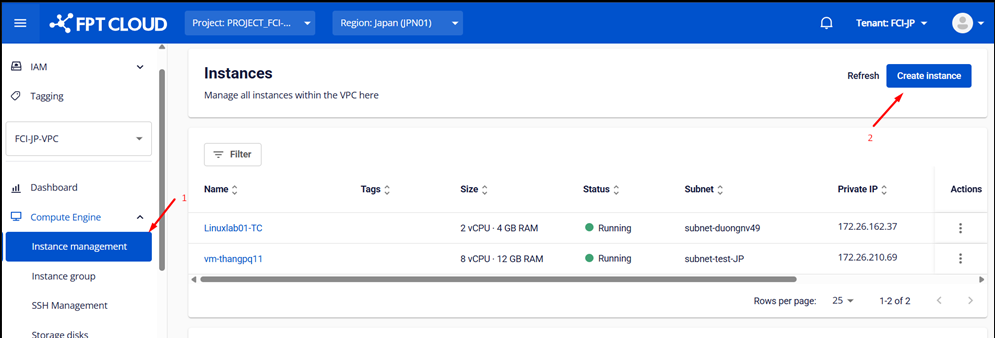
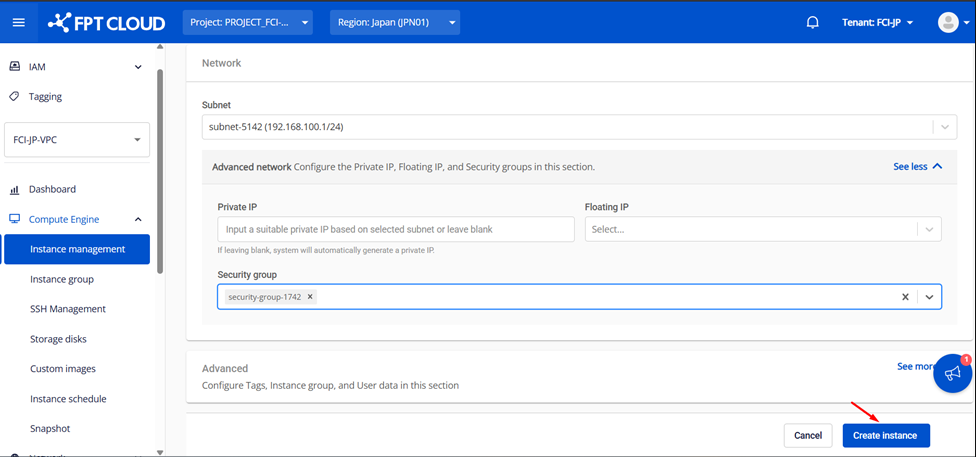
Step 1: Compute Engine
Go to the Compute menu in the FPT Cloud console and click "Create Instance".
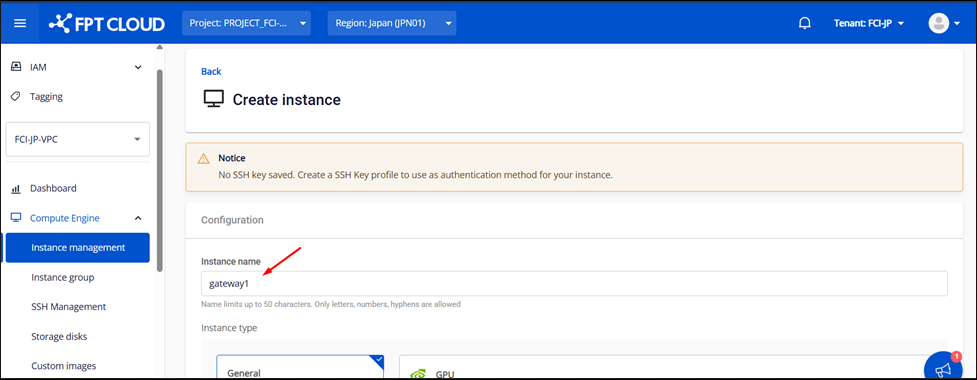
Step 2: Basic Information Settings
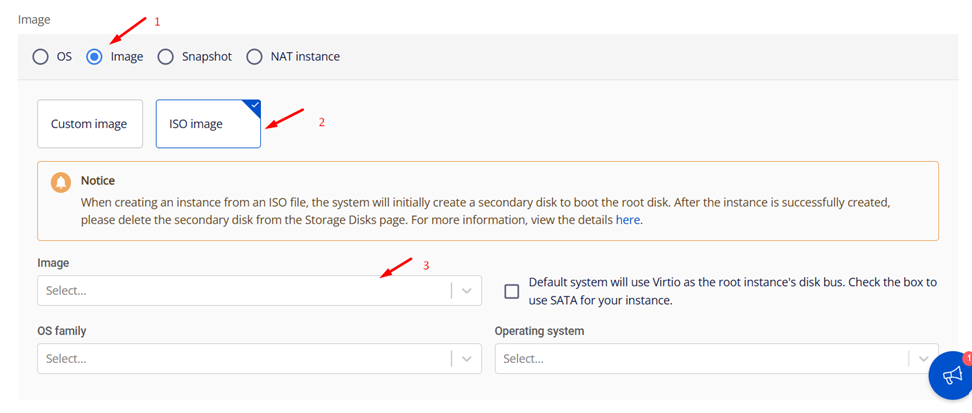
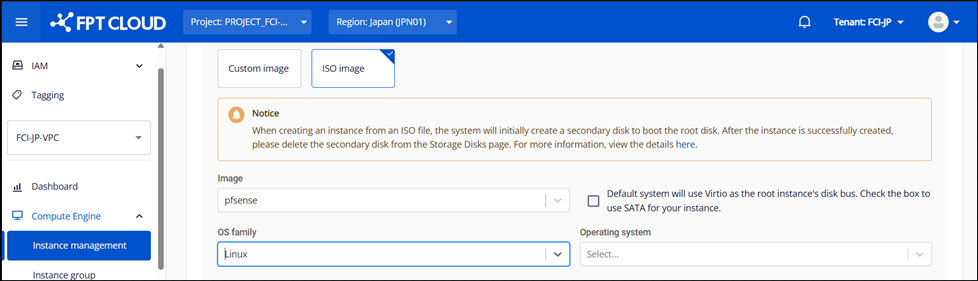
Set up an instance name (e.g., pfsense-master or pfsense-slave) and select the pfSense ISO you uploaded earlier under the ISO image option.
Step 3: Resource and Network Configuration
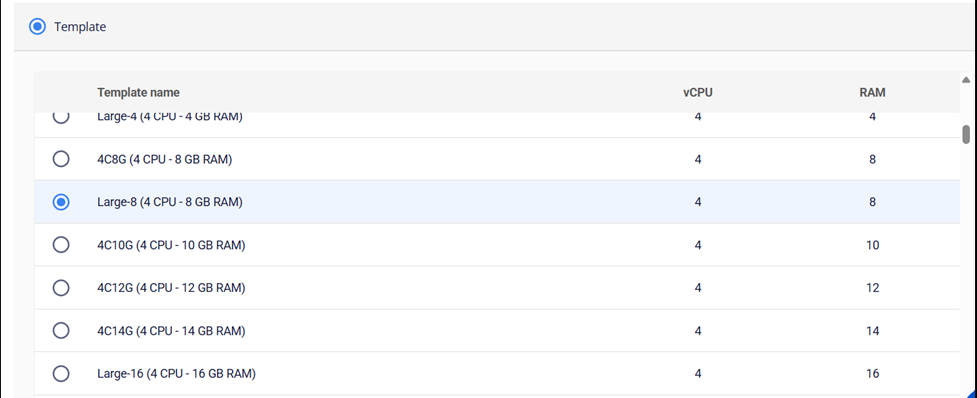
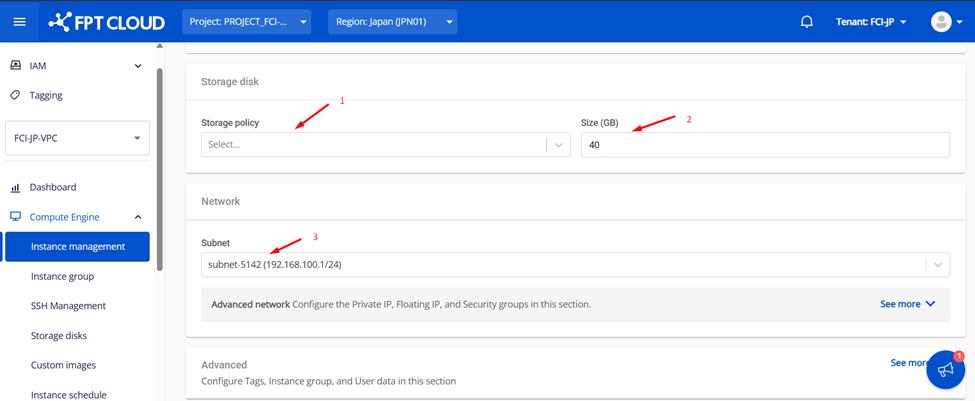
Select the appropriate resource size (CPU/RAM) for your environment and connect the necessary networks.
Step 4: Attach a Security Group
Attach the previously created security group and create the virtual machine.

HA (High Availability) Requirements
Minimum Requirements for High Availability (HA) Implementation:
- At least three IPs per subnet on the pfSense network interface
- One for the master
- One for the slave
- One virtual IP for external communication
- Layer 2 devices must support multicast
- The upstream / ISP / router must have access to the virtual IP used by CARP
Configuring the pfSense Interface
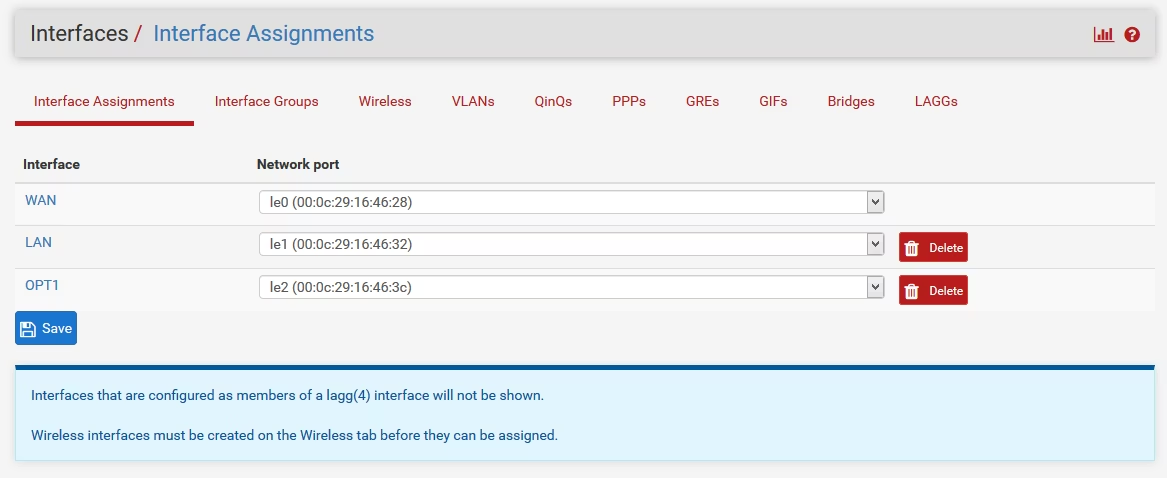
New Network: Adding a Card
-
Select "Assignment" from the Interface menu and click "Add" to add a new interface.
-
Double-click the OPT1 interface and enter the required information.
-
After setting, click "Save", then "Apply Changes".
Firewall: Creating Rules
-
Select "Rules" from the Firewall menu and switch to the "Sync" tab.
-
Click "Add" to create a new rule and enter the required information.
-
Once the configuration is complete, click "Save and Apply Changes".
-
Repeat the same configuration on both pfSense servers.
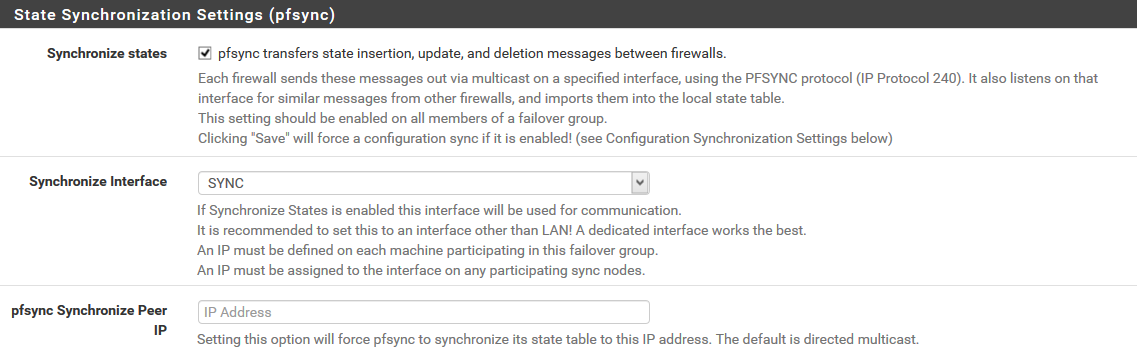
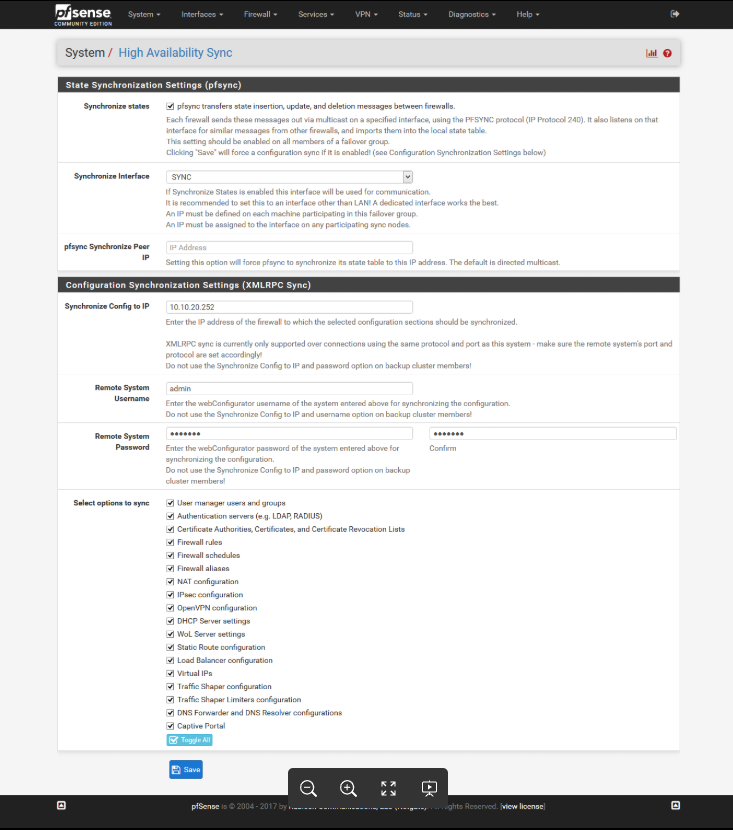
Configuring CARP (High Availability Protocol)
Configuring CARP on the Master
-
Select "High Availability Synchronization" from the System menu and enter the required information.
-
The username and password for the remote system specify the credentials of a high-privileged user on the pfSense slave virtual machine
Configuring CARP on the Slave
-
Similarly, select "High Availability Synchronization" from the System menu and enter the required information.
-
The settings will be different from those of the master, so please follow the instructions to set them appropriately.