Snapshots are on-demand disk images of GPU VMs and volumes saved to your account. You can use them to create new GPU VMs and volumes with the same contents.
Note: This feature only supports GPU VMs using Block Storage – Persistent Disk.
Create a Snapshot
The snapshot feature allows you to capture the current state of a virtual machine, enabling quick recovery or rollback in case of system changes or failures.

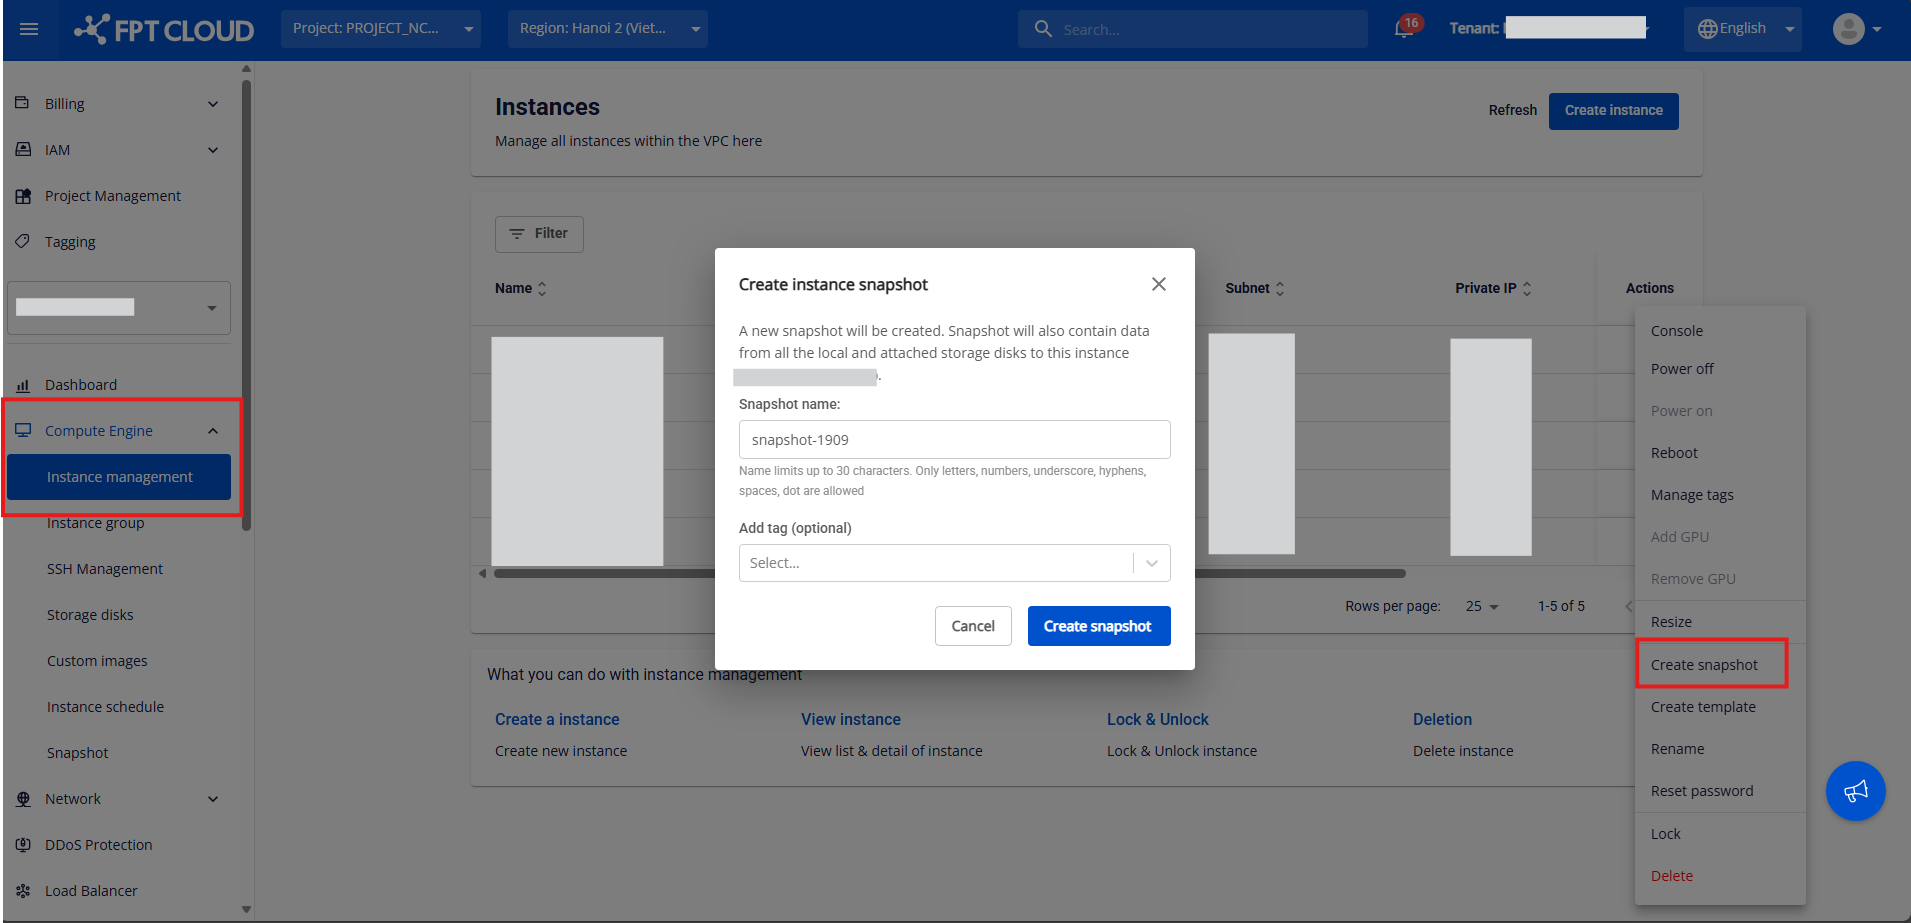
Step 1: Open the Instance Management from the Side menu.
Step 2: Find the GPU VM you want to create a snapshot for and click the 3-dot icon.
Step 3: Create an instance snapshot by entering a snapshot name and tag (optional).
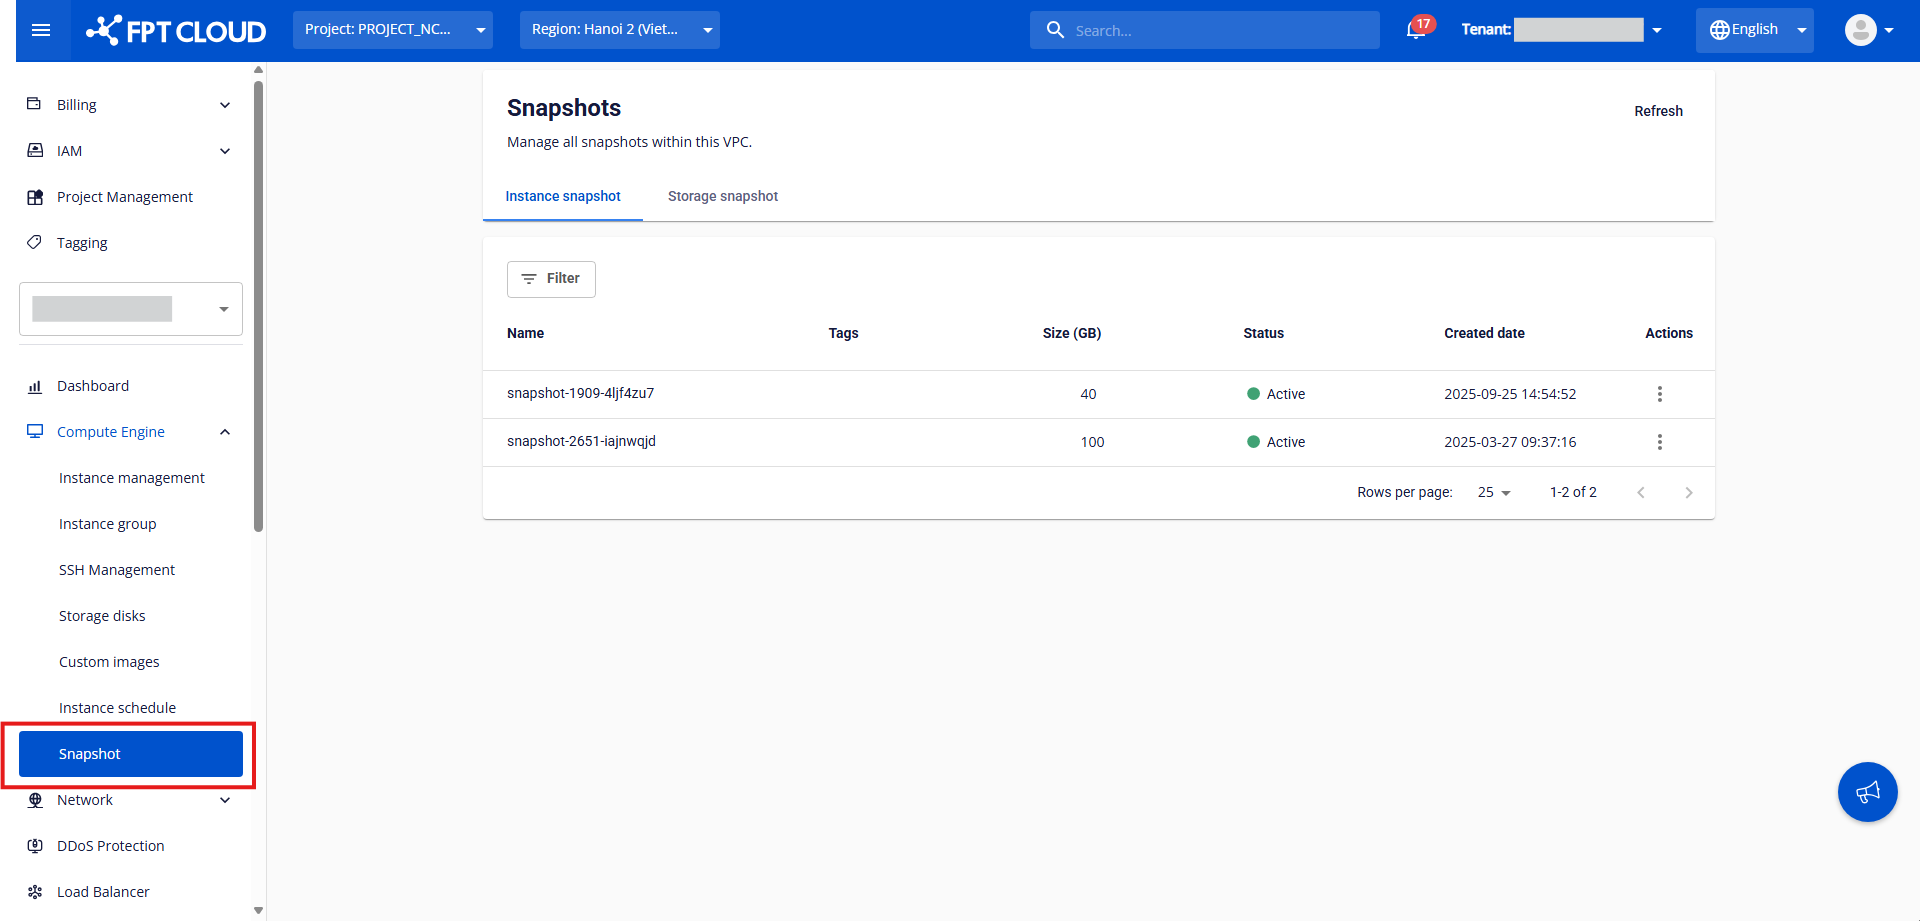
The snapshot that has been created will appear in the Snapshot section.

Use a Snapshot

Step 1: Open the Snapshot section from the Side menu.
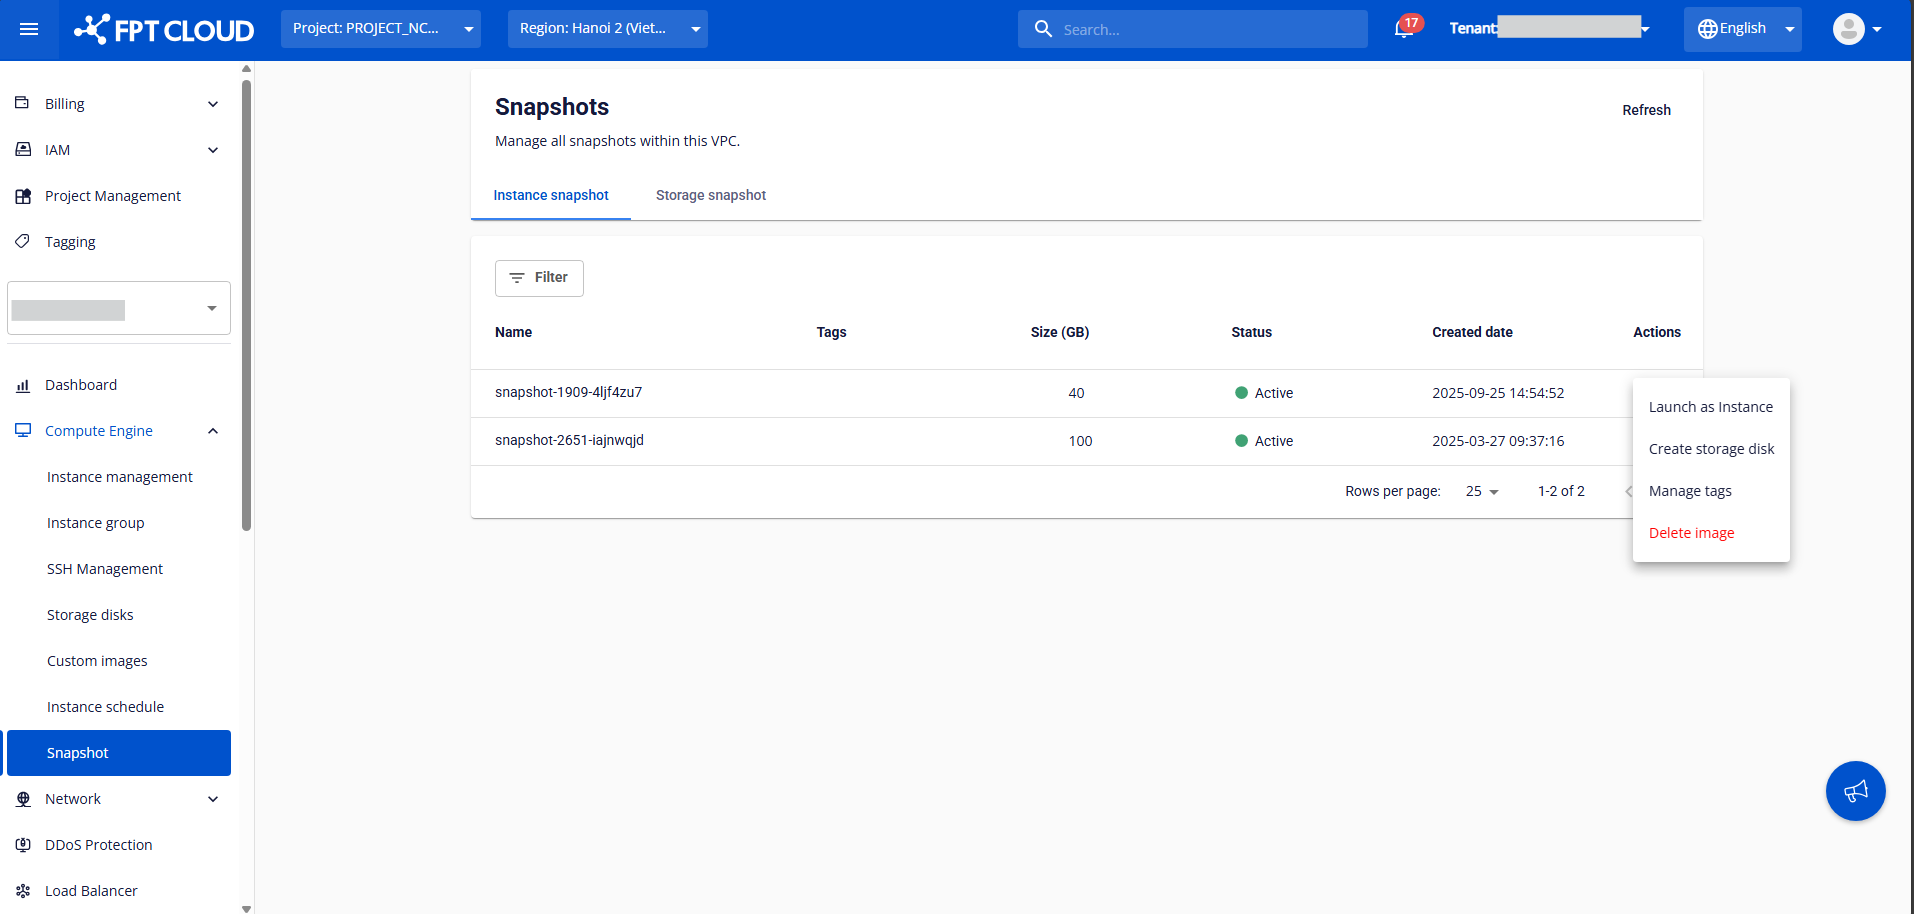
Step 2: Find the snapshot you want to use and click the 3-dot icon. Note: Only active snapshots can be used.
Step 3: You can choose one of the following actions:
-
Launch as an instance: Create a new virtual machine directly from this snapshot.
-
Create storage disk: Generate a new storage volume based on the snapshot’s data.
-
Manage tags: Add or edit tags to organize the snapshot.
-
Delete image: Permanently delete the snapshot.
Delete a Snapshot
To delete a snapshot, follow these steps:
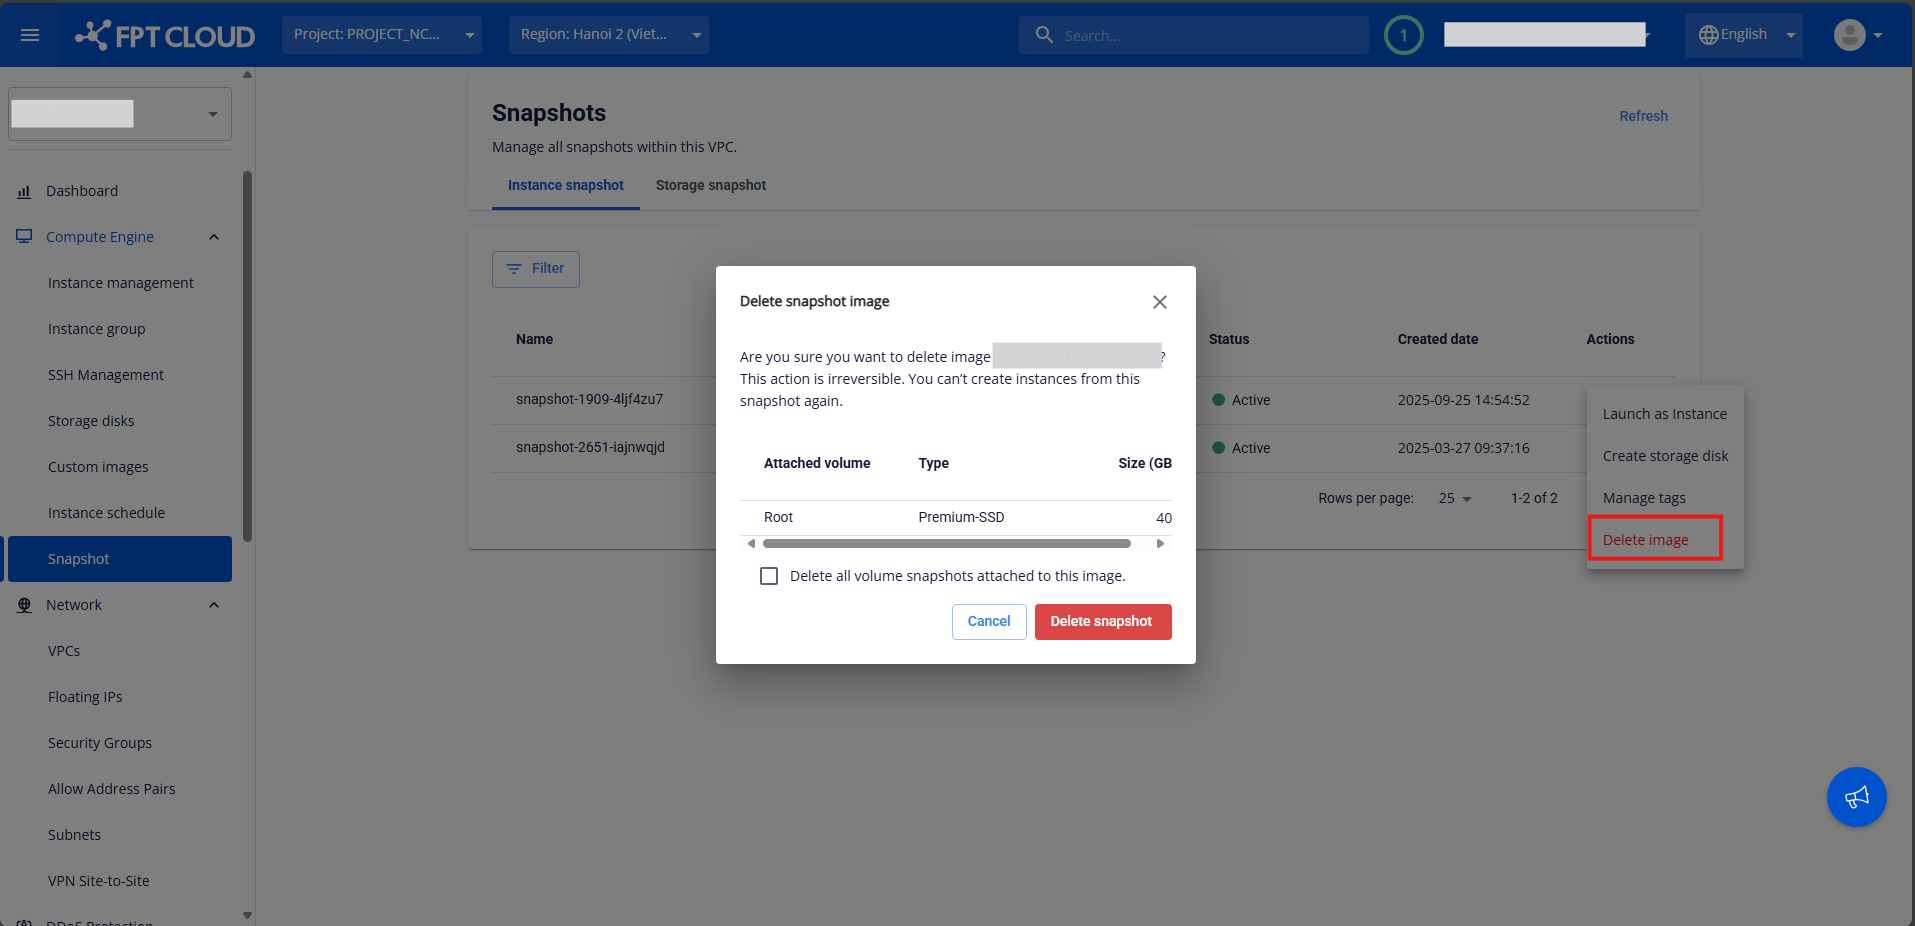
Step 1: In the menu, select Snapshot, then under the Actions menu of the snapshot, click Delete Image.
Step 2: Click Delete Snapshot.
Once you confirm the deletion, the system will delete the image and free up the snapshot resources that were being used by the VPC. You will be notified once the snapshot deletion is complete.
If you check the option "Delete all volume snapshots attached to this image", all snapshots created from the storage disk attached to that VM will also be deleted.


