- About Us
-
 Secure, unlimited storage to ensures efficiency as well as high and continuous data access demand.
 Virtual server integration for 3D Rendering, AI or ML
 Enhance application capacity and availability.
 Access to an all-inclusive stack for AI development, driven by NVIDIA’s powerful technology!
 FPT Web Application Firewall provides powerful protection for web applications
 Advanced virtual server with rapid scalability
 Backup and restore data instantly, securely and maintain data integrity.
Advanced virtual server with rapid scalability
Access to an all-inclusive stack for AI development, driven by NVIDIA’s powerful technology!
Enhance application capacity and availability.
Backup and restore data instantly, securely and maintain data integrity.
Recovery, ensuring quick operation for the business after all incidents and disasters.
Backup and restore data instantly, securely and maintain data integrity.
Advanced virtual server with rapid scalability
Access to an all-inclusive stack for AI development, driven by NVIDIA’s powerful technology!
Enhance application capacity and availability.
Backup and restore data instantly, securely and maintain data integrity.
Recovery, ensuring quick operation for the business after all incidents and disasters.
 Diverse throughput and capacity to meet various business workloads.
Secure, unlimited storage to ensures efficiency as well as high and continuous data access demand.
FPT Web Application Firewall provides powerful protection for web applications
Intelligent and Comprehensive Virtual Web Application Firewall - Security Collaboration between FPT Cloud and Penta Security.
The Next generation firewall security service
Easily store, manage, deploy, and secure Container images
Safe, secure, stable, high-performance Kubernetes platform
Provided as a service to deploy, monitor, backup, restore, and scale MongoDB databases on cloud.
Provided as a service to deploy, monitor, backup, restore, and scale Redis databases on cloud.
Provided as a service to deploy, monitor, backup, restore, and scale PostgreSQL databases on cloud. System Monitoring Solution anywhere, anytime, anyplatform
 Helps reduce operational costs by up to 40% compared to traditional BI solutions, while improving efficiency through optimized resource usage and infrastructure scaling.
 - Pricing
- Partner
- Event
Managed – FPT Database Engine
-
 Concepts
-
 Initial Setup
-
 Tutorials
-
 Peformance & Benchmark
-
 Troubleshooting
-
 FAQs
FAQs
-
 Glossary
-
This section provides detailed steps for users to perform operations related to the backup service, including activation, adjustment, and deactivation.
1. Enable backup service
To activate the backup service, you can do so directly during the additional service configuration step when provisioning the database engine (see the Provision a database cluster section for details), or activate it after the database cluster has been provisioned successfully by following the steps below.
Prerequisites
To activate the backup service, users must enable the Notification service and complete the configuration of email or Telegram recipients for receiving backup-related alerts in advance. If notification is not configured, the following dialog will appear:
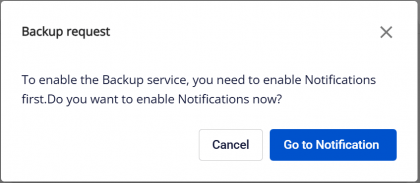
Click Go to Notification to navigate to the Notification tab and complete the alert configuration as described in the Notification section.
Step 1: Access the backup screen
On the menu bar, select Database Platform > Select All Database or the menu corresponding to the appropriate engine group for the cluster needing backup service activation > Click the Cluster ID > Select the Backup tab to enter the backup service management screen.
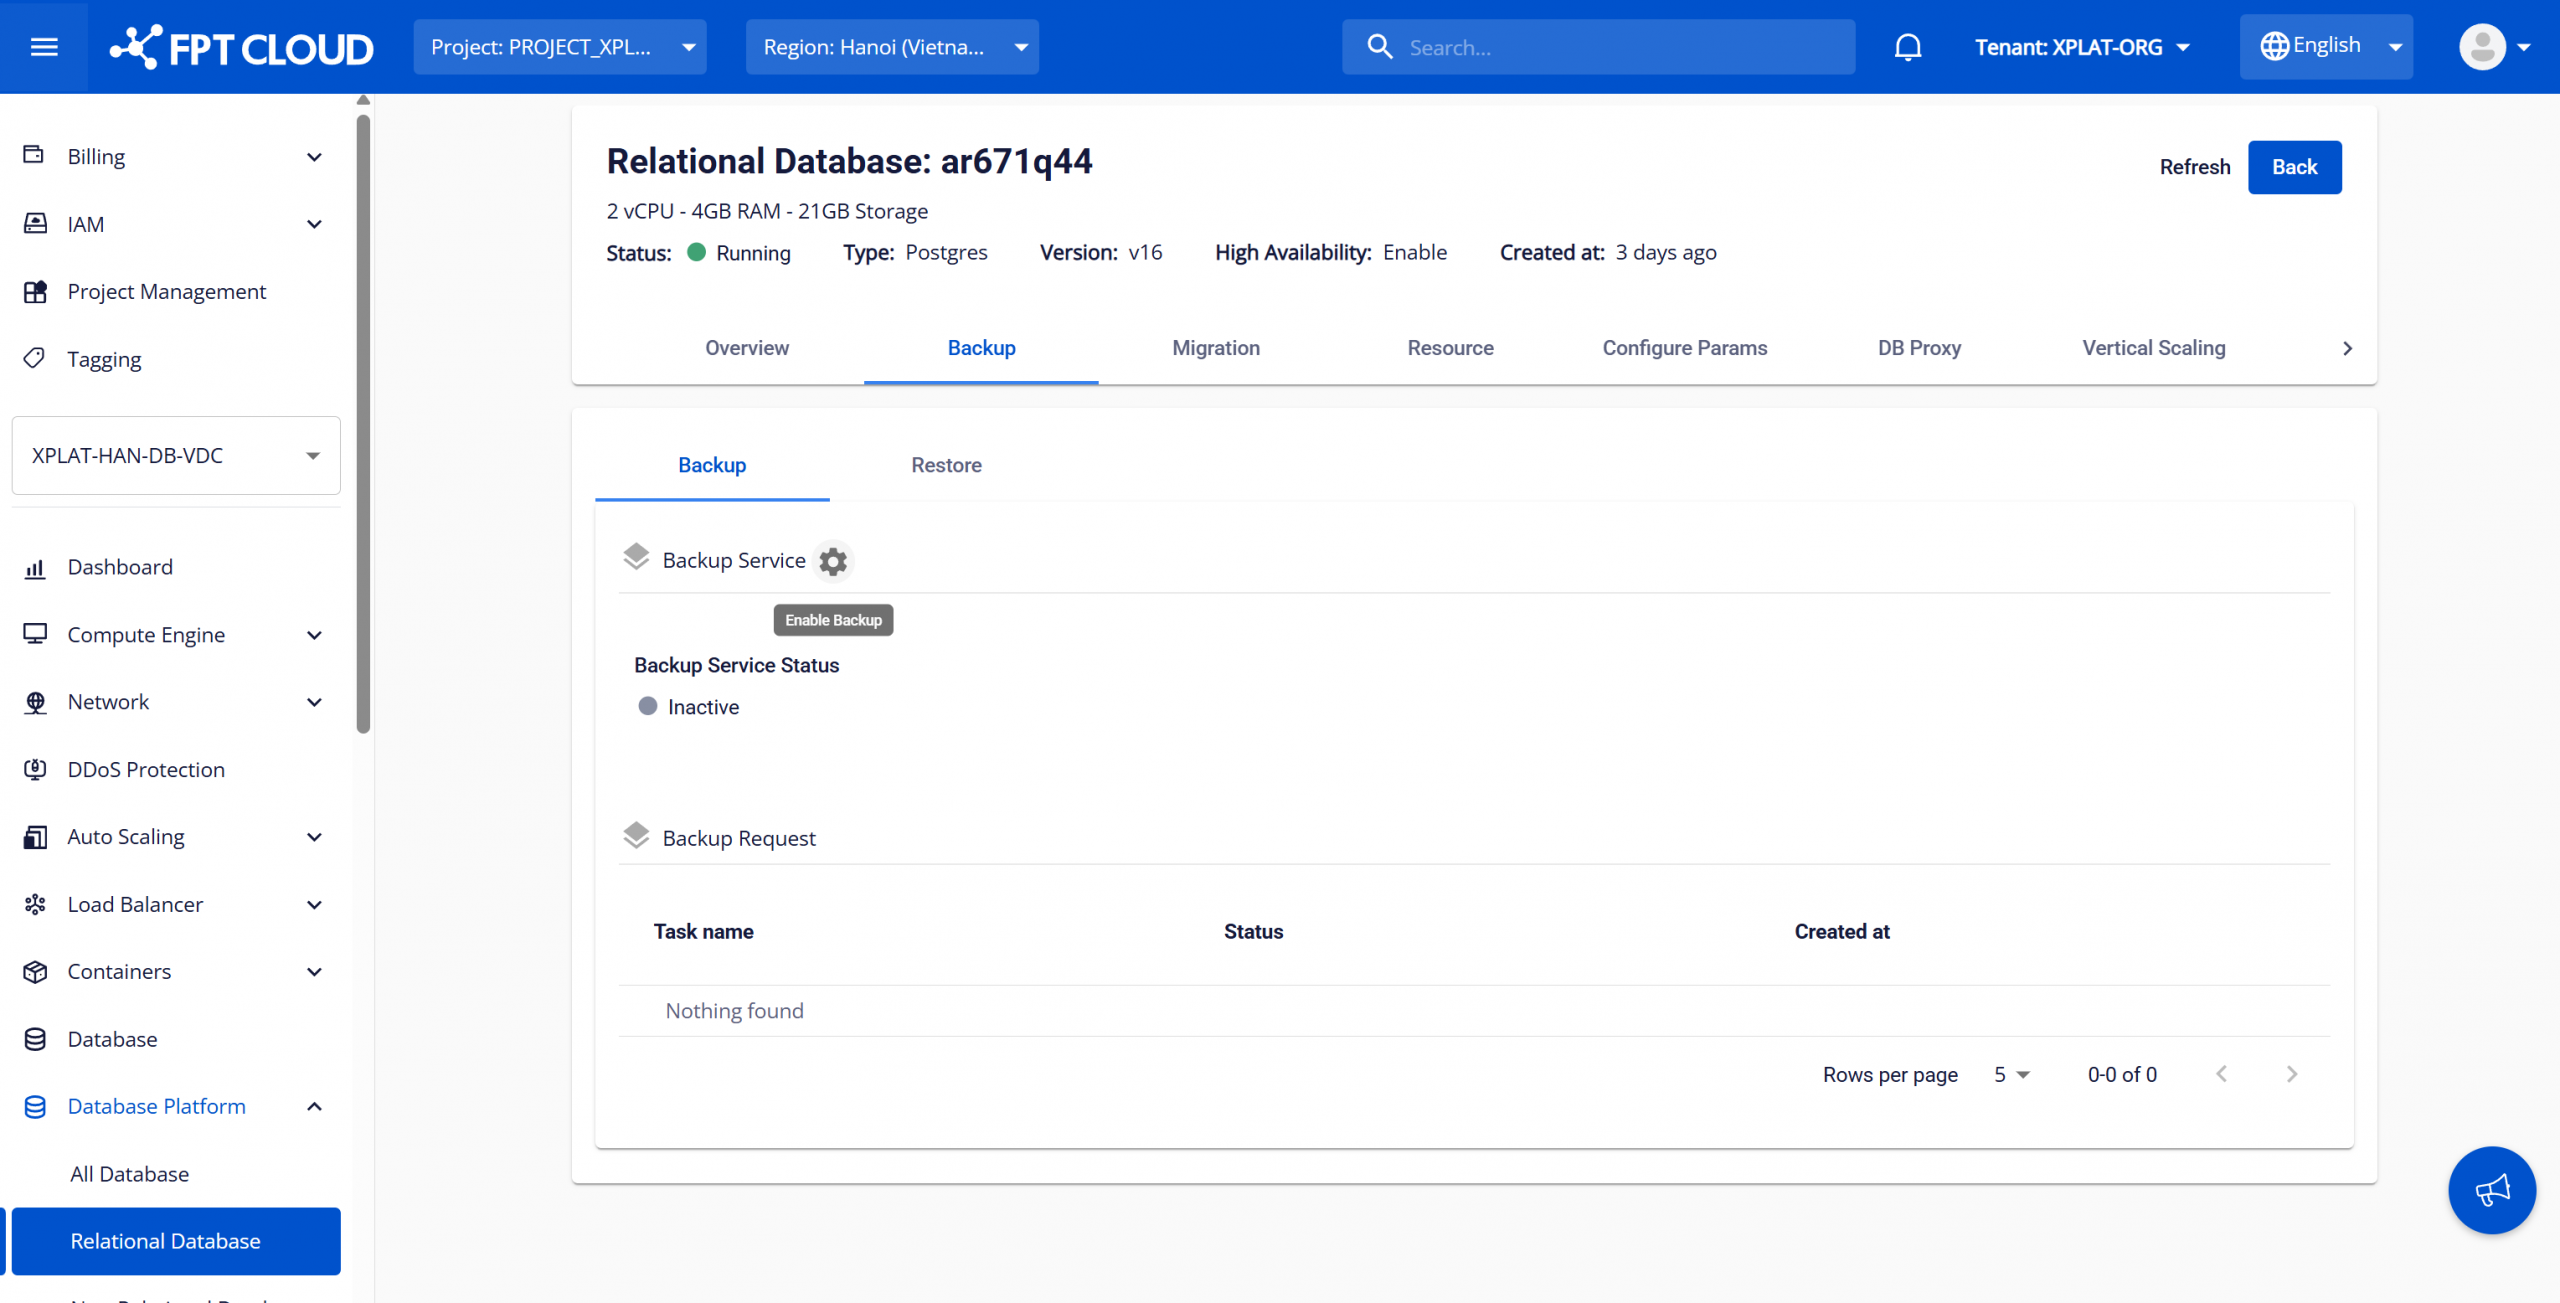
Step 2: Activate the backup service
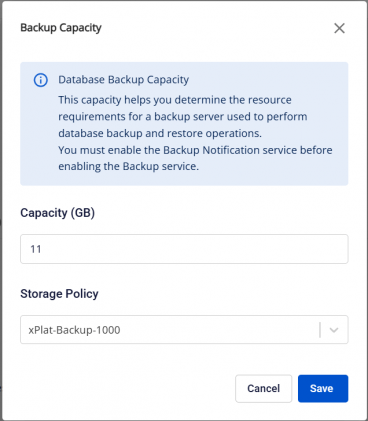
After the database cluster is created successfully and the backup service is not yet activated, the service status will default to "Inactive". Click the Enable Backup icon (gear icon) to open the dialog and proceed with activation. Depending on the database engine type and whether the VPC is VMware or OpenStack, some fields may vary.
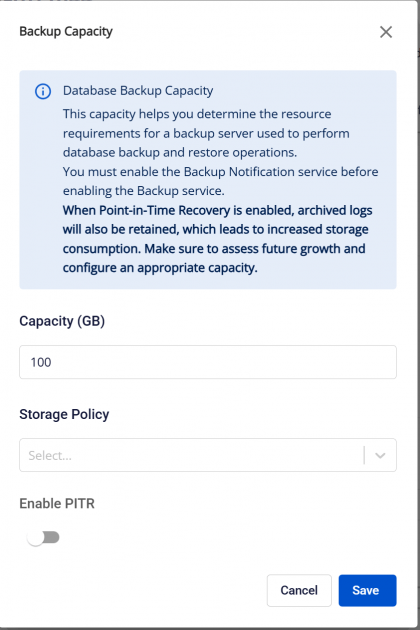
Description of fields and how to fill them:
- Capacity (GB): Enter the storage capacity for backup data in GB with the minimum value is 10 GB.
- Storage Policy: Select the storage policy (Storage Class) for the backup service. This field is displayed only if the VPC is running on the VMware platform.
- Enable PITR: Enable/disable the PITR feature for the backup service. This feature is currently supported for the PostgreSQL, MySQL and MariaDB.
After entering all information, click Save to confirm backup service activation.
The backup service activation process takes 5–10 minutes and displays a Processing progress bar. Upon successful activation, the backup service will show as Active with the configured parameters.
To perform data backups for a database cluster, users must create backup jobs, including full backup job and differential backup job, in order to configure a scheduled backup policy. Please refer to the detailed instructions at Manage backup job
For PostgreSQL HA cluster:
- If the cluster was created before March 13, 2026: Enabling PITR will automatically restart the cluster. The UI will display the warning: “Enabling PITR will automatically restart the database cluster. A brief service interruption may occur.”. This restart may cause a short service interruption. It is recommended to enable PITR during off-peak hours to minimize impact.
- For all other cases (non-HA clusters or HA clusters created after March 13, 2026 ): Enabling PITR does not require a cluster restart and will not cause service interruption.
2. Update backup service
During usage, if you need to modify the existing backup service settings, proceed as follows:
On the backup service management screen, click Update Backup (pencil icon) next to the Backup Service section to open the backup service configuration update dialog.
Enter the required changes and click Save to confirm. The update process may take approximately 5–10 minutes; during this time, the backup service will display the "Updating" status. Once the update is completed successfully, the service will return to the "Active" status with the updated configuration applied.
3. Disable backup service
To deactivate the backup service, on the backup service management screen, click the Delete Backup button (trash icon) next to the Backup Service section to open the confirmation dialog. Enter “delete” and click Confirm to confirm deactivation. This process may take 5–10 minutes, during which the Backup service will display Deleting status. Upon successful processing, the service will return to "Inactive" status.