- About Us
-
 Secure, unlimited storage to ensures efficiency as well as high and continuous data access demand.
 Virtual server integration for 3D Rendering, AI or ML
 Enhance application capacity and availability.
 Access to an all-inclusive stack for AI development, driven by NVIDIA’s powerful technology!
 FPT Web Application Firewall provides powerful protection for web applications
 Advanced virtual server with rapid scalability
 Backup and restore data instantly, securely and maintain data integrity.
Advanced virtual server with rapid scalability
Access to an all-inclusive stack for AI development, driven by NVIDIA’s powerful technology!
Enhance application capacity and availability.
Backup and restore data instantly, securely and maintain data integrity.
Recovery, ensuring quick operation for the business after all incidents and disasters.
Backup and restore data instantly, securely and maintain data integrity.
Advanced virtual server with rapid scalability
Access to an all-inclusive stack for AI development, driven by NVIDIA’s powerful technology!
Enhance application capacity and availability.
Backup and restore data instantly, securely and maintain data integrity.
Recovery, ensuring quick operation for the business after all incidents and disasters.
 Diverse throughput and capacity to meet various business workloads.
Secure, unlimited storage to ensures efficiency as well as high and continuous data access demand.
FPT Web Application Firewall provides powerful protection for web applications
Intelligent and Comprehensive Virtual Web Application Firewall - Security Collaboration between FPT Cloud and Penta Security.
The Next generation firewall security service
Easily store, manage, deploy, and secure Container images
Safe, secure, stable, high-performance Kubernetes platform
Provided as a service to deploy, monitor, backup, restore, and scale MongoDB databases on cloud.
Provided as a service to deploy, monitor, backup, restore, and scale Redis databases on cloud.
Provided as a service to deploy, monitor, backup, restore, and scale PostgreSQL databases on cloud. System Monitoring Solution anywhere, anytime, anyplatform
 Helps reduce operational costs by up to 40% compared to traditional BI solutions, while improving efficiency through optimized resource usage and infrastructure scaling.
 - Pricing
- Partner
- Event
Managed – FPT Database Engine
-
 Concepts
-
 Initial Setup
-
 Tutorials
-
 Peformance & Benchmark
-
 Troubleshooting
-
 FAQs
FAQs
-
 Glossary
-
Kafka user allows applications and services to authenticate to a managed Kafka cluster using SASL mechanisms. Kafka users are managed at the cluster level in DBaaS and are typically used by producers, consumers, and Kafka Connect workloads.
The Kafka User Management feature is available only for the Kafka engine. It allows administrators to view, create, and update Kafka users. This feature is typically used to:
- Control application access to Kafka clusters.
- Manage credentials securely in a managed cloud platform.
- Audit user-related operations via activity logs.
1. Create new Kafka user
To create a new Kafka user, follow these steps:
Step 1: Accessing Kafka User Management
Sign in to the FPT Cloud Console. Select “Database Platform” > “Data Streaming” > click the Kafka cluster ID to open the details page. Choose “Configure Params” tab > choose “Kafka ACL” sub-tab. The Kafka user management page is displayed.
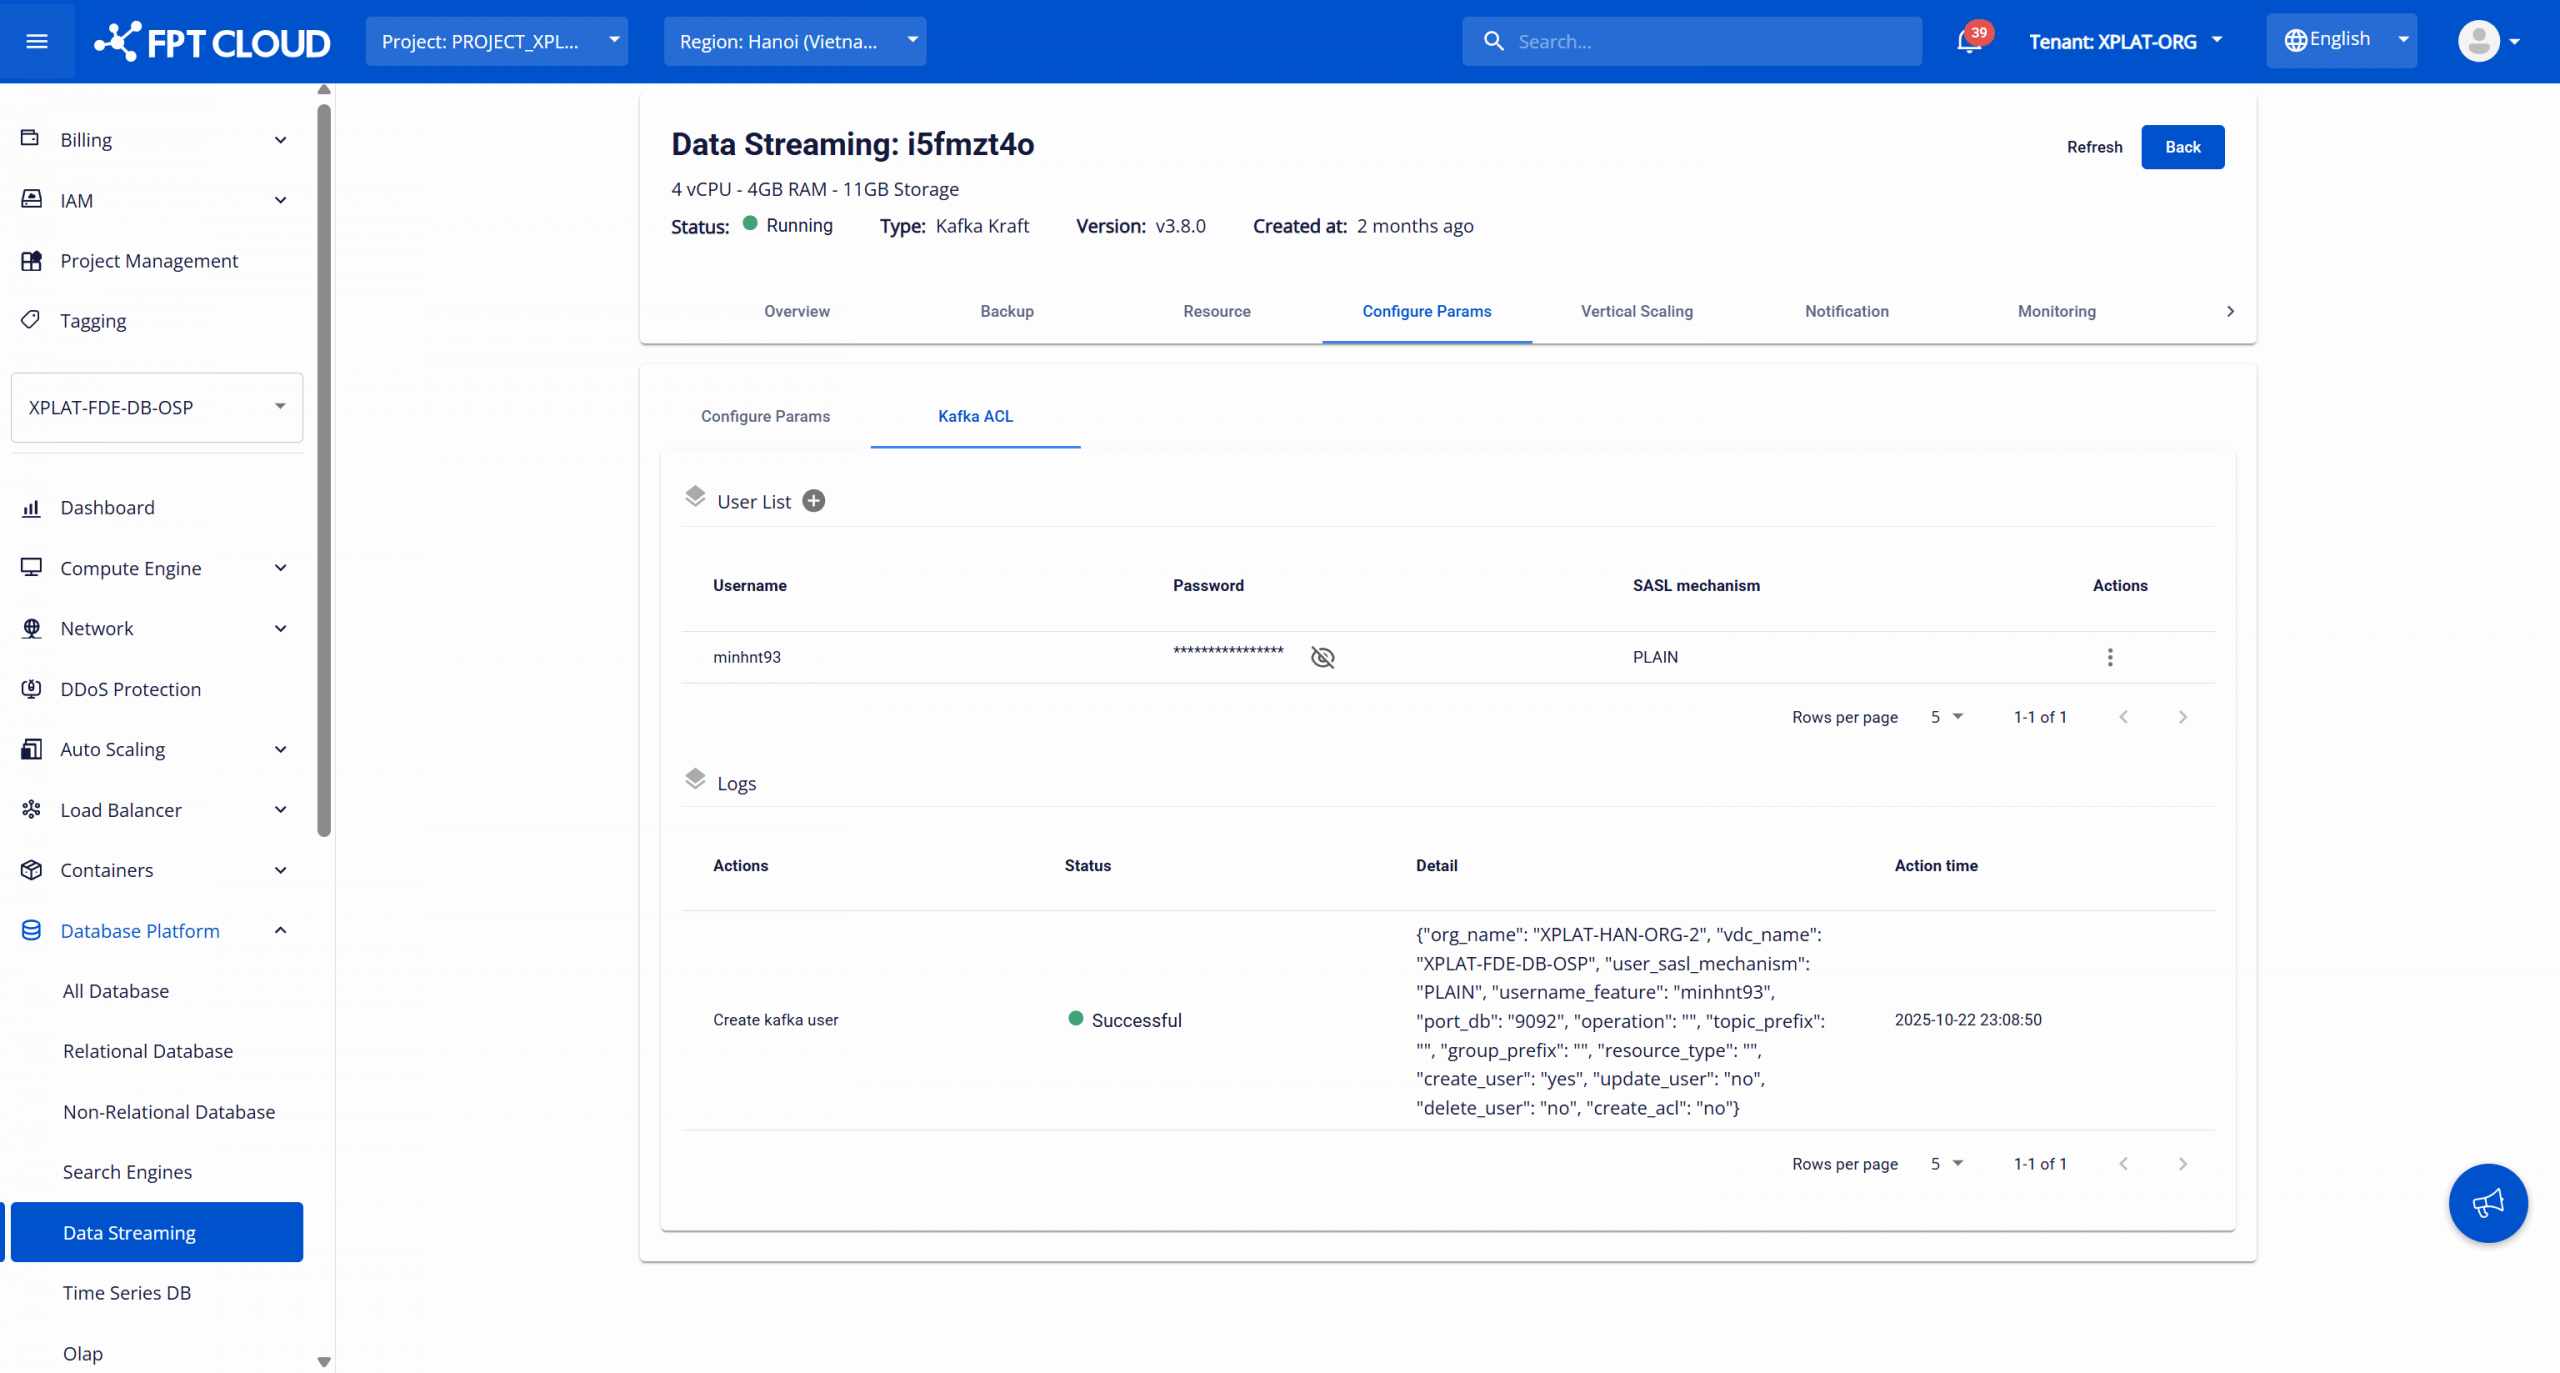
The “User List” section displays all Kafka users configured for the selected cluster. Displayed fields:
- Username: Kafka principal name.
- Password: Authentication password. Hidden for security reasons.
- SASL mechanism: Authentication mechanism (e.g. PLAIN).
Bước 2: Create a new Kafka user
On the Kafka user management page, under “User List”, select the Add user (plus icon). The Create new user dialog is displayed.
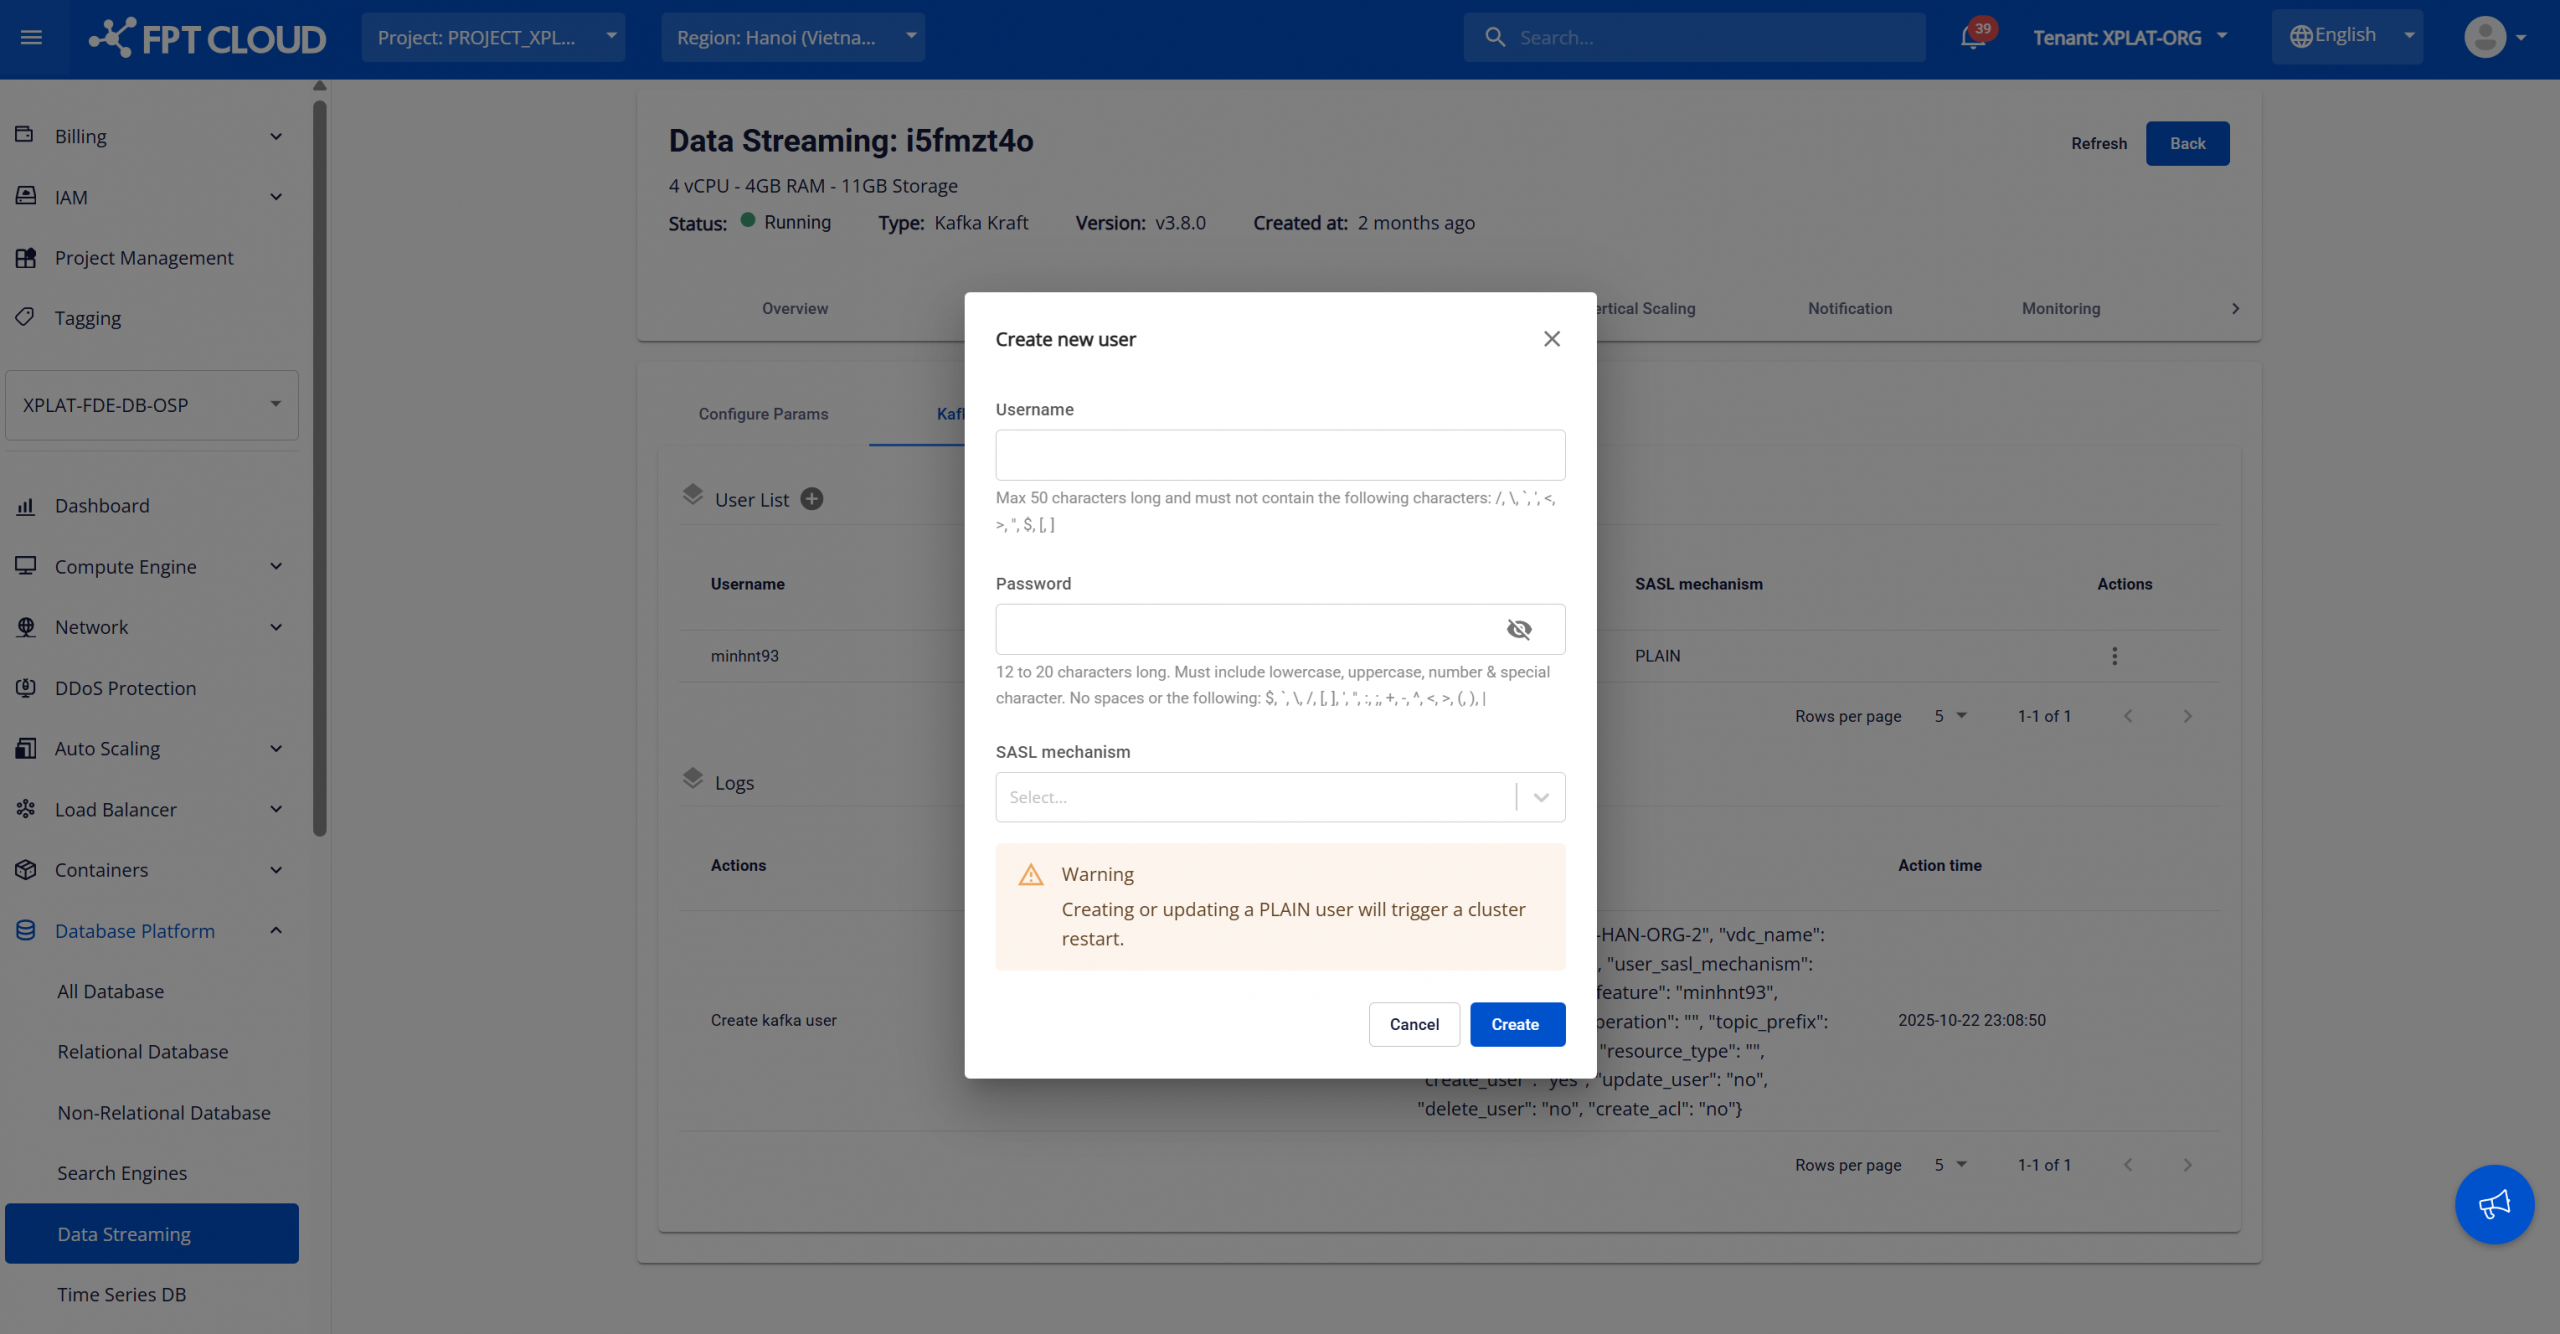
Enter configuration details:
- Username: The username is used as the Kafka principal for authentication. The maximum length is 50 characters. Must not contain the following restricted characters: / \ : * ? " < > | [ ]
- Password: Create a strong password that meets the following requirements:
- Contains at least one lowercase letter.
- Contains at least one uppercase letter.
- Length between 12 and 20 characters.
- Contains at least one special character, excluding the following: $ \ \ / [ ] ' " : ; + - ^ < > ( ) |`
- Contains at least one number.
- No spaces allowed.
- SASL mechanism: Select a supported authentication mechanism. Available options: “PLAIN”, “SCRAM-SHA256”, “SCRAM-SHA512”. Warning: Creating or updating Kafka users that use SASL/PLAIN will trigger a Kafka cluster restart. This may cause temporary service interruption for producers and consumers.
After completing the configuration, select “Create” to create the Kafka user. The newly created user appears in the User list and can be used for:
- Kafka client configuration.
- Kafka Connect.
- ACL policies (if supported).
Best Practices:
- Create Kafka users per application or service.
- Rotate passwords periodically.
- Avoid creating users during peak traffic hours.
- Use separate users for producers and consumers when possible.
When needed, you can perform the following actions on created Kafka users:
- Update password: This action allows you to change the password of a Kafka user. In the User list, select Update Password for the user you want to modify. Enter the new password and select Update to save changes.
- Delete user: Allows you to remove Kafka users that are no longer in use, helping maintain a clean system. In the User list, select Delete for the user to remove. Confirm the action in the warning dialog to complete the deletion.
- Grant ACL: Allows you to assign ACL permissions to Kafka users. For detailed instructions, see Section 2. Grant ACL to Kafka users.
2. Grant ACL to Kafka users
Kafka Access Control List (ACL) management allows administrators to grant fine-grained permissions to Kafka users for accessing topics and consumer groups in a managed DBaaS Kafka cluster.
ACLs help enforce:
- Secure access control
- Least-privilege principle
- Isolation between applications and workloads
ACLs are applied at the cluster level and take effect immediately after being saved.
Note: If a Kafka user is not assigned ACL permissions, the user will have no access to resources.
To assign permissions to a Kafka user, follow these steps:
On the Kafka user management page, under User list, select the “Grant ACL” action for the user. The Grant ACL dialog is displayed.

Enter configuration details:
- Username: Displays the selected Kafka user. This field is read-only.
- Resource Type: Choose the Kafka resource to grant permissions on:
- Topic – Grant access to Kafka topics.
- Consumer group – Grant access to consumer groups.
- Topic prefix / Group prefix: Specify a prefix-based pattern. Grant permissions to all resources matching the prefix. Use “All” to grant permissions to all topics or all consumer groups.
- Operations: Select one or more allowed Kafka operations depending on the resource type.
After completing the configuration, select “Save” to apply the ACL to the Kafka user. The ACL takes effect immediately without requiring a Kafka cluster restart. A Kafka user can be assigned multiple ACLs.
Best Practices:
- Grant permissions using prefix-based ACLs when possible. Prefix-based ACLs simplify permission management at scale.
- Separate ACLs for producers and consumers.
- Avoid granting wildcard access unless required.
- Regularly review ACL assignments.