- About Us
-
 Secure, unlimited storage to ensures efficiency as well as high and continuous data access demand.
 Virtual server integration for 3D Rendering, AI or ML
 Enhance application capacity and availability.
 Access to an all-inclusive stack for AI development, driven by NVIDIA’s powerful technology!
 FPT Web Application Firewall provides powerful protection for web applications
 Advanced virtual server with rapid scalability
 Backup and restore data instantly, securely and maintain data integrity.
Advanced virtual server with rapid scalability
Access to an all-inclusive stack for AI development, driven by NVIDIA’s powerful technology!
Enhance application capacity and availability.
Backup and restore data instantly, securely and maintain data integrity.
Recovery, ensuring quick operation for the business after all incidents and disasters.
Backup and restore data instantly, securely and maintain data integrity.
Advanced virtual server with rapid scalability
Access to an all-inclusive stack for AI development, driven by NVIDIA’s powerful technology!
Enhance application capacity and availability.
Backup and restore data instantly, securely and maintain data integrity.
Recovery, ensuring quick operation for the business after all incidents and disasters.
 Diverse throughput and capacity to meet various business workloads.
Secure, unlimited storage to ensures efficiency as well as high and continuous data access demand.
FPT Web Application Firewall provides powerful protection for web applications
Intelligent and Comprehensive Virtual Web Application Firewall - Security Collaboration between FPT Cloud and Penta Security.
The Next generation firewall security service
Easily store, manage, deploy, and secure Container images
Safe, secure, stable, high-performance Kubernetes platform
Provided as a service to deploy, monitor, backup, restore, and scale MongoDB databases on cloud.
Provided as a service to deploy, monitor, backup, restore, and scale Redis databases on cloud.
Provided as a service to deploy, monitor, backup, restore, and scale PostgreSQL databases on cloud. System Monitoring Solution anywhere, anytime, anyplatform
 Helps reduce operational costs by up to 40% compared to traditional BI solutions, while improving efficiency through optimized resource usage and infrastructure scaling.
 - Pricing
- Partner
- Event
Managed – FPT Database Engine
-
 Concepts
-
 Initial Setup
-
 Tutorials
-
 Peformance & Benchmark
-
 Troubleshooting
-
 FAQs
FAQs
-
 Glossary
-
A subnet is a logically defined range of IP addresses within a Virtual Private Cloud (VPC). In a cloud network, a subnet segments IP address space and controls network traffic within the environment, and serve as the foundation for routing, security, and service provisioning.
In FPT Database Engine, subnets play a key role in:
-
Locating database instances and related resources (e.g., Floating IPs)
-
Controlling internal network access and firewall/Security group scopes
-
Enabling proper routing and network isolation for security
Subnets define the IP address range used for FPT Database Engine resources and help ensure that traffic between applications and databases flows within a managed network environment.
Subnet management is a critical foundational task for FPT Database Engine provisioning in your cloud network. This guide shows how to create, verify, and manage subnets via the FPT Console Portal, ensuring your database workloads have stable, isolated network resources.
Step 1: Access the Subnet Management page
Log in to the FPT Cloud Portal. After logging successfully, from the main menu, select Network > Subnets. The Subnet Management interface will display the list of existing subnets, along with options to create, edit, or delete a subnet.
Step 2: Create a new subnet
On the Subnet Management page, click Create subnet. The Create New Subnet screen will appear as follows:
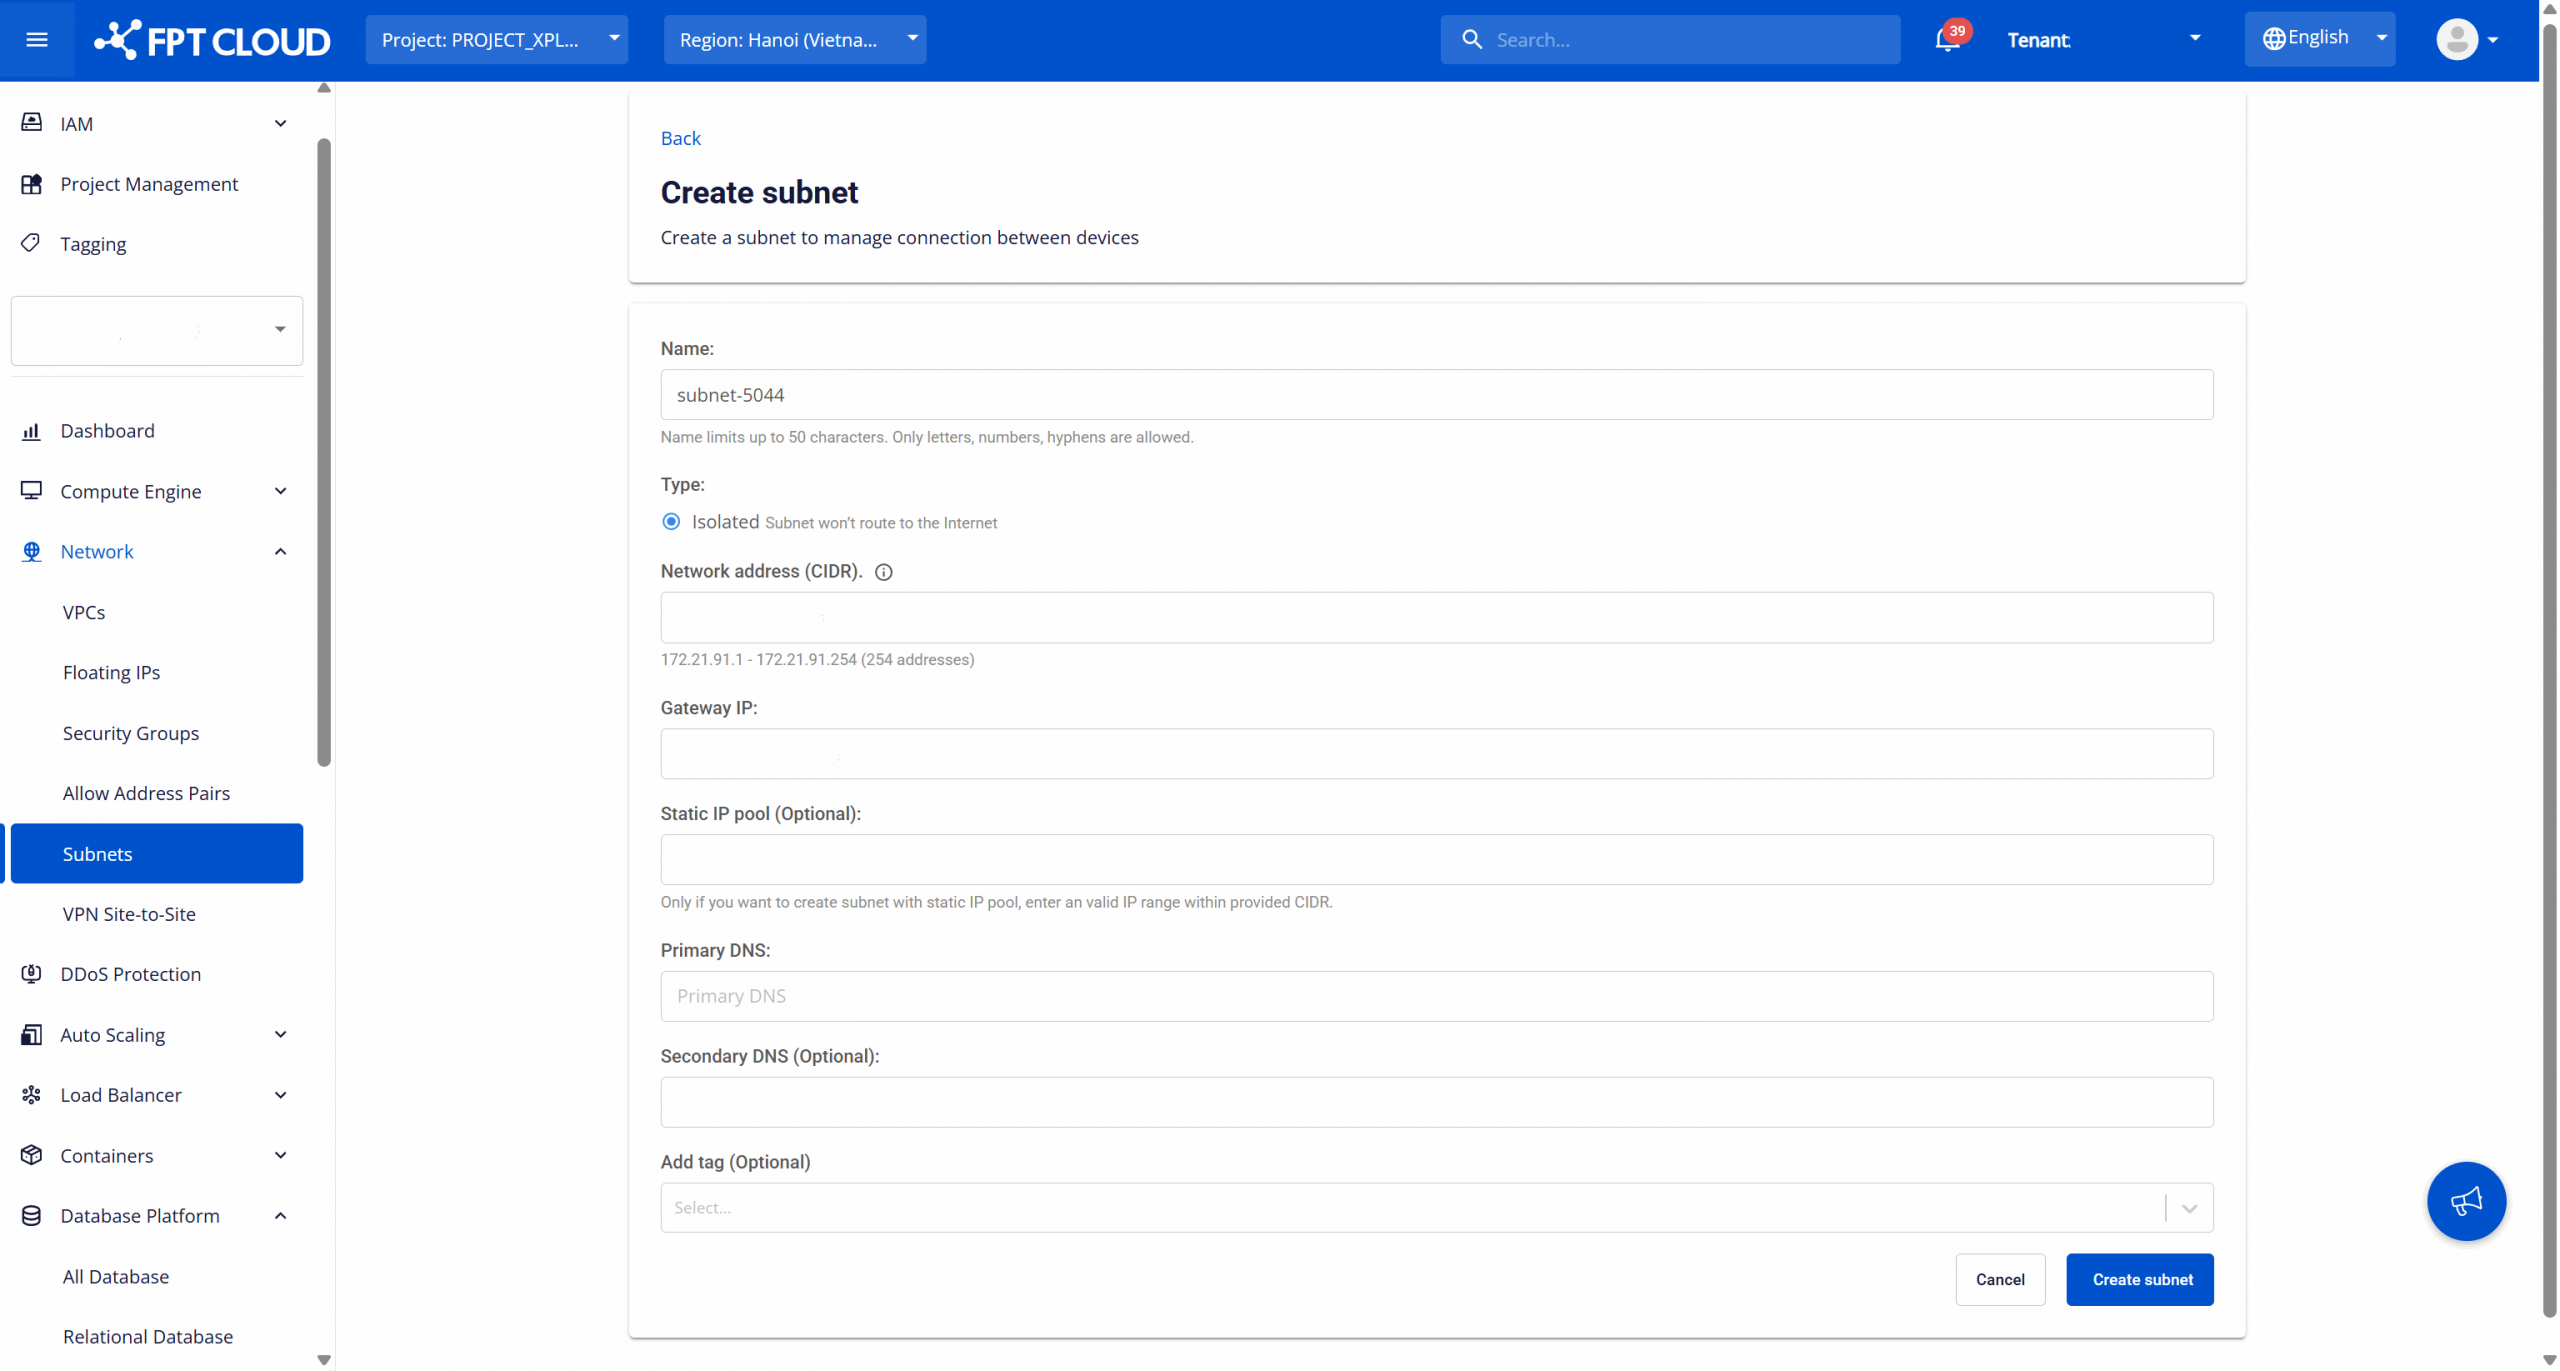
Configure the following information according to your network plan:
- Name: The identifier for the subnet, used to recognize the subnet when configuring network resources for services. The name can be up to 50 characters, including letters, numbers, and the hyphen "-". The subnet name must be unique within the same VPC (recommended).
- Type: The type of subnet determines the routing behavior. By default, the type is Isolated, meaning the subnet does not route to the Internet and is used for private networking. This is suitable for database production, backend services, and internal workloads.
- Network address (CIDR): Enter the IP address range for the subnet in CIDR notation (e.g., 192.168.10.0/24). The system will validate the availability and display the total number of available IP addresses. Note: The CIDR range must be valid and not overlap with any other subnet in the VPC.
- Gateway IP: The gateway IP address for the subnet, used as the default routing point for resources within the subnet. This is typically the first IP address or a reserved IP based on the internal network architecture. The gateway IP must be within the CIDR range and not overlap with the Static IP Pool (if configured).
- Static IP Pool (Optional): A range of static IPs reserved for assignment to resources requiring fixed IP addresses. Only enter this if needed. The IP range must be within the specified CIDR range and should not include the Gateway IP.
- Primary DNS: The primary DNS server address assigned to resources in the subnet, used for resolving internal or external domain names (depending on network architecture). You can use internal DNS or public DNS based on system policy.
- Secondary DNS (Optional): The secondary DNS server, used if the Primary DNS is unavailable. It is recommended to configure this for increased reliability.
- Add tag (Optional): Assign tags (key-value) to the subnet for resource classification, cost management, or to support operations and auditing.
After entering all required information, select Create subnet to complete the subnet creation process.
After the subnet is created successfully, the new subnet will appear in the management list and will be ready for use when provisioning database instances.
If needed, you can perform the following actions on the created subnet:
-
Rename a subnet: This function allows you to modify the name of the subnet. To use it, on the Subnet Management page, select Rename next to the subnet you want to modify. Make the changes and click Rename subnet to save.
-
Delete a subnet: This function allows you to remove unused subnets, keeping the subnet management system clean and accurate. On the Subnet Management page, select Delete next to the subnet you want to remove. Confirm the action in the warning dialog to complete the deletion.
Warning: Renaming or deleting an active subnet may disrupt network connectivity for DBaaS and other services. Always ensure that all dependent resources have been released before performing these actions.