- About Us
-
 Secure, unlimited storage to ensures efficiency as well as high and continuous data access demand.
 Virtual server integration for 3D Rendering, AI or ML
 Enhance application capacity and availability.
 Access to an all-inclusive stack for AI development, driven by NVIDIA’s powerful technology!
 FPT Web Application Firewall provides powerful protection for web applications
 Advanced virtual server with rapid scalability
 Backup and restore data instantly, securely and maintain data integrity.
Advanced virtual server with rapid scalability
Access to an all-inclusive stack for AI development, driven by NVIDIA’s powerful technology!
Enhance application capacity and availability.
Backup and restore data instantly, securely and maintain data integrity.
Recovery, ensuring quick operation for the business after all incidents and disasters.
Backup and restore data instantly, securely and maintain data integrity.
Advanced virtual server with rapid scalability
Access to an all-inclusive stack for AI development, driven by NVIDIA’s powerful technology!
Enhance application capacity and availability.
Backup and restore data instantly, securely and maintain data integrity.
Recovery, ensuring quick operation for the business after all incidents and disasters.
 Diverse throughput and capacity to meet various business workloads.
Secure, unlimited storage to ensures efficiency as well as high and continuous data access demand.
FPT Web Application Firewall provides powerful protection for web applications
Intelligent and Comprehensive Virtual Web Application Firewall - Security Collaboration between FPT Cloud and Penta Security.
The Next generation firewall security service
Easily store, manage, deploy, and secure Container images
Safe, secure, stable, high-performance Kubernetes platform
Provided as a service to deploy, monitor, backup, restore, and scale MongoDB databases on cloud.
Provided as a service to deploy, monitor, backup, restore, and scale Redis databases on cloud.
Provided as a service to deploy, monitor, backup, restore, and scale PostgreSQL databases on cloud. System Monitoring Solution anywhere, anytime, anyplatform
 Helps reduce operational costs by up to 40% compared to traditional BI solutions, while improving efficiency through optimized resource usage and infrastructure scaling.
 - Pricing
- Partner
- Event
Managed – FPT Database Engine
-
 Concepts
-
 Initial Setup
-
 Tutorials
-
 Peformance & Benchmark
-
 Troubleshooting
-
 FAQs
FAQs
-
 Glossary
-
The Vertical Scaling feature enables automatic adjustment of database resources, including vCPU, RAM, and Storage, in real time based on performance requirements or actual resource utilization. This feature allows the system to proactively scale resources when needed, ensuring operational flexibility and efficiency without requiring manual intervention.
Required Permissions:
| Permission | Action Type | Description |
|---|---|---|
| manageDatabase:Configuration | Edit | Allows modifying database configuration such as parameters, and scaling configurations. |
1. Enable Vertical Scaling Service
You can enable the Vertical Scaling service using one of the following methods:
- Enable it during the Additional Service configuration step when creating a database (refer to Section Provision Database), or
- Enable it after the database has been successfully created by following the steps below.
Prerequisites:
To enable Vertical Scaling, the Notification service must be enabled, and at least one Email or Telegram channel must be configured to receive scaling-related alerts. If Notification is not configured, the system will display a dialog prompting you to complete this configuration first.
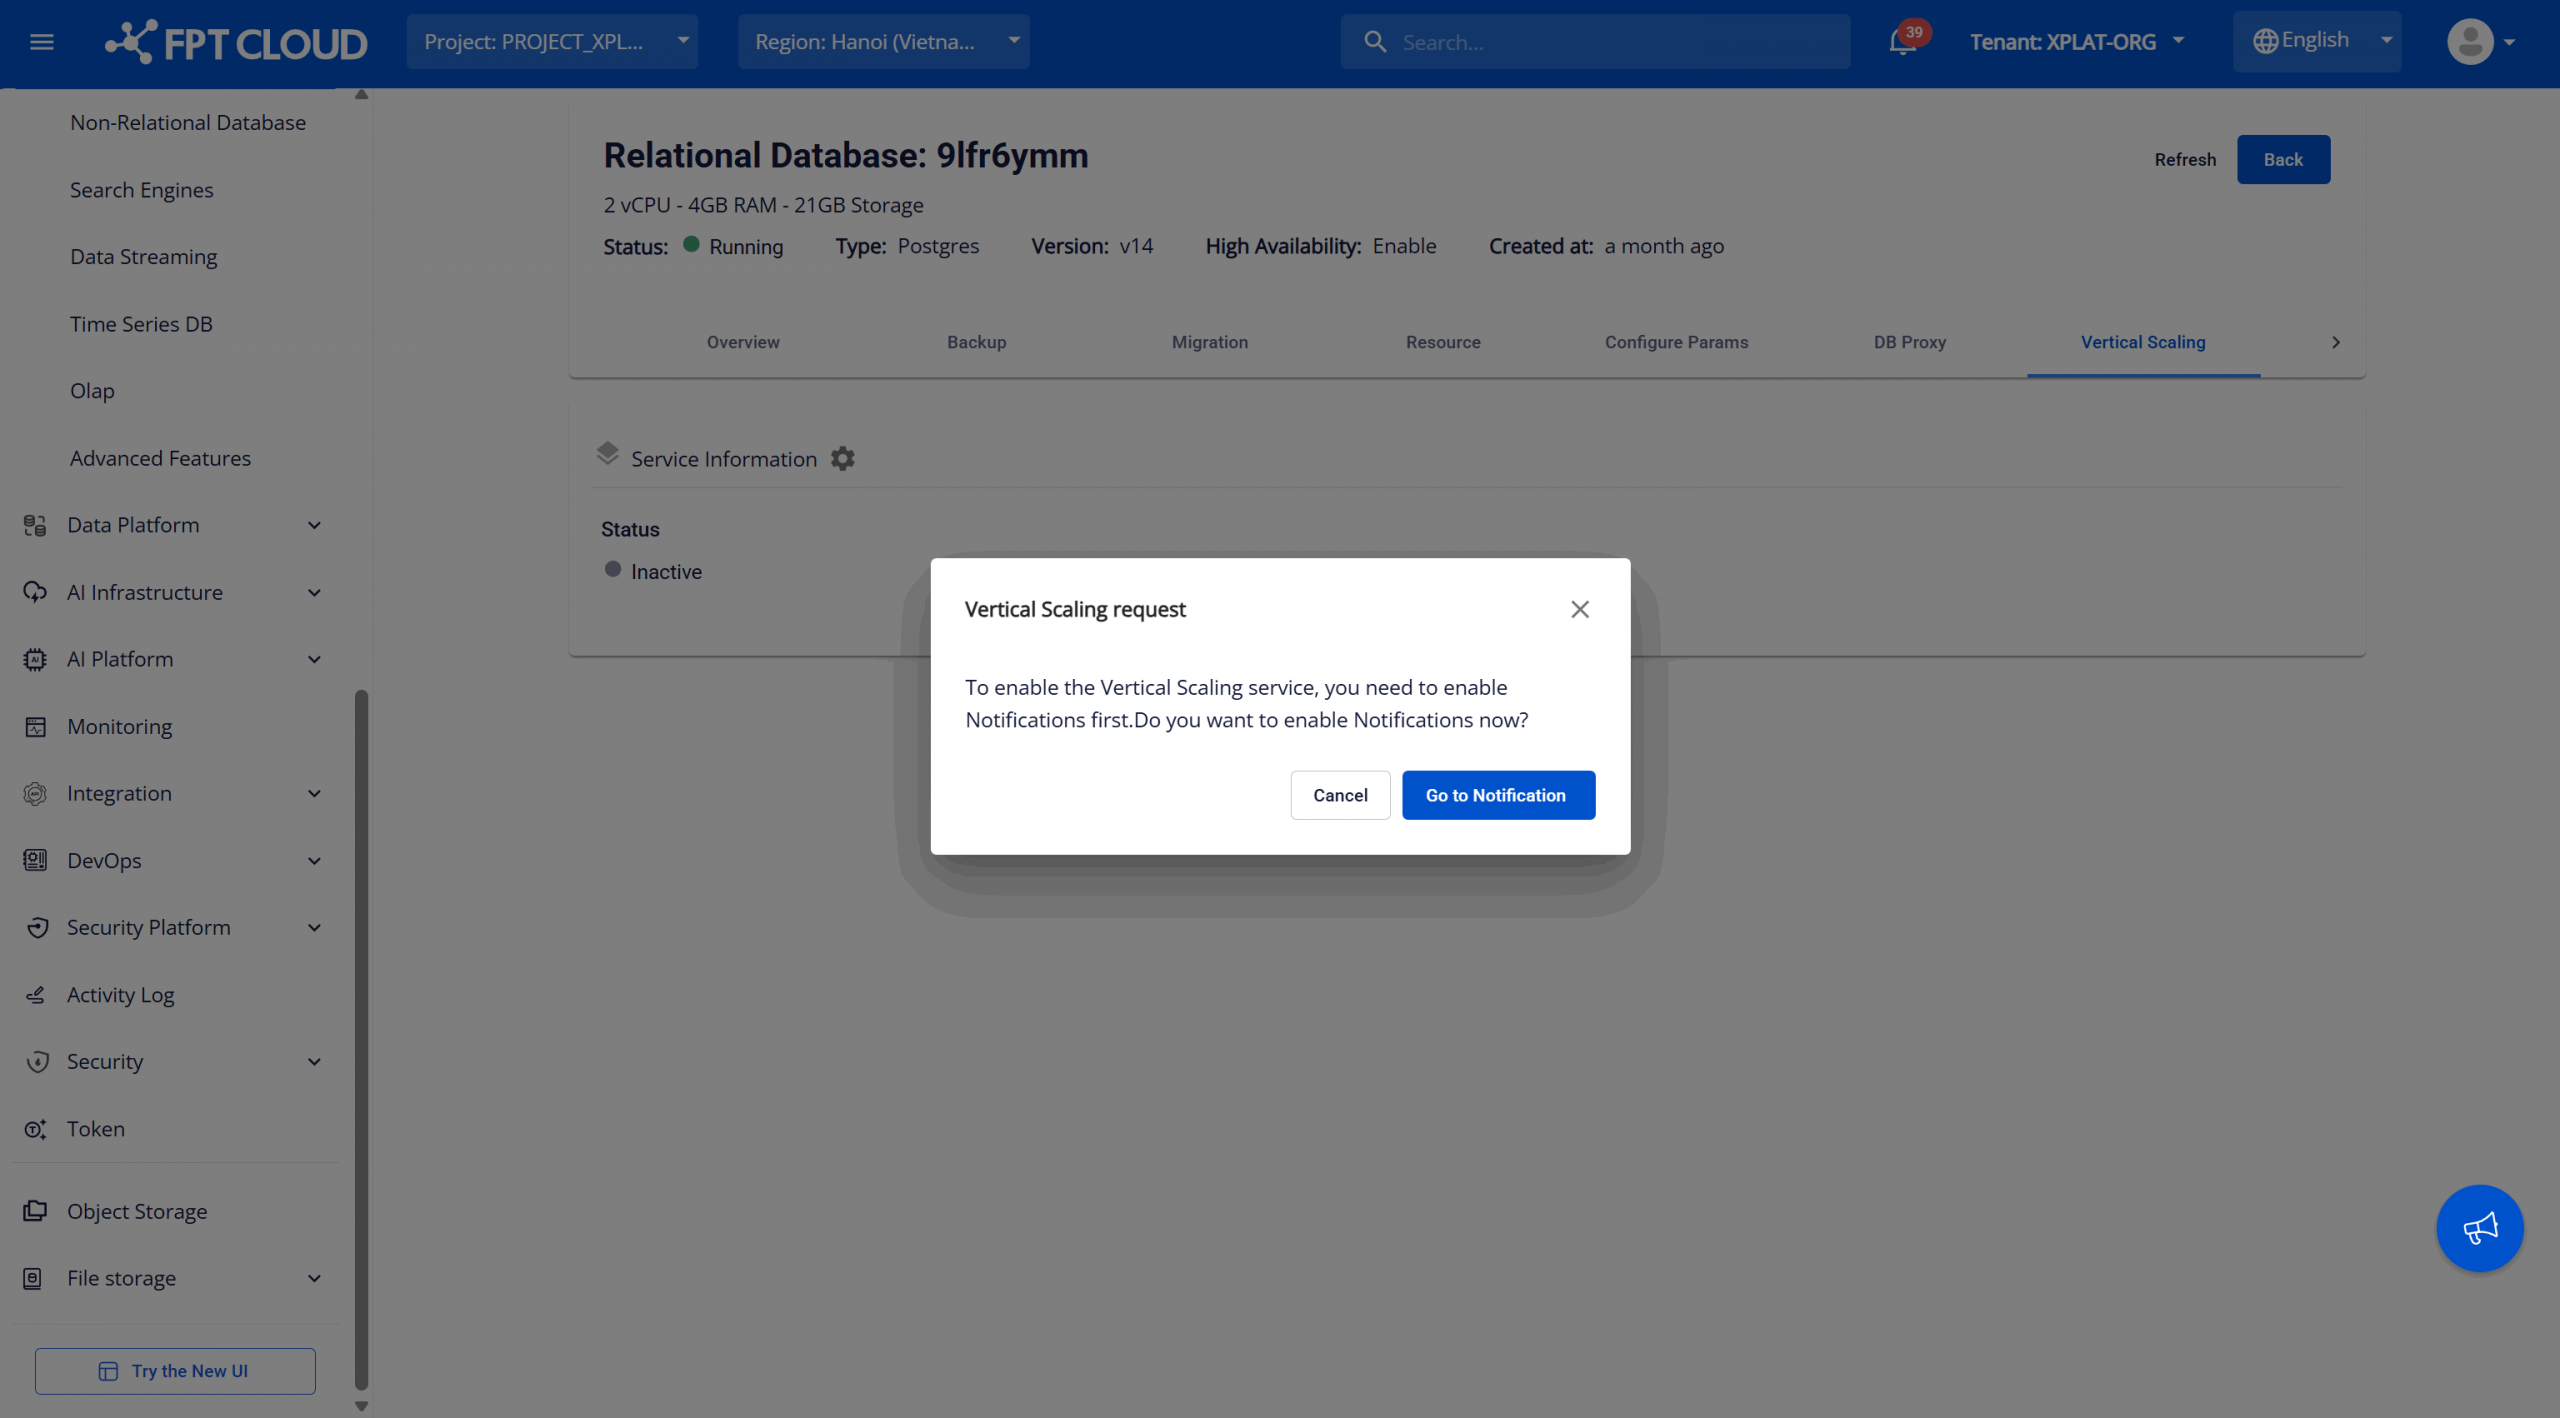
Click Go to Notification to navigate to the Notification tab and follow the instructions in Section 7.8. Notification.
Step 1: Access Vertical Scaling
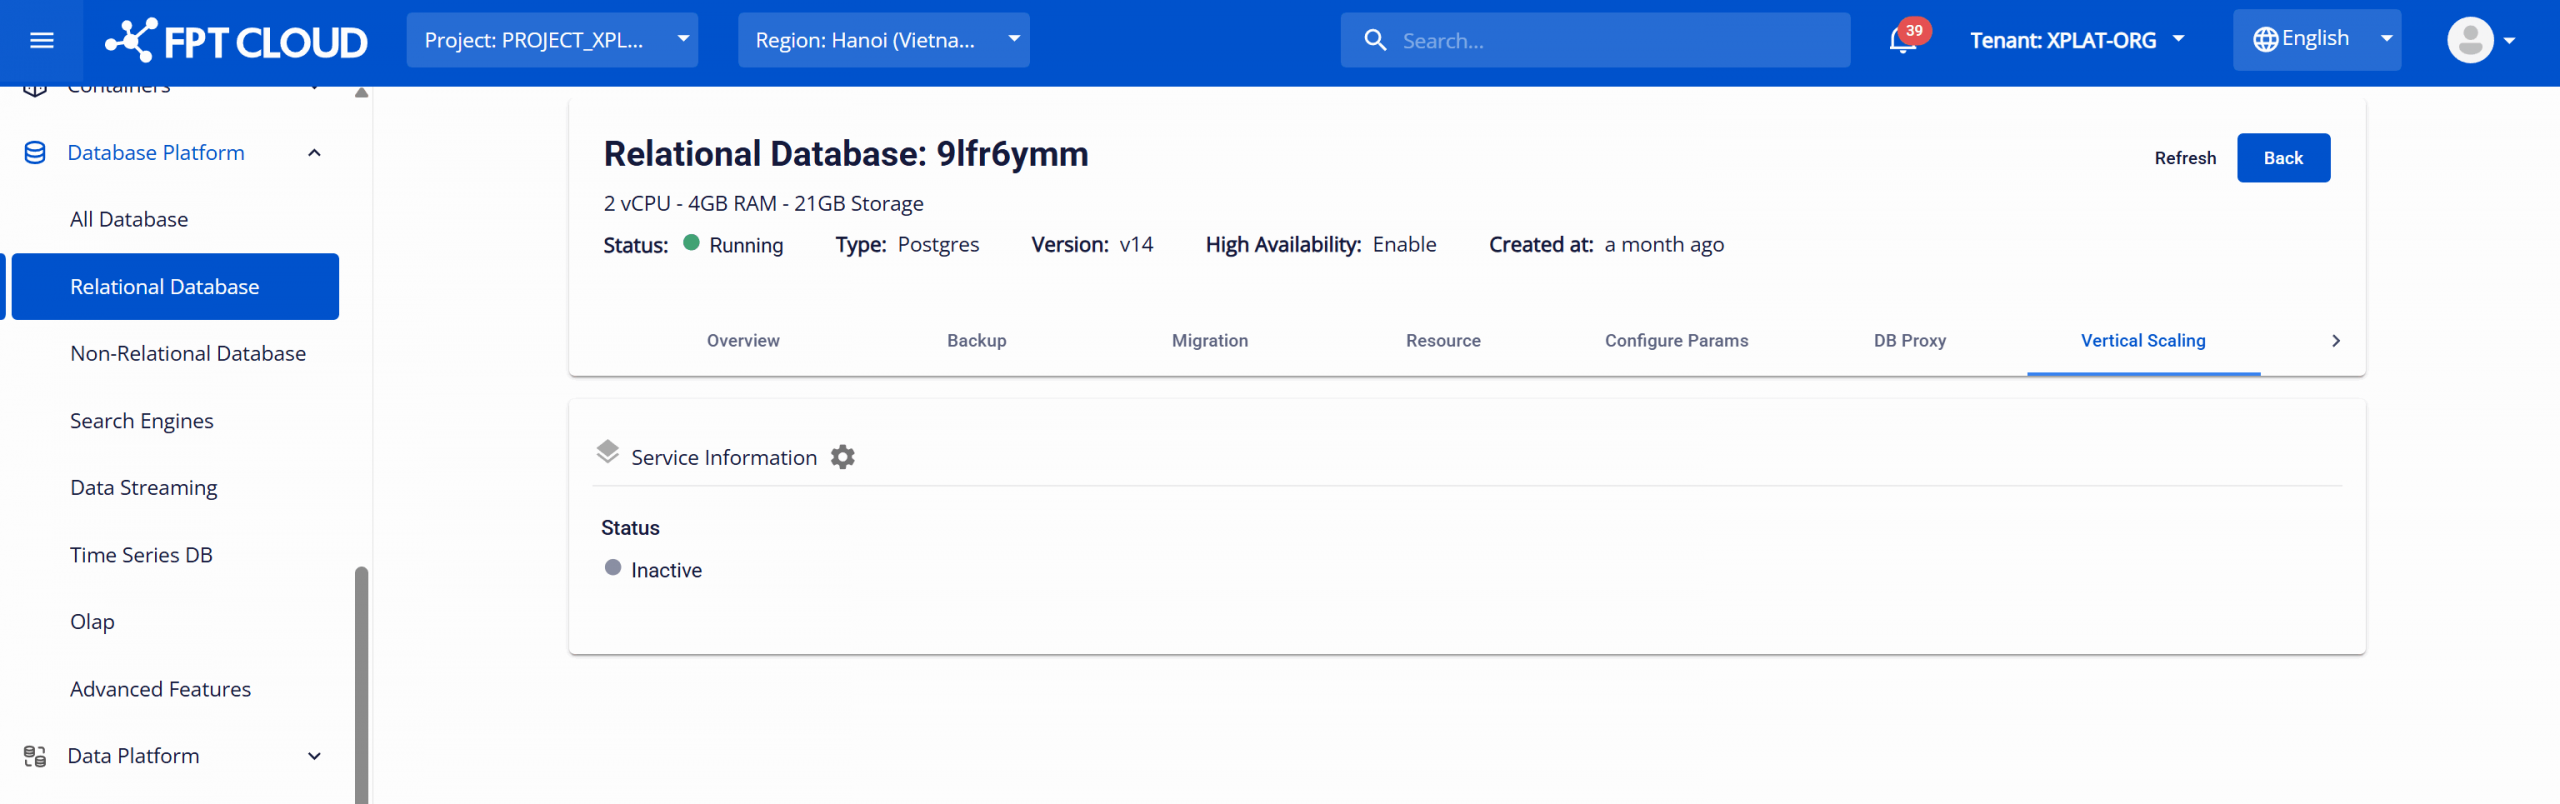
Log in to FPT Cloud Portal. From the main menu, select Database Platform → All Databases. Click the ID of the target database cluster. Switch to the Vertical Scaling tab to access the configuration management page. If the service has not been enabled, the Vertical Scaling page will display an Inactive status.
Step 2: Enabling Vertical Scaling
After the database cluster is successfully created, the Vertical Scaling service is set to Inactive by default. Click the Enable Vertical Scaling icon (gear icon) next to Service Information to open the confirmation dialog.
Click Confirm to enable the service. Once completed, the service status will change to Active as below:
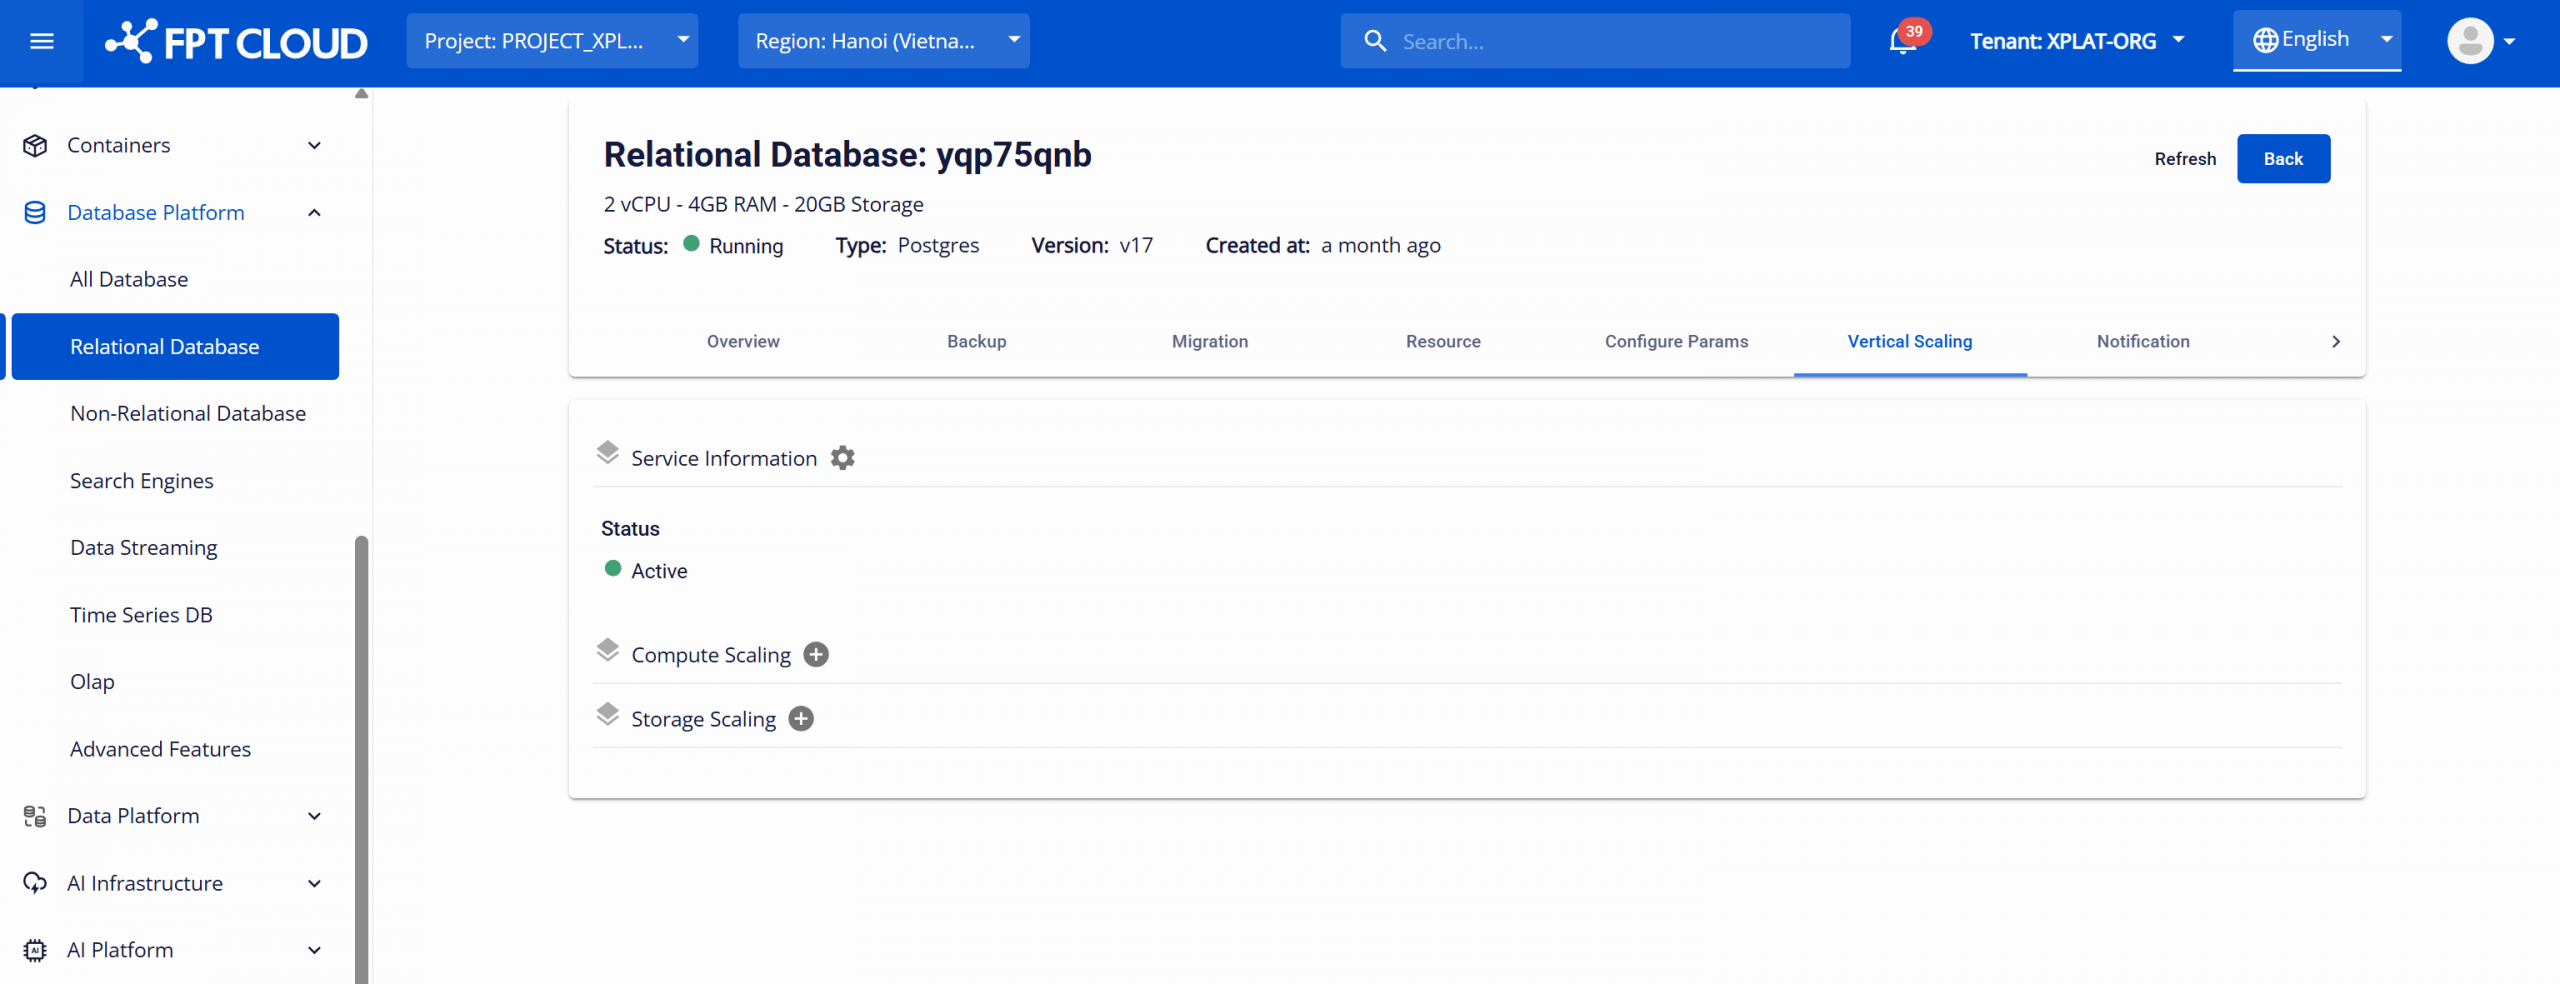
2. Configure Compute Scaling
On the Vertical Scaling page, click Add Flavor Scaling (plus icon) under Compute Scaling. The Add Compute Scaling dialog will appear, allowing you to configure automatic scaling for vCPU and RAM.
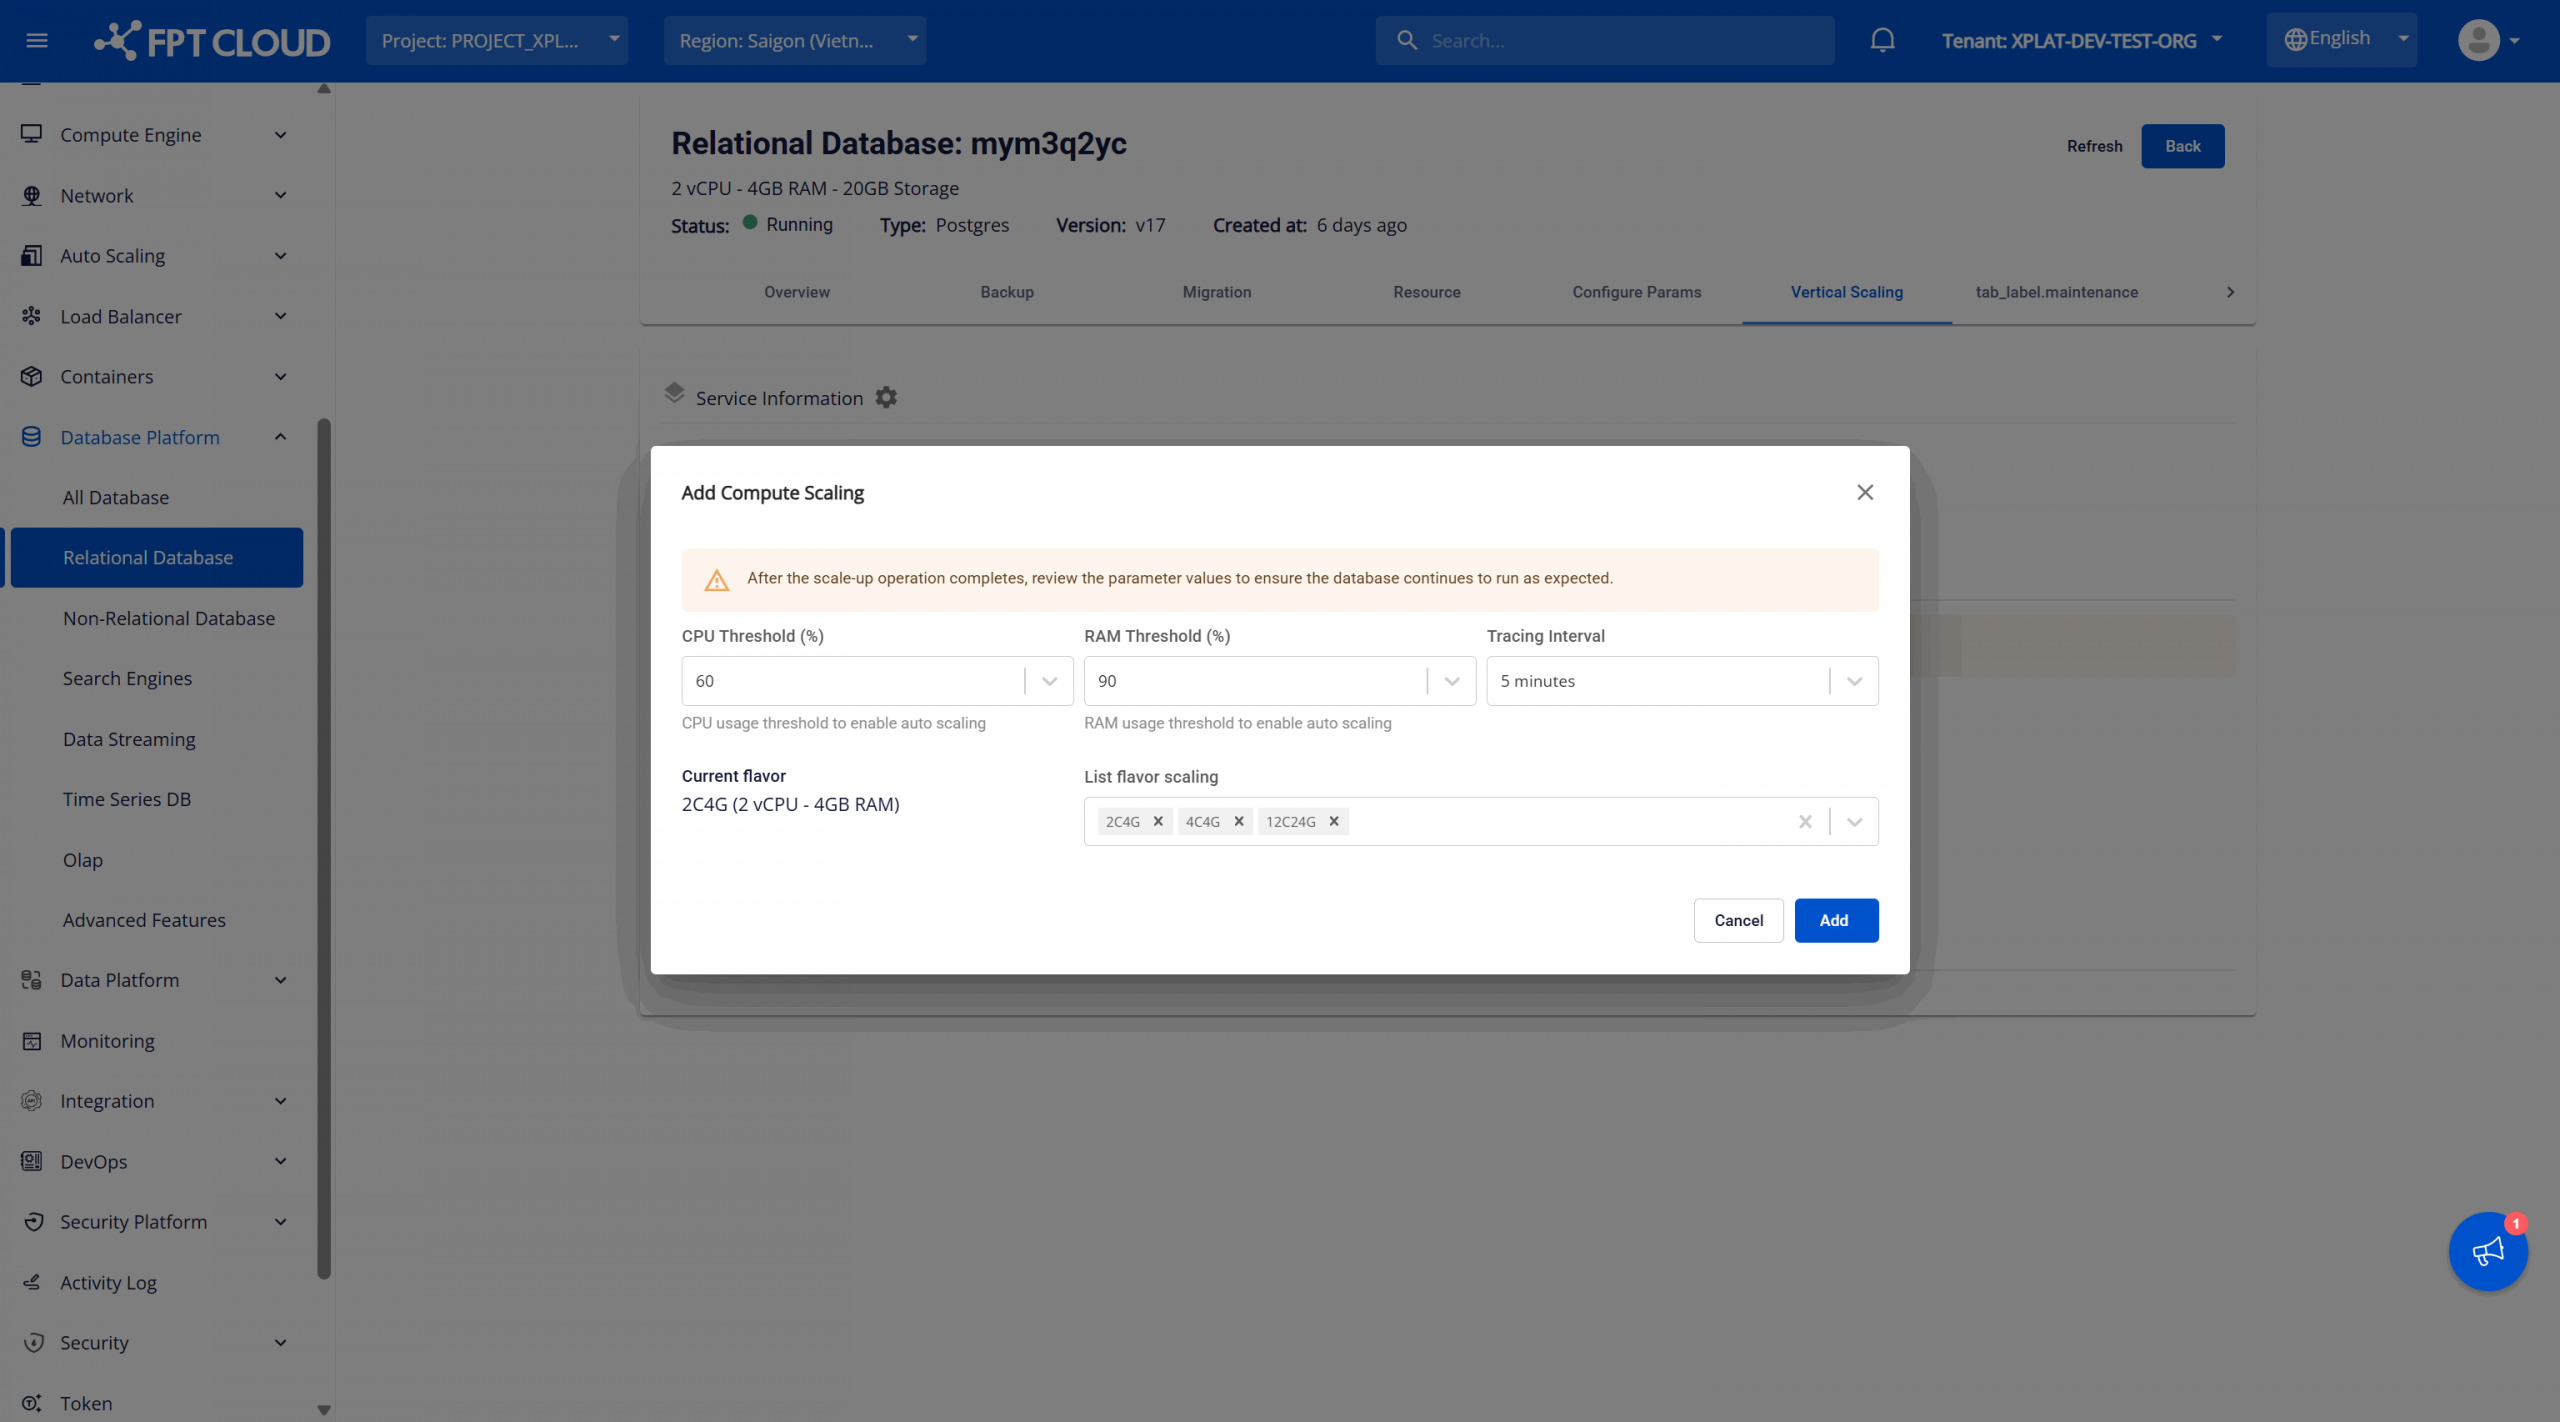
The required settings include:
- CPU Threshold (%): The CPU threshold defines the point at which the system will trigger resource scaling based on CPU usage. For example, if the CPU threshold is set to 60%, the system will automatically trigger scaling when CPU usage exceeds 60%.
- RAM Threshold (%): Similar to the CPU, the RAM threshold determines the trigger point for resource scaling when memory usage exceeds a certain value. For example, when RAM usage exceeds 50%, the system will automatically scale the resource.
- Tracing Interval: Time interval (in minutes) during which the system checks resource usage. For example, selecting 5 minutes will allow the system to monitor average CPU/RAM usage every 5 minutes.
- Current Flavor: Displays the current configuration of the instance, including the number of CPUs and allocated RAM. (e.g., Medium-4 (2 vCPU - 4GB RAM)).
- List Flavor Scaling: Select one or more flavors that the system is allowed to scale up. These flavors in the list will be selected sequentially when the threshold is exceeded. Example: Current flavor: Medium-4 and List flavor scaling: Medium-8, Large-2 When CPU or RAM exceeds the threshold, the system will scale up to Medium-8, and if the threshold is still exceeded, it will scale to Large-2.
After completing the configuration, click Add to save. The system will begin monitoring resources and automatically expand them when the conditions are met.
After successfully configuring the system, users can:
- Edit the configuration: click on Edit Compute Scaling (pencil icon in the Compute Scaling section) to adjust the values set for the configuration.
- Delete the configuration: click on Delete Compute Scaling (trash can icon in the Compute Scaling section) to stop the automatic resource scaling mechanism.
- Resource limits: Scaling is allowed only within the Available Resource quota. If the limit is exceeded, the system will prevent scale up.
- Threshold recomendation: Avoid setting thresholds too low (below 60%) to prevent continuous scaling.
- Restart database cluster: Some engines such as PostgreSQL and ClickHouse require a restart to apply new configurations when scaling compute resource. After the scaling process is complete, users need to manually restart the database cluster for the new configuration to take effect
- Regularly monitor CPU and RAM usage to proactively manage resource expansion requests.
3. Configure Storage Scaling
On the Vertical Scaling page, click Add Storage Scaling (plus icon) under Storage Scaling.
The Add Storage Scaling dialog will appear, allowing you to configure automatic scaling for vCPU and RAM.
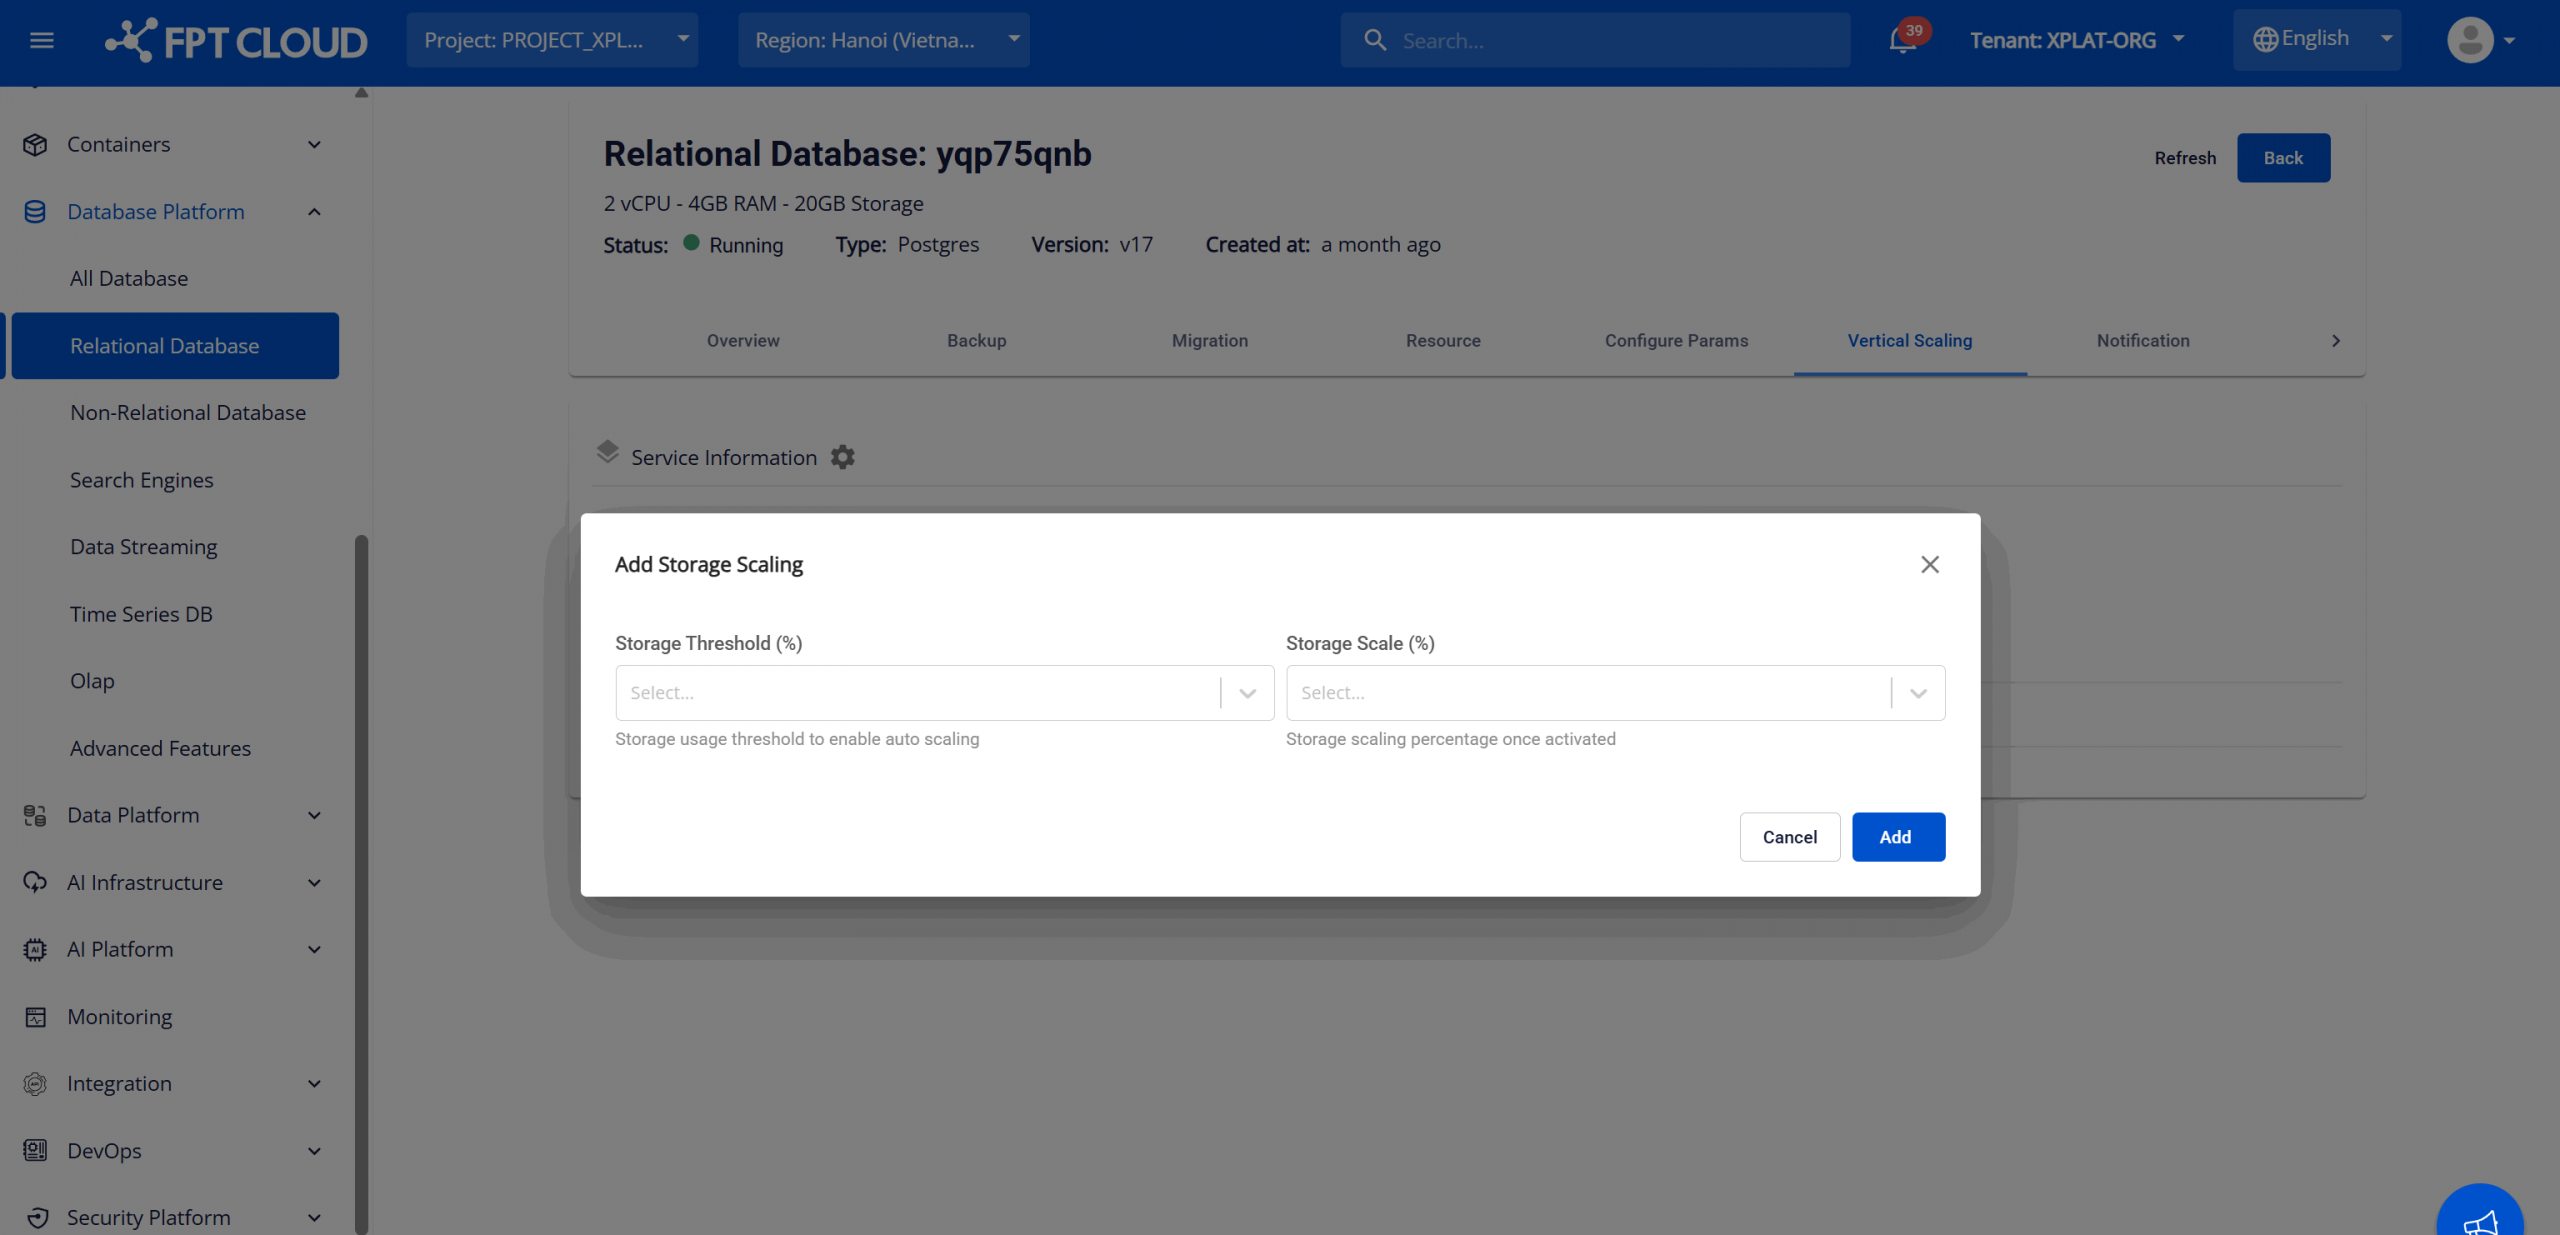
The required settings include:
- Storage Threshold (%): The storage threshold defines the trigger point for expansion when storage usage exceeds this value. For example, when storage usage exceeds 55%, the system will automatically trigger storage resource expansion.
- Storage Scale (%): The percentage of storage capacity will be expanded. For example: When the expansion rate is 20% → The system will automatically increase the storage capacity by 20% compared to the current total capacity. (If the current capacity is 100 GB → After scaling, the new capacity will be 120 GB).
After setting the storage scaling options, click Add to save the configuration. The system will begin monitoring storage usage at the default interval. When storage usage exceeds the Storage Threshold, the system will scale up the storage by the specified percentage (Storage Scale). The scaling process occurs online, without causing any service disruptions.
After successfully configuring the system, users can:
- Edit the configuration: click on Edit Storage Scaling (pencil icon in the Storage Scaling section) to adjust the values set for the configuration.
- Delete the configuration: click on Delete Storage Scaling (trash can icon in the Storage Scaling section) to stop the automatic resource scaling mechanism.
Important Notes:
- Resource limits: Scaling can only occur within the Available Resource (quota). If the limit is exceeded, the system will prevent scale up.
- Scaling frequency: Avoid setting the threshold too low (e.g., below 70%) to prevent constant scaling that could waste resources.
- Non-reducible scaling: Once storage is scaled up, it cannot be reduced back.