- About Us
-
 Secure, unlimited storage to ensures efficiency as well as high and continuous data access demand.
 Virtual server integration for 3D Rendering, AI or ML
 Enhance application capacity and availability.
 Access to an all-inclusive stack for AI development, driven by NVIDIA’s powerful technology!
 FPT Web Application Firewall provides powerful protection for web applications
 Advanced virtual server with rapid scalability
 Backup and restore data instantly, securely and maintain data integrity.
Advanced virtual server with rapid scalability
Access to an all-inclusive stack for AI development, driven by NVIDIA’s powerful technology!
Enhance application capacity and availability.
Backup and restore data instantly, securely and maintain data integrity.
Recovery, ensuring quick operation for the business after all incidents and disasters.
Backup and restore data instantly, securely and maintain data integrity.
Advanced virtual server with rapid scalability
Access to an all-inclusive stack for AI development, driven by NVIDIA’s powerful technology!
Enhance application capacity and availability.
Backup and restore data instantly, securely and maintain data integrity.
Recovery, ensuring quick operation for the business after all incidents and disasters.
 Diverse throughput and capacity to meet various business workloads.
Secure, unlimited storage to ensures efficiency as well as high and continuous data access demand.
FPT Web Application Firewall provides powerful protection for web applications
Intelligent and Comprehensive Virtual Web Application Firewall - Security Collaboration between FPT Cloud and Penta Security.
The Next generation firewall security service
Easily store, manage, deploy, and secure Container images
Safe, secure, stable, high-performance Kubernetes platform
Provided as a service to deploy, monitor, backup, restore, and scale MongoDB databases on cloud.
Provided as a service to deploy, monitor, backup, restore, and scale Redis databases on cloud.
Provided as a service to deploy, monitor, backup, restore, and scale PostgreSQL databases on cloud. System Monitoring Solution anywhere, anytime, anyplatform
 Helps reduce operational costs by up to 40% compared to traditional BI solutions, while improving efficiency through optimized resource usage and infrastructure scaling.
 - Pricing
- Partner
- Event
Managed – FPT Database Engine
-
 Concepts
-
 Initial Setup
-
 Tutorials
-
 Peformance & Benchmark
-
 Troubleshooting
-
 FAQs
FAQs
-
 Glossary
-
The Report Schedules function allows users to create, manage, and monitor schedules for automatically sending reports on backup activities for database clusters over selected periods. Instead of manually accessing the system to export reports, users can set up schedules for the system to automatically send periodic reports to predefined email addresses. Reports are sent as CSV files.
To create a report submission schedule, follow these steps:
Step 1: Access the Reporting schedule management
Select Database Platform on the menu bar, then select Advanced Features to open the Advanced Features screen.
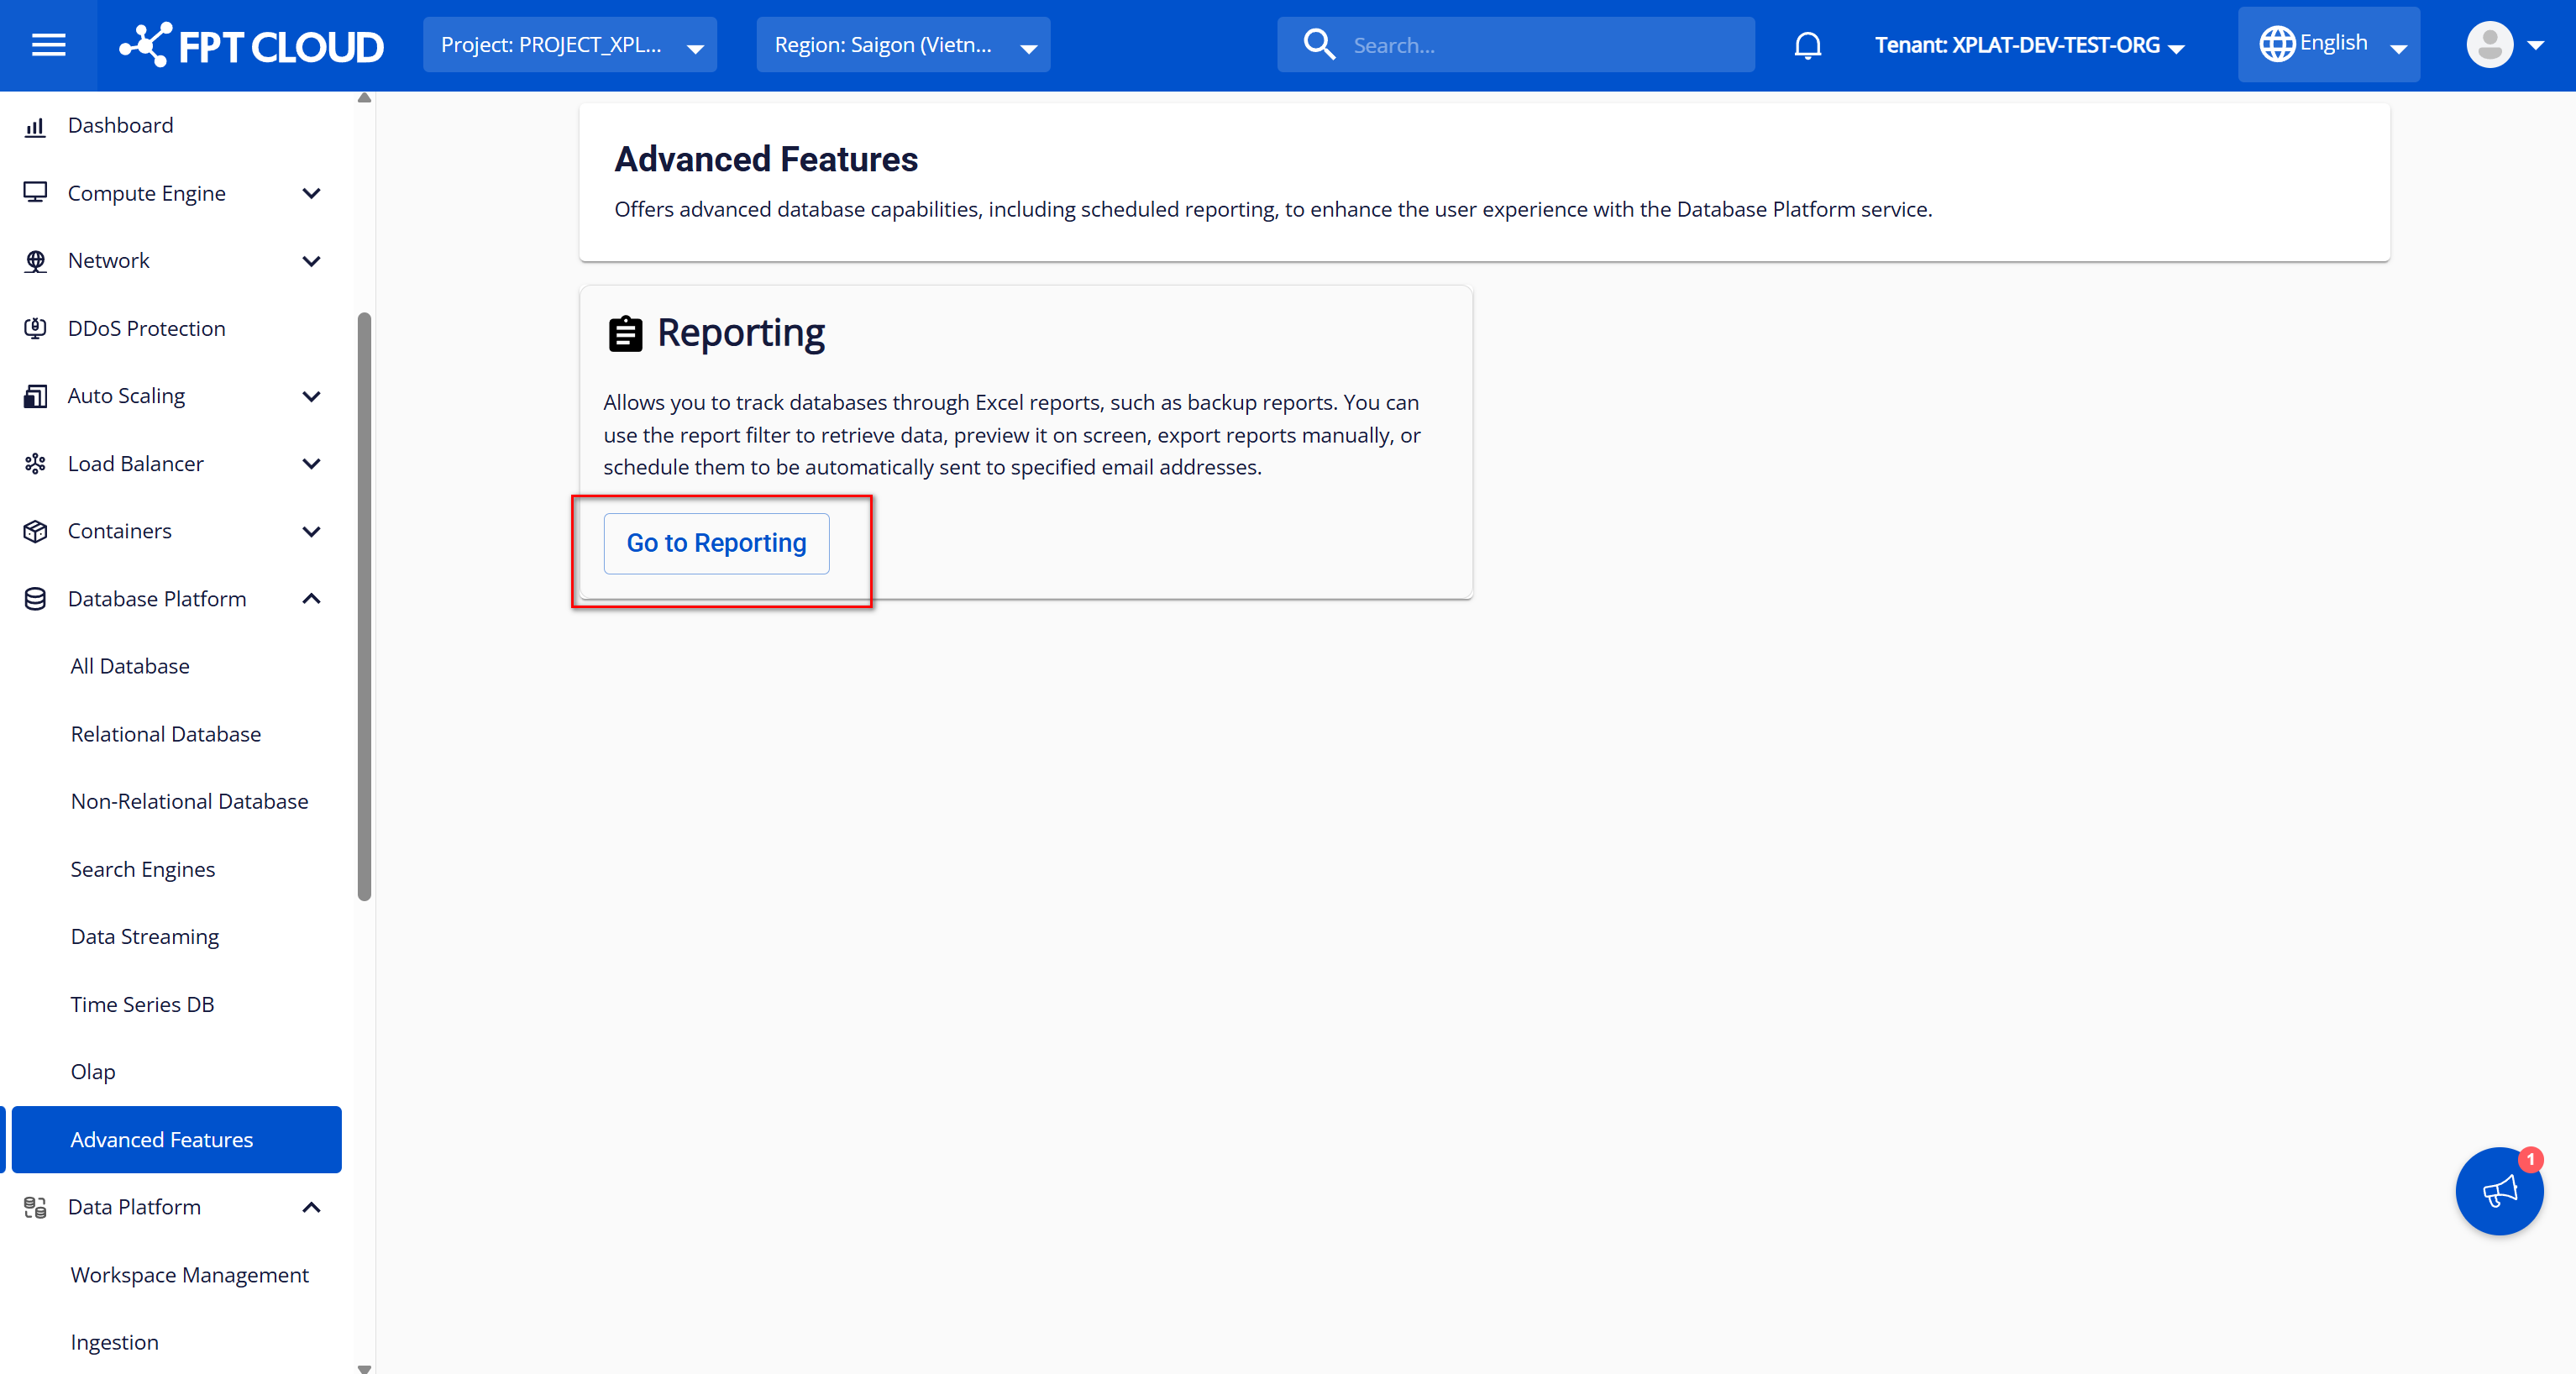
On the Advanced Features screen, click Go to Reporting to open the Reporting screen. When the Reporting interface appears, select the Report Schedules tab to view the list of existing report schedules. If no schedules have been created, the list displays "Nothing Found."
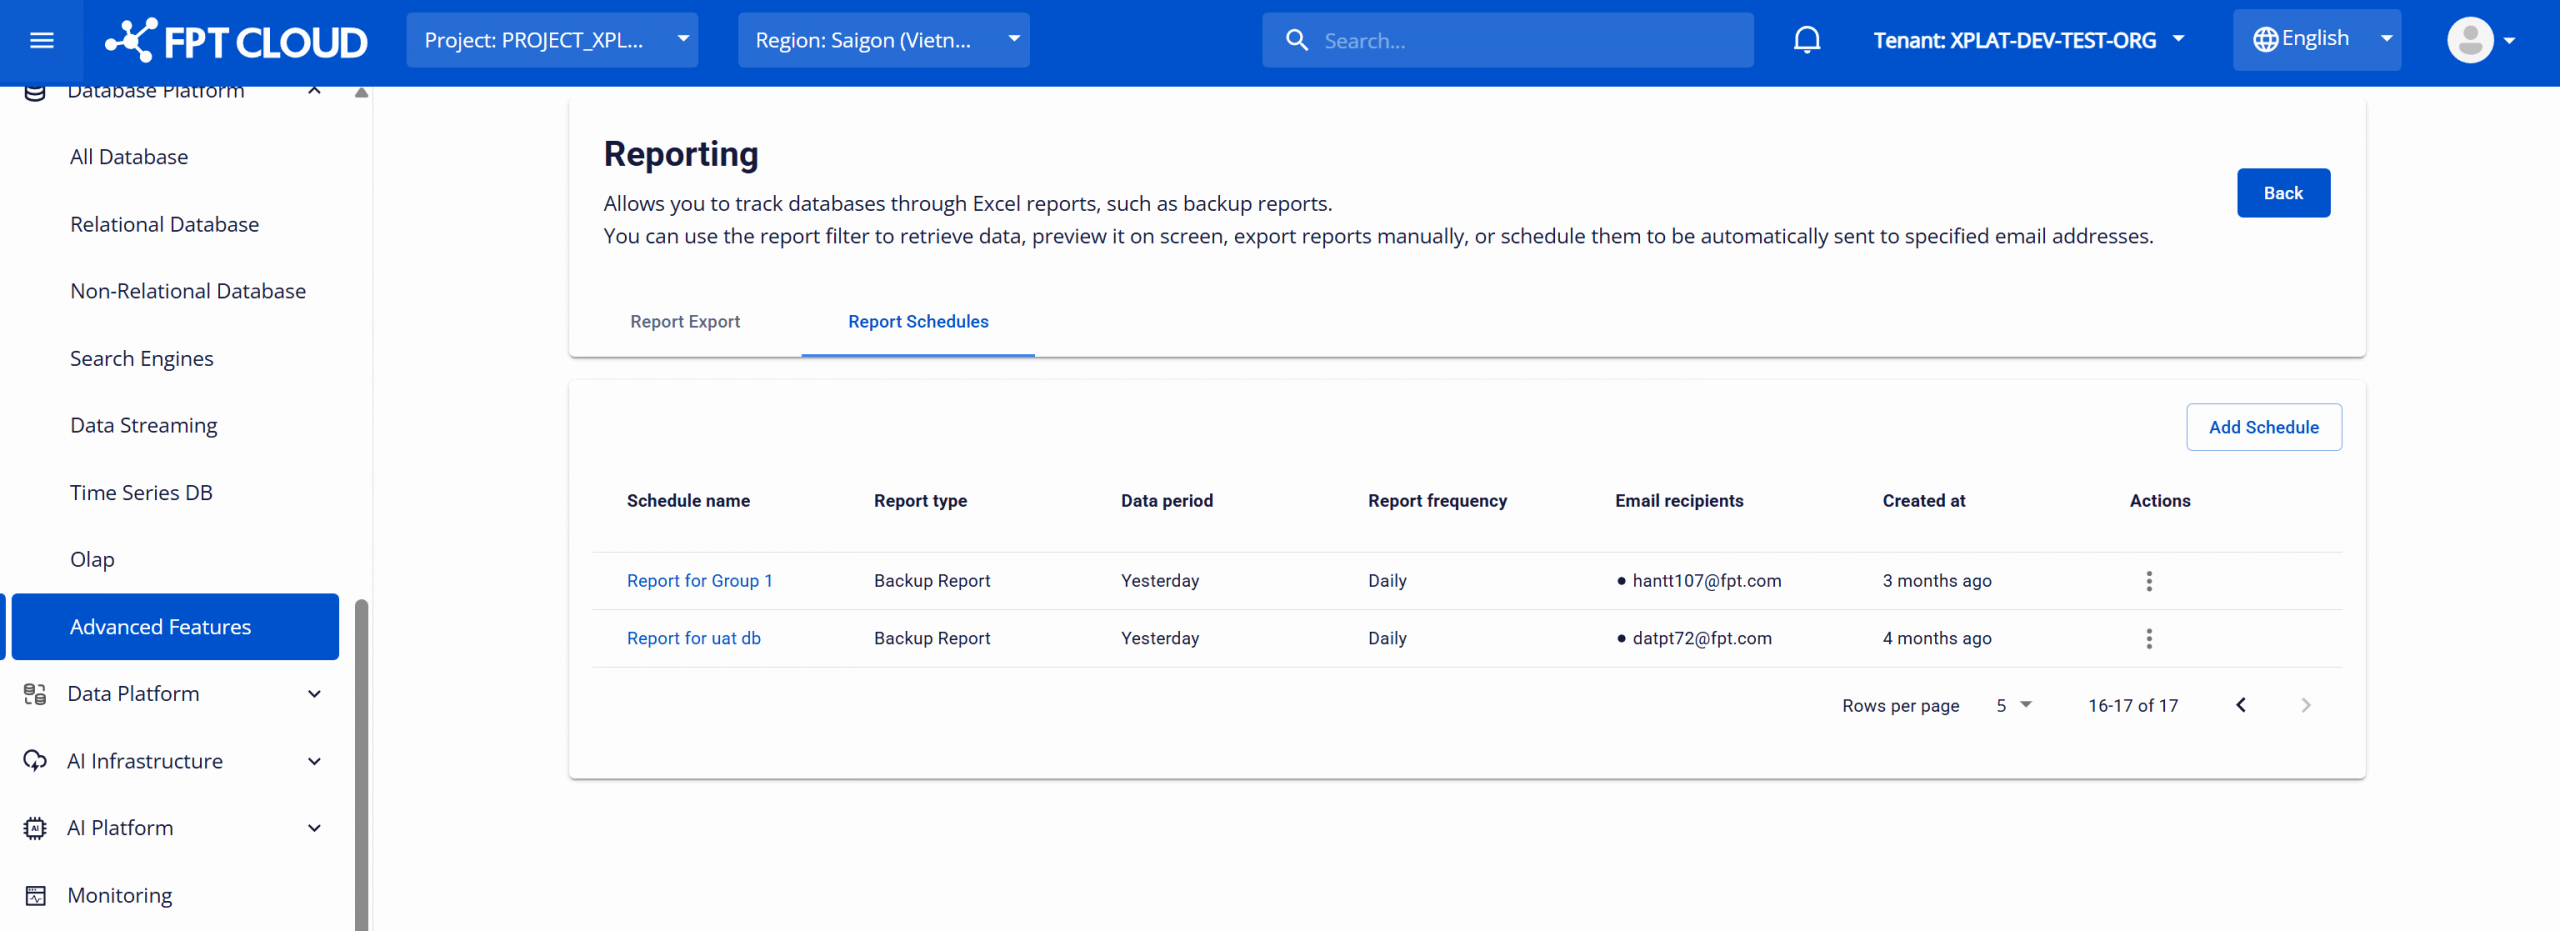
Displayed information for each schedule:
| Column Name | Description |
|---|---|
| Schedule name | Name of the schedule |
| Report type | Report type (e.g., Backup Report) |
| Data period | Data period for each report (e.g. Daily, Weekly, Monthly) |
| Report frequency | Report sending frequency (e.g., Daily, Weekly, Monthly) |
| Email recipients | List of email addresses receiving the report |
| Created at | Schedule creation time |
| Action | Options to edit (Edit) or delete (Delete) the schedule |
Step 2: Create a new report schedule
On the Report Schedules screen, click the Add Schedule button in the top-right corner to open the Add a Report Schedule screen.
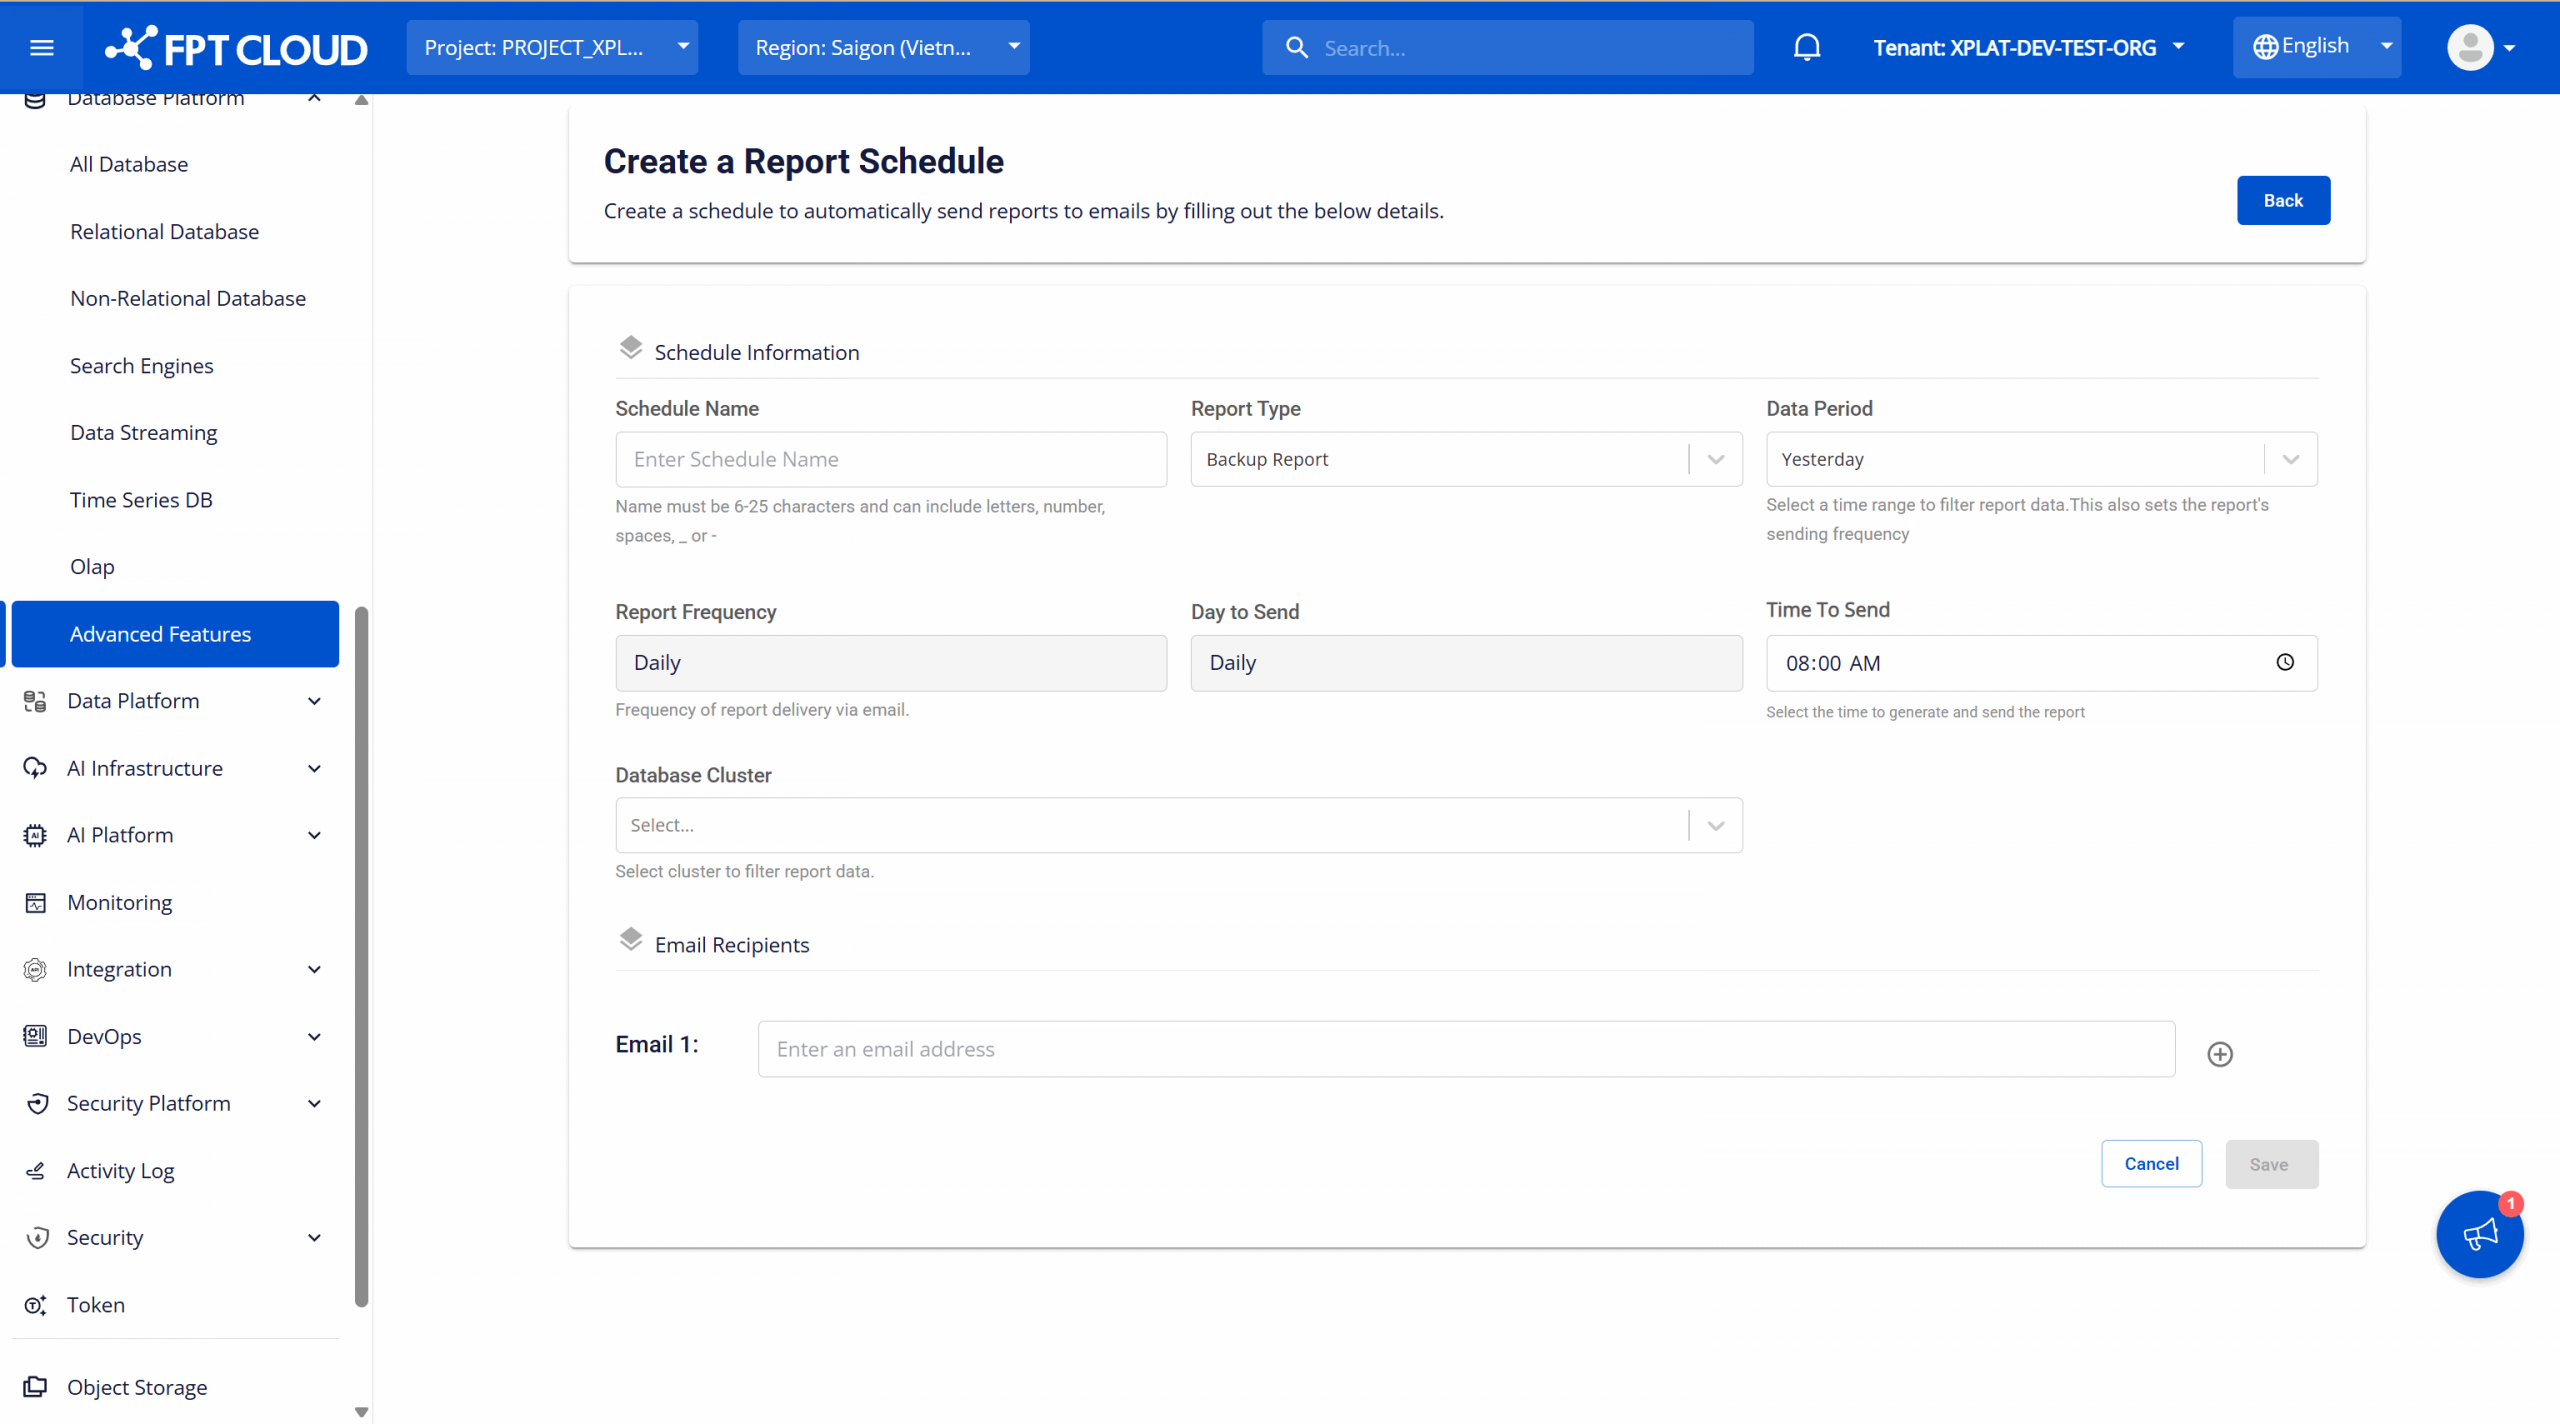
Enter configuration information for the schedule:
-
Schedule Name: Enter a name for the schedule. The name should clearly describe the schedule's purpose (maximum 25 characters, minimum 6 characters, containing only English letters, numbers, spaces, underscores (_), and hyphens (-)). Example: Report_for_group1, Report for group 2.
-
Report Type: Select the report type from the available list. Currently, only the backup service report is provided, so the list has one value that is Backup Report and will be selected by default. Additional values will be added when other report types are provided.
-
Data Period: Select the data time period to be retrieved for each report generation. Changing the value of Data Period will automatically update the values of the Report Frequency and Day To Send fields depending on the selected case (see descriptions for each field below). The available options are:
- Yesterday: Retrieves data from the day immediately preceding the current date (current date − 1). Example: If the report is generated on April 17, 2025, the report data covers April 16, 2025.
- Last 7 days: Retrieves data for the seven consecutive days prior to the current date, ranging from current date − 7 to current date − 1. Example: If the report is generated on April 17, 2025, the report data covers April 10, 2025 to April 16, 2025.
- Last 30 days: Retrieves data for the thirty consecutive days prior to the current date, ranging from current date − 30 to current date − 1. Example: If the report is generated on April 17, 2025, the report data covers March 18, 2025 to April 16, 2025.
- Last month: Retrieves data for the entire previous calendar month, from the first day to the last day of that month. Example: If the report is generated on April 17, 2025, the report data covers March 1, 2025 to March 31, 2025.
-
Report Frequency: The frequency at which the schedule runs. Values include Daily, Weekly and Monthly. This field’s value automatically changes based on the selected Data Period:
- If "Yesterday" is selected for Data Period, Report Frequency displays "Daily" (reports sent daily).
- If "Last 7 days" is selected for Data Period, Report Frequency displays "Weekly" (reports sent Weekly).
- If "Last 30 days" or "Last Month" is selected for Data Period, Report Frequency displays "monthly" (reports sent monthly).
-
Day To Send: Select the day on which the schedule runs. This field’s value changes based on the selected Data Period:
- If "Yesterday" is selected for Data Period, Day To Send displays "Daily" (schedule runs every day) and cannot be edited
- If "Last 7 days" is selected for Data Period, the options include weekdays: "Monday", "Tuesday", "Wednesday", "Thursday", "Friday", "Saturday" and "Sunday" (schedule runs on the selected weekday)
- If "Last 30 days" or "Last Month" is selected for Data Period, the options include days 1–31 (schedule runs on the selected day of the month). If the selected day does not exist in a given month (e.g., day 31 in February), the schedule runs on the last day of that month.
-
Time To Send: Select the time of day when the schedule runs.
-
Database Cluster: Select the databases from which data will be retrieved for the report (multiple selections possible). Options include:
- Select All: Select all databases in the list.
- o Databases belonging to the user's selected VPC.
-
Email Recipients: Enter the list of email addresses that will receive the report. Ensure emails are entered accurately to avoid delivery issues. Use the (+) button to add an email and the (–) button to remove one
- Each email must follow the standard email format (username + "@" + domain).
- Duplicate emails are not allowed.
After entering all information, click Save to create the schedule. The system returns to the list screen, with the newly created schedule displayed at the top.
At the configured run time, the schedule executes, retrieves data for the specified period and selected database clusters, generates a CSV file, and sends it to the registered email addresses.
If needed, you can perform the following actions on the created schedule:
- View schedule details: On the Report Schedules screen, click the name of a schedule to view its configuration details and activity log.
- Edit a schedule: On the Report Schedules screen, select Edit in the Action column corresponding to the schedule to open the schedule configuration edit screen. Users can update information in the same way as when creating a new schedule. After entering all information fully, click the Edit button to save the changes. The system will return to the list screen with the updated information for the edited schedule.
- Delete a schedule: On the Report Schedules screen, select Delete in the Action column corresponding to the schedule to be deleted to display available actions. The system will display a confirmation dialog. Enter the confirm information and click Confirm to permanently delete the schedule. After deleting successfully, the system will stop sending reports to the configured email addresses.