- Giới thiệu
-
 Lưu trữ dữ liệu đối tượng không giới hạn và truy xuất dữ liệu liên tục
 Certified DBaaS (cơ sở dữ liệu theo dạng dịch vụ) đầu tiên của MongoDB tại Việt Nam
 Tích hợp với máy chủ ảo dành cho 3D Rendering, AI hay ML
 Nền tảng phân tích dữ liệu đáng tin cậy cho doanh nghiệp và chuyên gia, giúp tối ưu chi phí vận hành lên đến 40% so với giải pháp BI khác.
 Sản phẩm hợp tác giữa FPT Cloud và CyRadar, cung cấp dịch vụ tường lửa với khả năng bảo vệ mạnh mẽ cho các ứng dụng web
 Sản phẩm hợp tác giữa FPT Cloud và CyRadar, dịch vụ cung cấp khả năng rà quét toàn diện, phân tích chi tiết và đánh giá lỗ hổng bảo mật để tăng cường an ninh thông tin cho hệ thống ứng dụng doanh nghiệp
 Sao lưu và khôi phục dữ liệu tức thời, an toàn và toàn vẹn dữ liệu
 Trở thành doanh nghiệp đầu tiên trải nghiệm bộ giải pháp phát triển AI toàn diện, được phát triển trên công nghệ mạnh mẽ bậc nhất từ NVIDIA!
 Giải pháp làm việc từ xa hiệu quả và an toàn cho doanh nghiệp
 Dịch vụ máy chủ ảo tiên tiến với khả năng mở rộng nhanh chóng
 Hiệu năng mạnh mẽ với hạ tầng riêng biệt
Tích hợp với máy chủ ảo dành cho 3D Rendering, AI hay ML
Dịch vụ máy chủ ảo tiết kiệm đến 90% chi phí cho doanh nghiệp
Sao lưu và khôi phục dữ liệu tức thời, an toàn và toàn vẹn dữ liệu
Dịch vụ dự phòng & khôi phục hệ thống nhanh chóng
Lưu trữ khối đa dạng thông lượng và dung lượng cho mọi nhu cầu
Lưu trữ dữ liệu đối tượng không giới hạn và truy xuất dữ liệu liên tục Nâng cao năng lực, tính sẵn sàng của ứng dụng
Sản phẩm hợp tác giữa FPT Cloud và CyRadar, dịch vụ cung cấp khả năng rà quét toàn diện, phân tích chi tiết và đánh giá lỗ hổng bảo mật để tăng cường an ninh thông tin cho hệ thống ứng dụng doanh nghiệp
Sản phẩm hợp tác giữa FPT Cloud và CyRadar, cung cấp dịch vụ tường lửa với khả năng bảo vệ mạnh mẽ cho các ứng dụng web
Dịch vụ tường lửa thông minh cho các ứng dụng web - Giải pháp bảo mật đột phá với sự hợp tác giữa FPT Cloud và Penta Security.
Dịch vụ bảo mật tường lửa thế hệ mới
Lưu trữ, quản lý, và bảo mật các Docker Images
Nền tảng Kubernetes an toàn, bảo mật, ổn định, hiệu năng cao
Nâng cao năng lực, tính sẵn sàng của ứng dụng
Sản phẩm hợp tác giữa FPT Cloud và CyRadar, dịch vụ cung cấp khả năng rà quét toàn diện, phân tích chi tiết và đánh giá lỗ hổng bảo mật để tăng cường an ninh thông tin cho hệ thống ứng dụng doanh nghiệp
Sản phẩm hợp tác giữa FPT Cloud và CyRadar, cung cấp dịch vụ tường lửa với khả năng bảo vệ mạnh mẽ cho các ứng dụng web
Dịch vụ tường lửa thông minh cho các ứng dụng web - Giải pháp bảo mật đột phá với sự hợp tác giữa FPT Cloud và Penta Security.
Dịch vụ bảo mật tường lửa thế hệ mới
Lưu trữ, quản lý, và bảo mật các Docker Images
Nền tảng Kubernetes an toàn, bảo mật, ổn định, hiệu năng cao Tăng tốc phát triển ứng dụng yêu cầu hiệu năng cao bằng dịch vụ Kubernetes tích hợp với vi xử lý cao cấp GPU
Giám sát và triển khai cơ sở dữ liệu như Kafka,..
Tăng tốc phát triển ứng dụng yêu cầu hiệu năng cao bằng dịch vụ Kubernetes tích hợp với vi xử lý cao cấp GPU
Giám sát và triển khai cơ sở dữ liệu như Kafka,..
Certified DBaaS (cơ sở dữ liệu theo dạng dịch vụ) đầu tiên của MongoDB tại Việt Nam
Giám sát và triển khai cơ sở dữ liệu Redis, Cassandra, ...
Giám sát và triển khai cơ sở dữ liệu xử lý phân tích trực tuyến
Giám sát và triển khai cơ sở dữ liệu MySQL, Postgres, SQLserver, MariaDB,...
Giám sát và triển khai cơ sở dữ liệu truy vấn thông tin
Giám sát và triển khai cơ sở dữ liệu chuỗi thời gian
Giám sát hệ thống và tài nguyên toàn diện trên mọi nền tảng Giải pháp quản lý sự cố thông minh
 Dịch vụ cung cấp giải pháp khởi tạo và quản lý FPT ArgoCD được tạo ra từ dự án mã nguồn mở Argo
Nền tảng tự động hoá bảo mật trong quy trình phát triển phần mềm
Dịch vụ cung cấp giải pháp khởi tạo và quản lý FPT ArgoCD được tạo ra từ dự án mã nguồn mở Argo
Nền tảng tự động hoá bảo mật trong quy trình phát triển phần mềm Tăng cường khả năng quản lý tài sản dữ liệu doanh nghiệp
 Quản lý dữ liệu liền mạch & toàn diện
Truy vấn, quản lý, trực quan hóa dữ liệu hiệu quả
Tăng tốc độ xử lý, đảm bảo tính nhất quán cho ứng dụng
Nền tảng phân tích dữ liệu đáng tin cậy cho doanh nghiệp và chuyên gia, giúp tối ưu chi phí vận hành lên đến 40% so với giải pháp BI khác.
Trở thành doanh nghiệp đầu tiên trải nghiệm bộ giải pháp phát triển AI toàn diện, được phát triển trên công nghệ mạnh mẽ bậc nhất từ NVIDIA!
Nền tảng hội thoại thông minh gắn kết khách hàng trên mọi nền tảng
Xác thực nhanh chóng, dễ dàng, tối ưu chi phí
Nâng tầm trải nghiệm khách hàng
Quản lý dữ liệu liền mạch & toàn diện
Truy vấn, quản lý, trực quan hóa dữ liệu hiệu quả
Tăng tốc độ xử lý, đảm bảo tính nhất quán cho ứng dụng
Nền tảng phân tích dữ liệu đáng tin cậy cho doanh nghiệp và chuyên gia, giúp tối ưu chi phí vận hành lên đến 40% so với giải pháp BI khác.
Trở thành doanh nghiệp đầu tiên trải nghiệm bộ giải pháp phát triển AI toàn diện, được phát triển trên công nghệ mạnh mẽ bậc nhất từ NVIDIA!
Nền tảng hội thoại thông minh gắn kết khách hàng trên mọi nền tảng
Xác thực nhanh chóng, dễ dàng, tối ưu chi phí
Nâng tầm trải nghiệm khách hàng
Trích xuất dữ liệu vượt mọi giới hạn
Chuyển văn bản thành giọng nói tiếng Việt với ngữ điệu tự nhiên.
- Bảng giá
- Sự kiện
Managed – FPT Database Engines
-
 Concepts
-
 Thiết lập ban đầu (Initial Setup)
-
 Hướng dẫn chi tiết
-
 Peformance & Benchmark
-
 Troubleshooting
-
 Các câu hỏi thường gặp (FAQs)
-
 Glossary
-
1. Export Data Tier Application via SSMS tool
Connect to a SQL instance and expand databases in the object explorer. Right-click on a database in SSMS and you get data-tier application options as shown below.
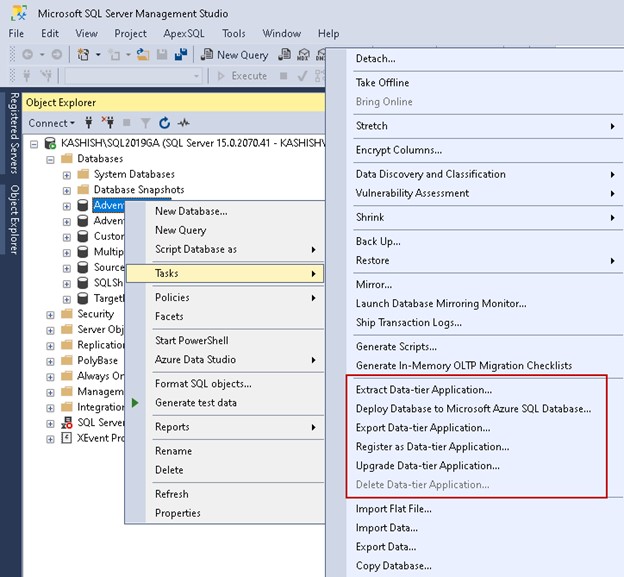
Right-click on the source SQL Database and click on Export Data-tier application. It launches an introduction page. This introduction page defies the summary and high-level steps for this wizard. The high-level steps are as follows:
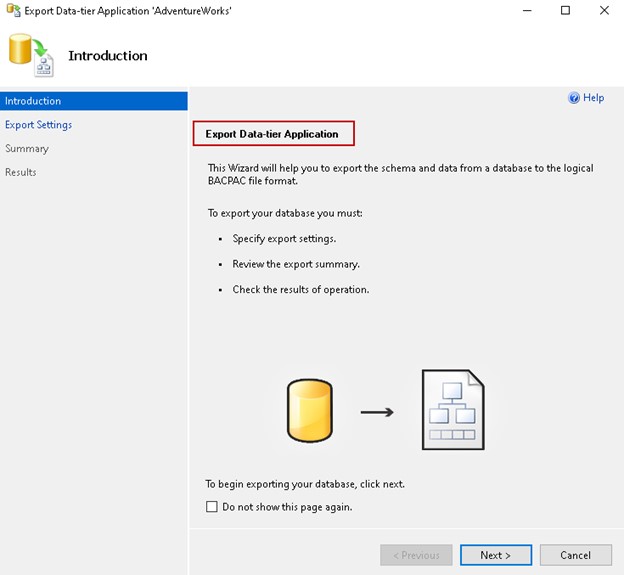
Click Next, and it takes you to the Export setting page.
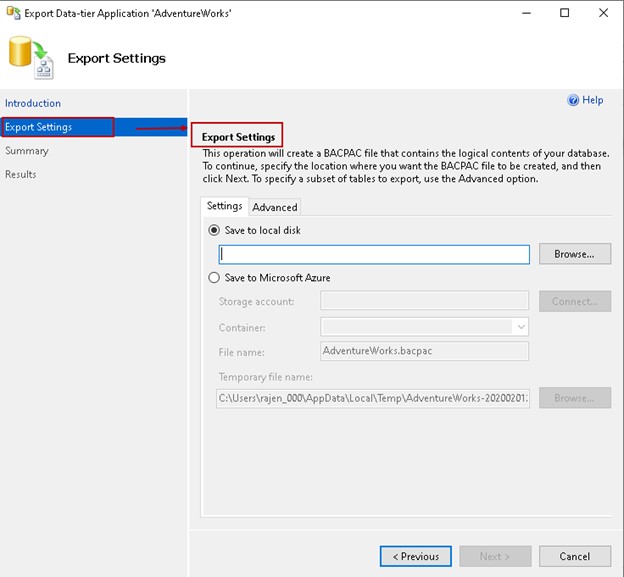
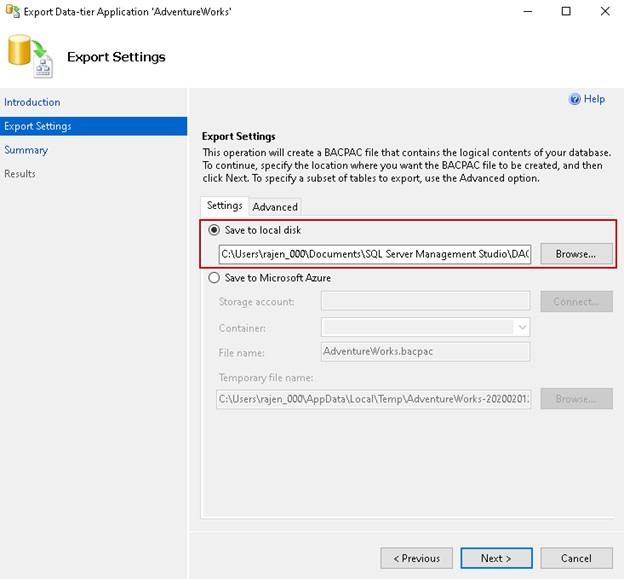
Let’s use a local disk directory, as shown below.
By default, it extracts all schema, tables (with data) available in the database. We can also filter selected objects in the advanced page select all database schema, tables in the advanced tab of this page. Click on the advanced tab and review the objects. It groups objects per schema such as dbo.
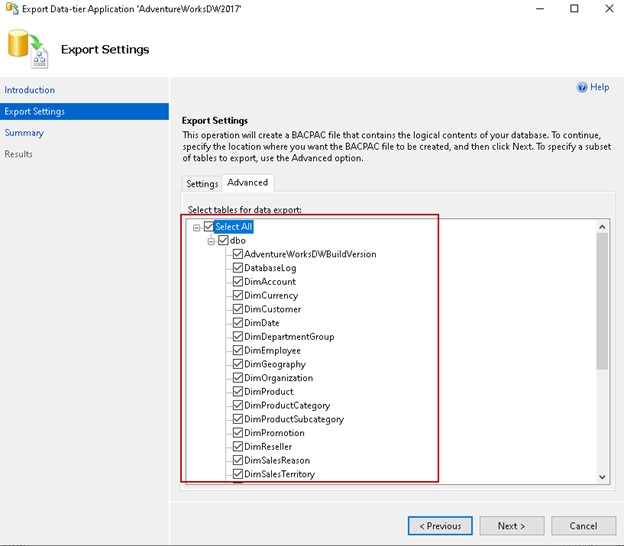
We are not using any object filtering in BACPAC export. It will create an export for all tables in the database. Click on Next and review the configurations.
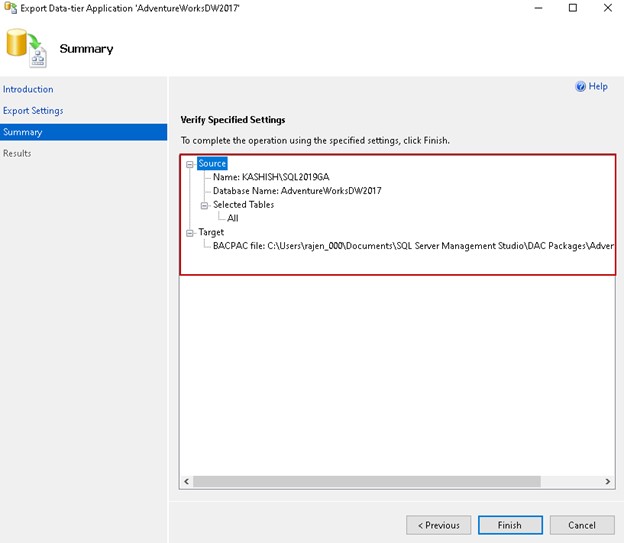
Click Finish, and it starts the export of the database. You can see the success message for each step.
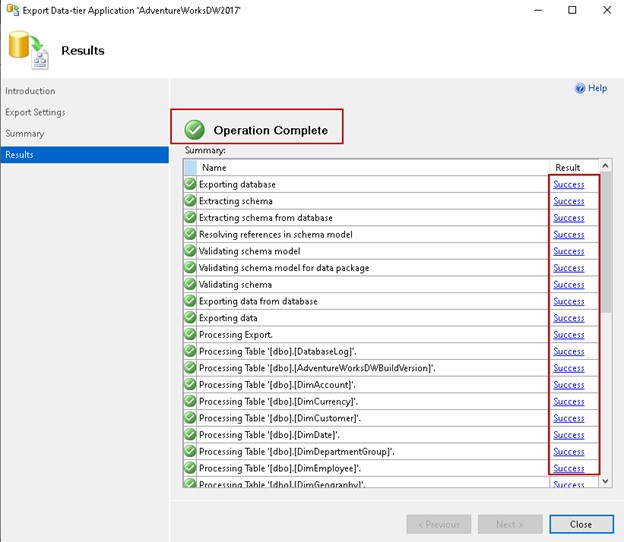
We can browse to the directory and verify a BACPAC extension file exists.

2. Import a BACPAC file using SSMS Import Data-tier Application wizard
We can copy this BACPAC file to destination SQL instance having either on-premise or Azure SQL Database. Right-click on the connected destination instance and launch Import Data-tier applications wizard.
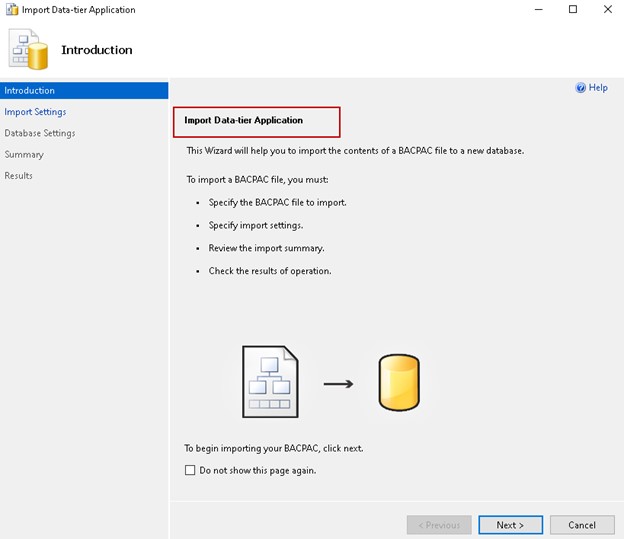
Click Next, and it takes you to the import settings page. Here, we specify the path of a BACPAC file either from the local disk or Microsoft Azure Storage container. We used local disk storage during the import process so, select the local disk option and browse to the directory containing required BACPAC package.
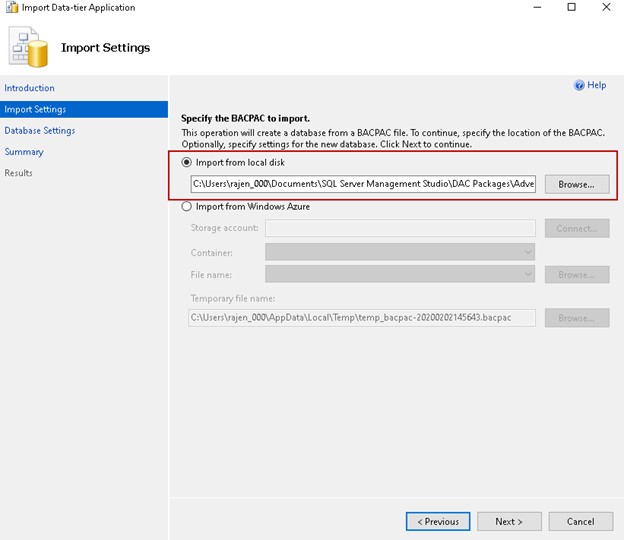
In the next page, we specify a setting for the new database. We cannot use an existing SQL Database for importing a BACPAC package.
It also requires input for the data and log file of this new database. By default, it shows you default data and log file location of connected SQL instance. We can change it per requirement.
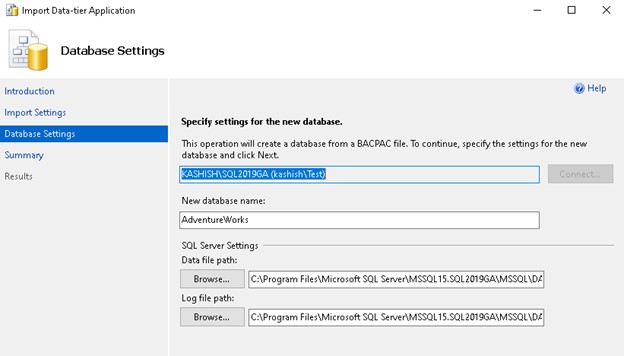
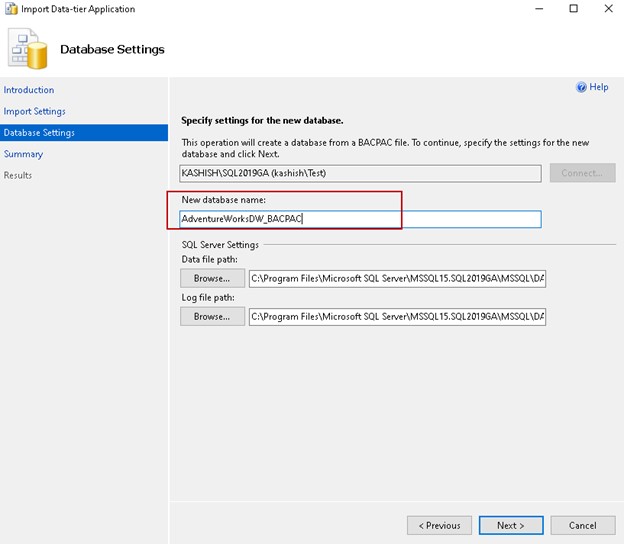
Modify the new database name. In my demonstration, I specified AdventureWorksDW_BACPAC name for SQL Database. Click Next and view summary.
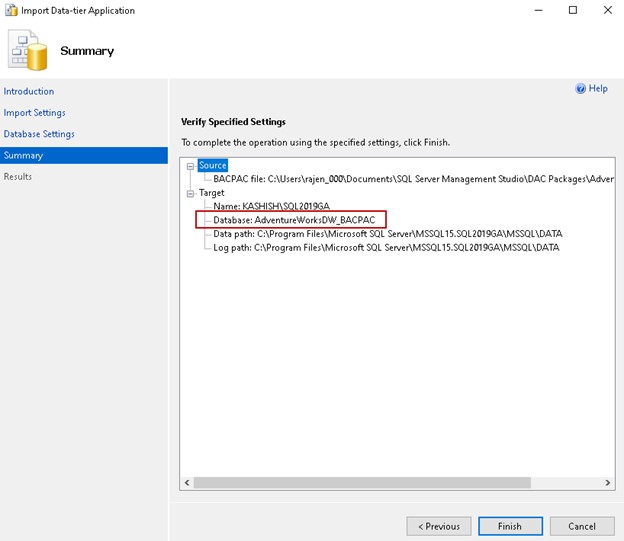
The next page is a summary page showcasing your configurations. I recommend you always review it before proceeding. You can easily navigate back and make the required changes.
Click Finish, and you can see the following steps. • Creates a new database • Imports schema and data into this new database • Disables indexes • Inserts data into tables • Enable indexes

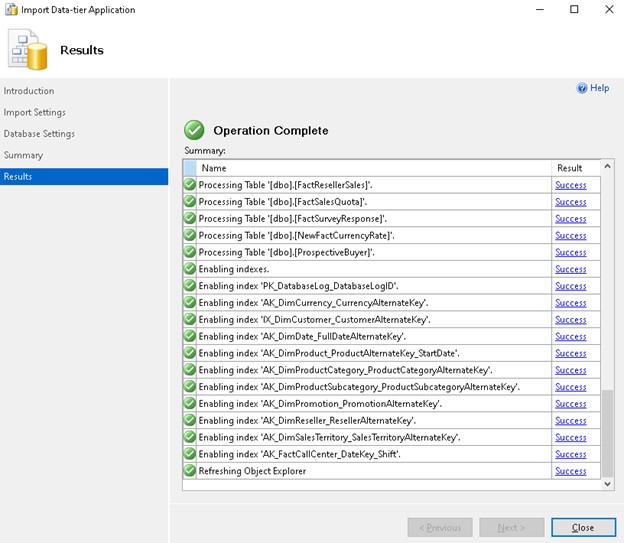
Refresh the object explorer, and you see the newly restored database.